Pattern Reviews, Sewing Hacks, Tips & Free Patterns
Sewing Blog Besties
A Photographer Skirt
Sew an easy skirt. No zipper needed! It has an elastic back and flat front. It’s cute and comfortable. Add some pockets too!
Camera fabric for a new skirt.
If you’re anything like me, you have many hobbies and interests. I love sewing, gardening, farm animal-ing, photography, cooking (sometimes, ha!), and Netflixing. As a photographer who sews, I have the skills to make my clothing in exciting prints that speak to me.
Novelty prints are my favorite. So, when I saw this fun camera fabric at Hobby Lobby, I bought the remainder of the bolt. I planned on making a skirt and hoped I had enough left for a few other small projects. Hint: I’m going to make another bag using leftover pieces.
This tutorial is super simple. We’re going to make a gathered skirt. It requires 2 yards or less of fabric. Since “Cove Cove,” aka the 2020 pandemonium, I’ve gained a few pounds. Elastic waistbands are my best friend, so I made the waistband with elastic in the back. The front has a flat waistband. Business in the front, party in the back!
Interested in making one? Let’s go.
What You Need:
2 yards of fabric
1” Elastic, measuring half the width of your waist, plus 1” for overlap
Matching thread
Sewing machine
Scissors, a chalk marker, ruler, etc.
Pins or clips
Safety pin to thread the elastic
Measuring tape
Pencil and paper to create your pattern
Scrap fabric for pockets
Pocket pattern piece
Pockets
If you don’t want to self-draft a pocket piece, here are a couple of easy ways to find a pocket pattern.
Grab a pocket piece from another sewing pattern you already own. Most skirt, dress, and pants patterns usually have a pocket. Check your envelopes to find an in-seam pocket pattern piece.
Look online for a free PDF one. A quick Pinterest or Google search will give you lots of patterns.
Cut 4 pieces from some matching or contrasting fabric scraps. Sometimes it’s fun to have colorful pockets. Use solids, patterns, polka dots, or cut animal print fabric for your pockets. Make it fun!
Pocket pattern and yellow fabric for the pockets.
Skirt Instructions
Measure the length from your waist to your leg (calf, above, or below your knee) that you want your skirt, then add 2-4” for a hem. I wanted to make mine 20” long. So, I cut my fabric 22” long. I used quilting cotton that was roughly 44” wide. I cut my fabric 22” by 44”.
Cut 2. This will be your front and back.
My waist is 35”, so this created a lightly gathered skirt. If your waist is larger, you will have less gathers. If you like lots of gathers you might need more fabric. If your waist is smaller, you will have more gathers.
Pinning the pockets to the front of the skirt.
I measured 1.5” down from the top and made a notch. This is where you want your pocket to be placed. This is customizable, depending on how tall or short you are.
Pin the pocket RST to the front of the skirt. Then sew using a 1/4”-3/8” seam allowance. Press open. Repeat on the other side.
Do the same for the back skirt piece. You will now have two pieces that look like rectangles with floppy elephant ears.
Place front and back pieces RST, and pin the side seam starting at the bottom, going around the pockets, and up to the top. Sew in that order, sewing around pocket pieces. Use a 5/8” Seam allowance.
As an extra precaution, I do a few extra back-and-forth stitches at the corners where I pivot for my pockets.
I chose yellow pockets to match the branding for my photography business. I usually wear this skirt when I have a vendor show or meet a new client. It’s a fun conversation piece.
Sew around the pinned pocket. It will get pressed and tuck away nicely within the skirt seam.
You inseam pocket should look something like the one below. Yes, I used the selvedge of my fabric and we all know that’s a big no-no. Shhh, don’t tell anyone.
The pocket is tucked inside nice and neat.
Secret yellow pocket.
Gathering your skirt.
Sew 2 rows of stitching along the top with a 5-7mm length. Pull to gather the skirt. Go slowly so you don’t break a thread.
Waistband Fun
Time to sew the waistband. This part is a little more tricky than a regular waistband. You’re going to gather the back with a piece of elastic while leaving the front flat. It gives a nice look while adding comfort.
Cut the front waistband strip half your waist measurement, plus 1” for seam allowance. If your waist is 30”, cut the piece 16”.15”+1”=16”. Use a 1/2” seam allowance for the waistband. I like easy math.
I made my waistband 2.5” tall, this is completely customizable for you and what you want.
Example: Cut 2 front strips 16” wide by 2.5” tall.
Add interfacing to one strip, this will be the outer piece.
Sew right sides together, along the top long edge, only. Press open.
Making your waistband.
For the back waistband piece, you’ll cut 2 strips the same height, 2.5” (or your preferred height) by the fabric width measurement.
I cut mine 2.5” by 35”. The width can be fudged a little here, it’ll be gathered anyway. Sew along the top with the 2 pieces facing RST, just like you did with the front waistband. Press open.
Pin and sew the short sides of the waistband pieces together, creating a super-duper long loop. Press the seams open.
Pin the waistband to the skirt gathers, starting at the side seams.
Pin your waistband strip to the skirt along the gathered top.
Pin at the side seams first.
Then, pin the front waistband piece along the front skirt.
Fold the back piece in half and mark it with chalk. Pin that to the center back of the skirt. This can be finicky because you’re pinning 2 gathered pieces to each other, go slow and it’ll work out. Use lots of pins or clips.
You can hand sew the waistband- which is the correct way but, hand sewing is not my favorite thing. I turn the edge under on the inner waistband and pin it from the outside, making sure I catch the seam.
Pin from the outside and remove the pins as you stitch in the ditch.
Tricky Part of the Waistband
Stitch in the ditch when sewing the waistband. This means keeping your needle in the area where the waistband and skirt meet up. It’s a hidden stitch.
Make sure to leave a 2” gap in the side seams for inserting your elastic.
Use a bodkin or safety pin to insert your elastic.
Use a safety pin or bodkin to insert your elastic into the waistband. Insert through one open side seam.
When you get to the other side, stitch over the side seam to lock the elastic in place. Repeat on the other side. Gather back fabric evenly, then stitch to close the openings.
You are “locking” the elastic in place by sewing over it, on the side seams. The elastic will only go in the back of the skirt.
The front looks nice and flat, the back is gathered for comfort.
Closer look at the gathered back waistband.
Front waistband is flat.
The hem is the easy part. Fold your hem up however much you want1-2”, then press, then fold up again 1-2”. Pin, and stitch using a 3-3.5mm stitch length. I chose to do a shorter hem here, but I usually do a 2” hem.
I love my skirt! I made this to wear when I have events for my photography business. I usually pair it with a yellow top to match my branding. It’s simply perfect!
What do you think? Do you plan on making a skirt with elastic in the back? I call it a mullet skirt. Business in the front, comfort in the back. LOL
Happy sewing,
Annette
Back of the skirt hanging on my dressform.
Front of the skirt on the dressform.
How to make sewing friends
Arizona Sewcial was a great opportunity to meet new people who sew. It was a fun evening filled with talk about fabric, patterns, fittings, and more. Great food and even greater company.
Before I share all the fun I recently had, I want to give you a little back story.
Around 6 or 7 years ago a group of friends and I would get together to sew. We'd meet once a month and head to one hostess' house. Sometimes there would be 3, 4 or even 5 of us. We'd eat, snack, and sew for a few hours while chatting about our lives. You learn a lot about someone if you sew together, because all you do is talk.
Those days and nights were cherished. I would take a pattern I had cut out so I could do some actual sewing. Or, I'd take a pattern to lay on the floor for cutting/ tracing. Ahh, those were the days. Well, over time, one of the friends moved and those sewing nights ended. No reason in particular, but life shifted as it does from time to time.
Fast forward a couple of years.
Another friend of mine who sews, but lives one state over found a group of sewists. She told me about this sewing social she attended last year. She met wonderful people, discovered new pattern companies and fabric shops that were local to her. It sounded like an overall great time and I knew I wanted to go to the next one!
I patiently waited for the year to go by and once she shared the event info, I bought my ticket.
It was go time! Or, sew time! ;)
For the sewcial you can bring 1-2 unused patterns and a cut of fabric that measures 1/2 yard or more. I had a pattern and fabric and set them aside for the swap. Such a fun idea!!
I even sewed up a new dress (blog post coming soon) to wear for the evening. I packed my bag and everything I needed for a quick mini vacation. No kids. No husband. Just me.
I listened to my own music, and podcasts, and simply enjoyed the six-hour drive. Alone. Best weekend ever. LOL
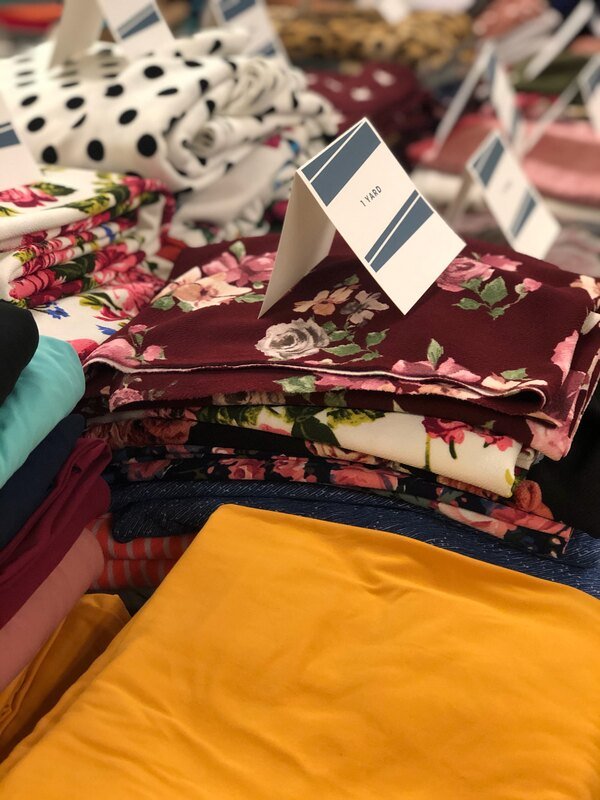
Mood Fabrics donated these for us to use for the swag bags.
Saturday evening was here and it was Sewcial time!
This sewing social is called the Arizona Sewcial or AZsewcial. It's a social hour for sewists hosted by Lauren, to talk, meet, and hang out with fellow sewing friends. So. Many. Sewing. Friends! What was inside the magical land of sewing delight?
Swag bags filled with coupon codes, cuts of fabric, little notions, patterns, and other goodies. Honestly, they were the best swag bags I’ve come in contact with.
Photo backdrop for all the selfies and group photos you could take.
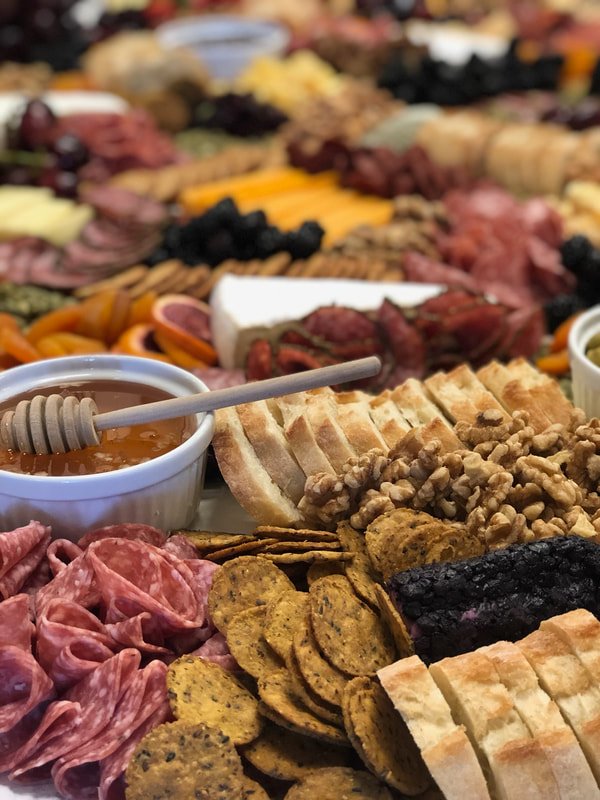
The Queen of charcuterie boards was for snacking. It had everything! Coolest and biggest charcuterie board ever!
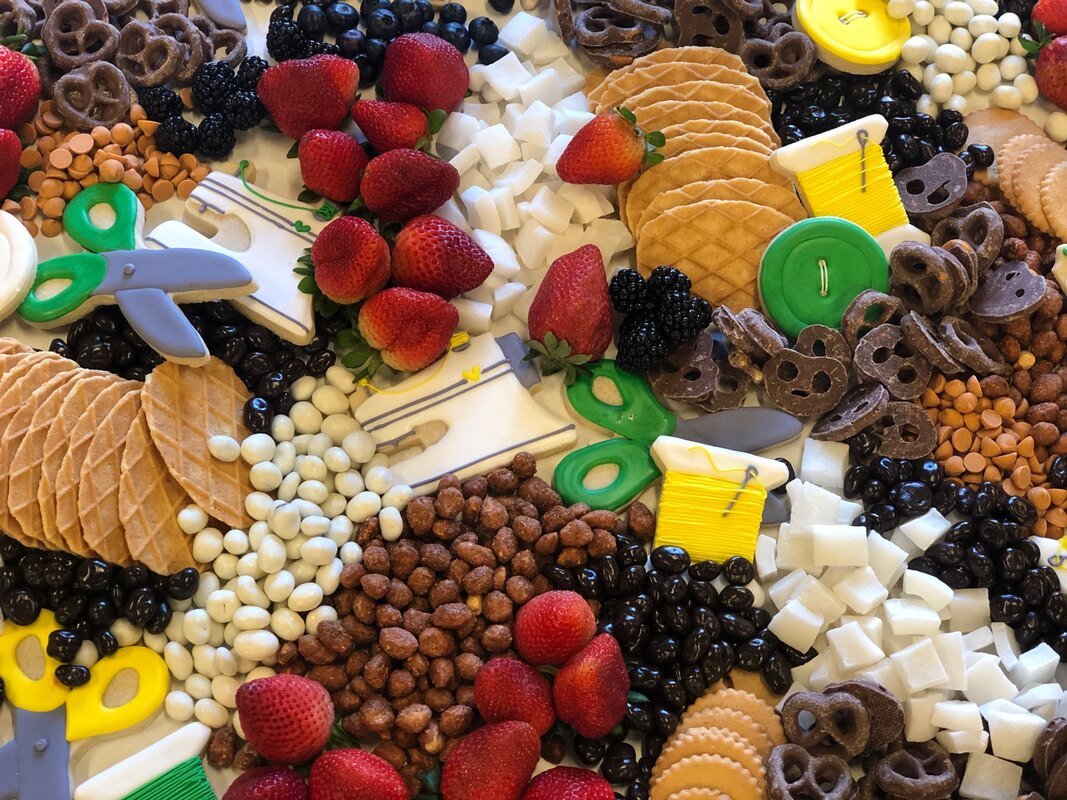
A dessert table was piled with sweet nuts and candies, and also had cute sewing-themed cookies!!
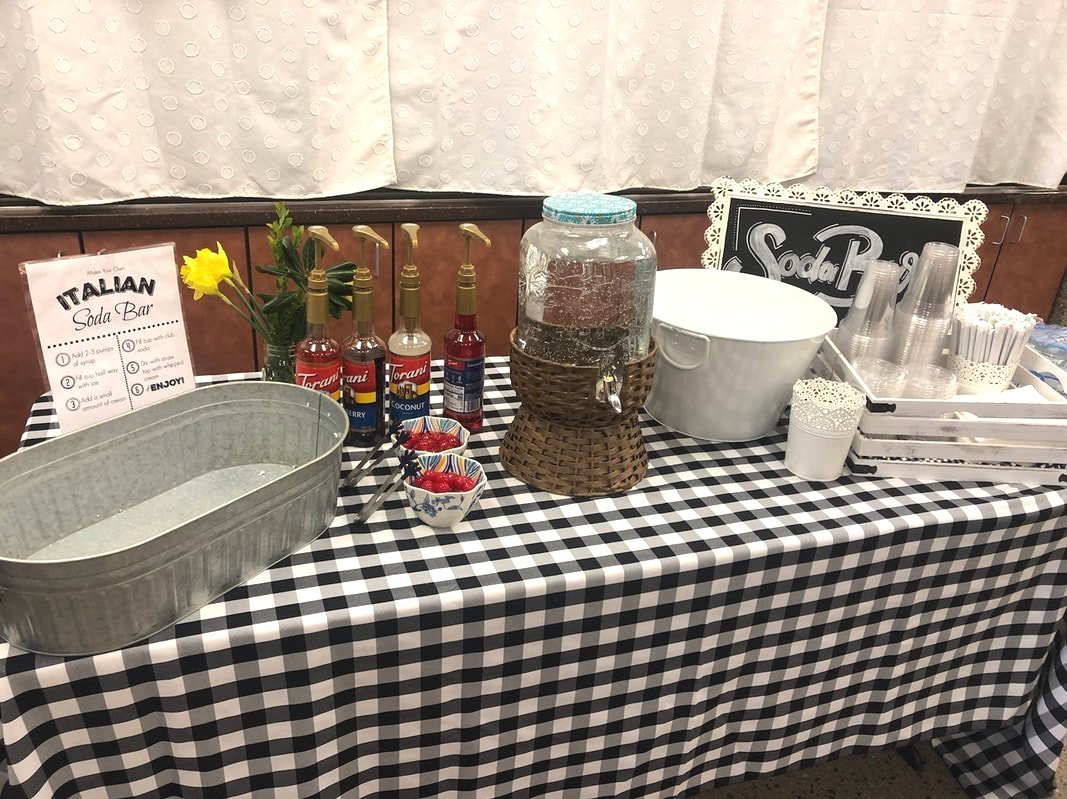
There was a lovely Italian soda bar complete with maraschino cherries. Yum!!
The food photos are by Jillian S.
We started the evening by signing in, grabbing a name tag, and picking your swag bag. Each bag had a different number. That number was yours for the raffle prize and swap table.
They had a few icebreaker games to get conversations started. I was from California, so I didn’t know a single soul, so the games were a good thing.
Lauren, the hostess would call out a small group of numbers throughout the night. If she called out your number, you went to pick out a raffle prize and then to the fabric and pattern swap table. I loved the swap table idea.
Prizes included Indie patterns, PDF pattern bundles from companies, gift certificates and vouchers for online fabric shops, pattern, and fabric bundles, the list goes on.
Such fantastic things to win!!
I ended up winning 3 Free PDF patterns from By Hand London. I was crazy excited, because I love them! I grabbed a cute handbag pattern and some soft blue knit from the swap table too.
The photos above are by Jillian S. (My phone lived inside my purse the whole time. Ha!)
After the games, they announced 4 women who were going to talk about their own thing. One woman spoke about tissue fitting and pattern adjustments. One gave a talk on social media and all that entails. Another presented on creating and designing your own fabric. And, the fourth gal spoke about how to become a pattern tester. I ended up making a new friend and chatted with her, so I missed this whole portion. LOL Ah well.
After round 2 of snacking, I visited the vendor booths to check out what they had. I grabbed a Grainline Studio Archer Pattern from one vendor table. I want to hack it into a western shirt for the fair this Spring. That post will go up after I make it in a few months, I'm sure. Ha!
Update: the fair was cancelled due to the world being shut down by Covid. So, the Archer never got made and I sold the pattern.
At the end of the night as my feet were getting tired, I sat down to sign all of the Thank you cards. The cards were already made out to each of the vendors and companies that donated items. This was such a thoughtful thing to do. I've never seen that idea and will keep it locked in the back of my mind, for future use. I ended the night laughing with another sewist as we signed the thank you cards and spoke on different sewing podcasts we listen to. We had the same opinion on the ones we loved and disliked. LOL
Whew! Such a great night. I was so fortunate that my friend let me join in on the fun even though I don't even live in Arizona. Ha!
I'm sure I missed a few points from the night, but I truly appreciate what Lauren did. It was amazingly unforgettable. Good job Lauren!!! I could tell she put a lot of heart and soul into the whole night.
My swag bag contents, fabric (blue knit), and bag pattern (on the left next to the blue knit) from the swap portion.
So this brings me to my next point. How do you make sewing friends? There are more of us out there, the hard part is finding each other.
I have always found my sewing sisters in real life. As a mom, it's easy to start up a conversation... You're sitting next to someone chatting, a topic comes up, you both realize you sew, and the rest is history.
Places to Find Sewists
Church Fundraisers and groups
Instagram hashtags
Facebook groups
Craft shops with classes, both local and big box
Crafting conferences such as Craftcation (read about my first experience here.)
Word of mouth- "Oh, I have a friend that sews, I'll give you her number"
School or church plays need costumes, and you could make friends doing that
Craft shows, maybe you hit it off with someone who has a sewing booth
Try all of these and see if you can find sewing friends in your area. Sewing is definitely a personal hobby, but it's so much more fun when you can talk about fabric and patterns with someone else! Plus, if you run into an issue, ask your new friend. If you've never made pants, but Suzie Sewsalot has, she can help.
Please share some ways you meet and make sewing friends in your community in the comments below. We all need friends to sew with!!
Happy friend finding,
Annette
Why I sew
Everyone has to start somewhere. I started making my own clothing a few years into my sewing journey. Here’s why…
Everyone has their own personal style. Whether you wear sweats or sequins, we all need to feel comfortable in our own skin. When I turned 30, I decided to change my look. I wanted to wear things that made me happy and feel good, rather than feel and look just like a mom. I wanted to wear pinup and vintage-inspired things with a splash of rockabilly. Everything was too pricey in the stores and online. My husband asked me why I didn't simply sew my own stuff. Talk about an "ah-ha" moment. LOL
The next chance I got, I drove to the nearest fabric store ( we all know the one, that rhymes with Conan). I grabbed a few patterns and a cart full of fabric. I started with skirts because, well, they're pretty simple. I was soon sewing my own tops and bottoms.
I had only ever sewn for my kids and home decor stuff. I never thought about sewing for myself. #momming #momlife There was a little trial and error in picking fabrics and patterns, but I got there eventually.
Oh hey, it’s me!
Let me tell you though, it's an amazing feeling when I walk out wearing something I've made! Sometimes things don't turn out, but when they do, It's the greatest feeling! The best compliment is “Where did you buy that?” And it usually gets paired with “Thanks, I made it!”
I hope you’re able to benefit from what I’ve learned, here.
I love teaching others to sew. Welcome, and I hope you stick around.


