Pattern Reviews, Sewing Hacks, Tips & Free Patterns
Sewing Blog Besties
7 Sewing Myths, Busted
7 Sewing myths, busted. Truths and lies about sewing and people who sew. Sewing isn’t cheaper than buying clothes. It’s not only for old ladies either. Let us bust some of these common sewing myths.
Wow, sewing sure seems to have made a popular comeback! Let's debunk common misconceptions about sewing and the people who do it. Whether you're new to sewing or a seasoned seamstress, you may have heard some of these tall tales. Let's put an end to them, now. Since more people are sewing nowadays, it'll be easier to make new sewing friends. Hopefully, fabric and notions will be easier to find as well.
Let's dive into a few sewing myths and bust them!
Vintage wooden sewing spools
1. Sewing is for old ladies
A common sewing myth is that sewing is for an older generation only. I'm here to tell ya, that more young people are learning how to sew. And, men sew too. My husband learned to sew when I put him to work for mask making. If you don't know where to start, you can find online classes, head to your local college and sewing shops, or even ask a friend to teach you. Sewing people are everywhere, you just gotta look.
I have taught a handful of friends and family that I don't consider "old ladies". However, I do refer to sewing as one of my old lady hobbies. LOL. Oh, and kids sew too. I have taught all 4 of my kids to sew at a young age. It's a good life skill to have and it's not being taught in school anymore. Here's an article I found online about young people sewing more and more. I'm not crazy, I swear! Sewing is for everyone.
Busted!
2. Sewing is cheap
LOL! I always laugh at this one. Sewing is often more expensive. A lot more expensive.
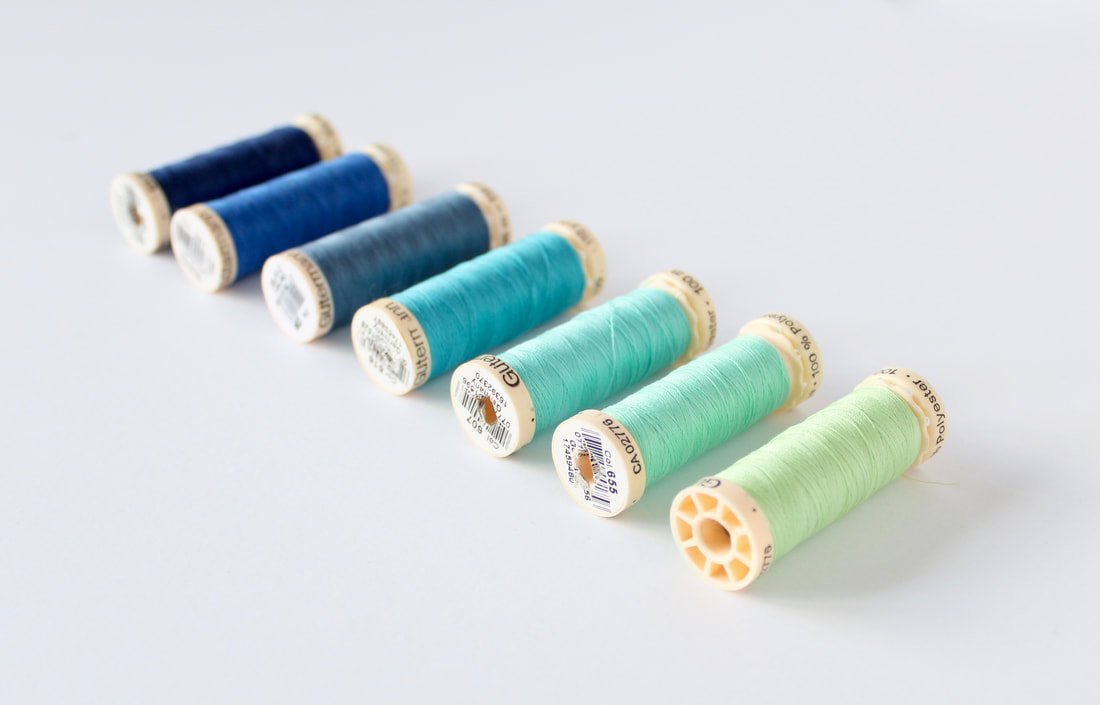
Making something from start to finish is costly. You walk into the fabric store and buy a pattern (or online) for roughly $12. You need a minimum of 1-2 yards (for most garments) of fabric which costs roughly $20+. A spool of electric blue thread to match your new fabric, $3. You need a new pack of needles too, $5. Not to mention the price you paid for your machine and all those other glorious notions you've put hard-earned money into. The cost is $40+ just for the 4 items I mentioned. And, I didn't include the price for your time. Time is money and you know it doesn't take 10 minutes to whip up a dress for little Suzie.
You can buy a nice top or pair of shorts for $25 at a big box retail shop.
This misconception always gets me and it hurts my feelings sometimes. I love making gifts but, I've gotten looks and questions asking why I didn't buy something instead. Sigh. It takes a lot of time and energy to sew something. It ends up costing more than if you purchased the same item in the store, usually.
Let's spread the word and lay this myth to rest.
Busted!
3. Only talented people can sew
Remember the movie Ratatouille? The chef's motto was "Anyone can cook." Welp, I believe anyone can sew! Seriously! I truly believe anyone can sew, anything.
This is a silly misconception that even runs in the sewing community. I've met sewists who say they could never make bras or they could never make a certain garment! Um.. yes you can! If you have the drive to sew a pot holder, you can make a prom dress. You can make anything you put your mind to. Cliche, I know. But, with the right tools and experience, you can sew whatever your heart desires. Will it be cheaper than buying it? Probably not (see myth number 2).
If you want to make something that seems crazy and difficult, search for it on youtube. You'd be surprised at how much info is out there. Not everything is there though, and that's why I started my blog. Shameless plug. ;)
Busted!
Photo by Erica Lancaster
4. It's an inexpensive hobby
Sewing can be frugal or it can be really expensive.
If you were gifted a sewing machine and boxes of fabric and notions, you're on team frugal. You can use bedsheets to make dresses. Scour yard sales for patterns and buy scissors at the dollar store. It can be a frugal hobby. *Never use old thread though. Please, splurge and buy new spools. Old thread breaks easily, causes issues with your tension discs, and creates more lint.
However, if you are new to sewing and don't have a hand me down machine, you'll have to buy one. They cost upwards of $100. You should start with a basic machine and if you love it, upgrade a few years down the road. This is my upgraded one. Fabric and interfacing cost money. Thread, bobbins, needles, and rulers are needed to make everything. Scissors. So many pairs of scissors are needed. Fabric shears, thread snips, paper scissors, applique and embroidery scissors, and pinking shears, I have so many pairs of scissors. A rotary cutter and self-healing mat are nice, but not necessary. Not to mention elastic, buttons, sewing feet, zippers, and tons of other fun notions you have to have. Oh and don't forget about a seam ripper. Because... sewing. Seam rippers are the second thing you need after you purchase your machine. You'll need an iron and ironing board too.
I didn't list everything for sewing, but these are the basics. Sewing is not an inexpensive hobby. Eeek!
Photo by Erica Lancaster
5. Handmade looks homemade
Making a handmade gift for someone is such a sweet gesture. But, not all sewing is created equal. If a sewist takes shortcuts and skips pressing all the seams, the item will look wonky and homemade. We don't want that.
When you think of handmade, you should think of artisan quality. You shouldn't think of little Darla's card she made for grandma last summer. Handmade is often better quality than what you can buy in a store. It's made with love and the person has looked it over twice before giving it away or selling it. This is true as long as the artist doesn't take shortcuts. Seams need to be pressed, under stitching needs to happen, and interfacing must be used when needed. That being said, practice makes perfect stitches. Someone who is a passionate sewist takes their time and creates something beautiful.
Let's change the stigma on the term "handmade". Think artisan-made instead.
Busted!
Photo by Erica Lancaster
6. If you sew, you need to sell
Nope, not true. This is a huge misconception. If you sew, you do not have to make items to sell. Sewing is a hobby, just like gardening, painting, or listening to music. Just because you love it doesn't mean you have to turn a profit. I sew and I choose to make things to sell. But, there are many folks out there who sew every day and never sell their items.
If you don't feel like your skills are developed enough to sell, then don't. If you don't want to make things to sell, don't. Also, if you are a new sewist, you need time to perfect your skillset before you should sell. You want quality products at your craft booth or online shop.
Don't beat yourself up over it either. If sewing items and selling them at local craft shows makes you happy, then do it. But, don't let someone make you feel bad if you don't sell stuff that you make. It's your hobby. Yours. You do what you want with it.
And, no, I won't hem your pants. Hemming and sewing are 2 different things in my book. One is fun, the other is soul-sucking. Hahaha
My husband's pants get hemmed at the cleaners. #sorrynotsorry
Busted!
7. Quilting and sewing are the same
I'm probably entering controversial sewing territory.
But, I sew. I don't quilt. To me, they are different. Quilting uses quilting cotton fabrics. You sew rows of different pieces of coordinating fabrics. Cutting must be precise and it can take many, many hours to complete a quilt. They can be in blanket form, placemats, bags, jackets, etc. You then sandwich the pieced front to a solid back with a layer of batting inside. Then, you stitch rows or swirls on top to keep all the layers together. I have made a few quilted table runners for the holidays. I bring them out and place them on the coffee or kitchen table for the holiday. Then, put them away until next year.
But, to some, quilting is extraordinarily fun!!
I.... love sewing and the process of sewing. Finding that perfect pattern. Looking and touching pretty fabrics for said pattern. Figuring out the fit for your body. Making a muslin, or not.
If you sew a garment, you have something you can use every day. The key term is use. If I spend hours on something, I want to use it. I want to wear it out into the world. I want to show it off!
My mom has made the most beautiful quilts and I hope to get one, someday. I sew. I don't quilt.
Busted!
UPDATE: I made a quilt! And, I liked it. I made two, actually. Shhh, don’t tell anyone.
I'm sure I missed tons of other sewing myths, but these are the top ones I wanted to bust for you.
Please share in the comments below any myths or stereotypes you've encountered.
Thanks for hanging out today and happy myth-busting!
XO,
Annette
Bra Making Hack
This is an easy and quick bra hack for busty gals. Make a cheap bra fit you in a pinch. An inexpensive bra can be hacked to fit you. Stop spending hundreds of dollars on bras with this hack.
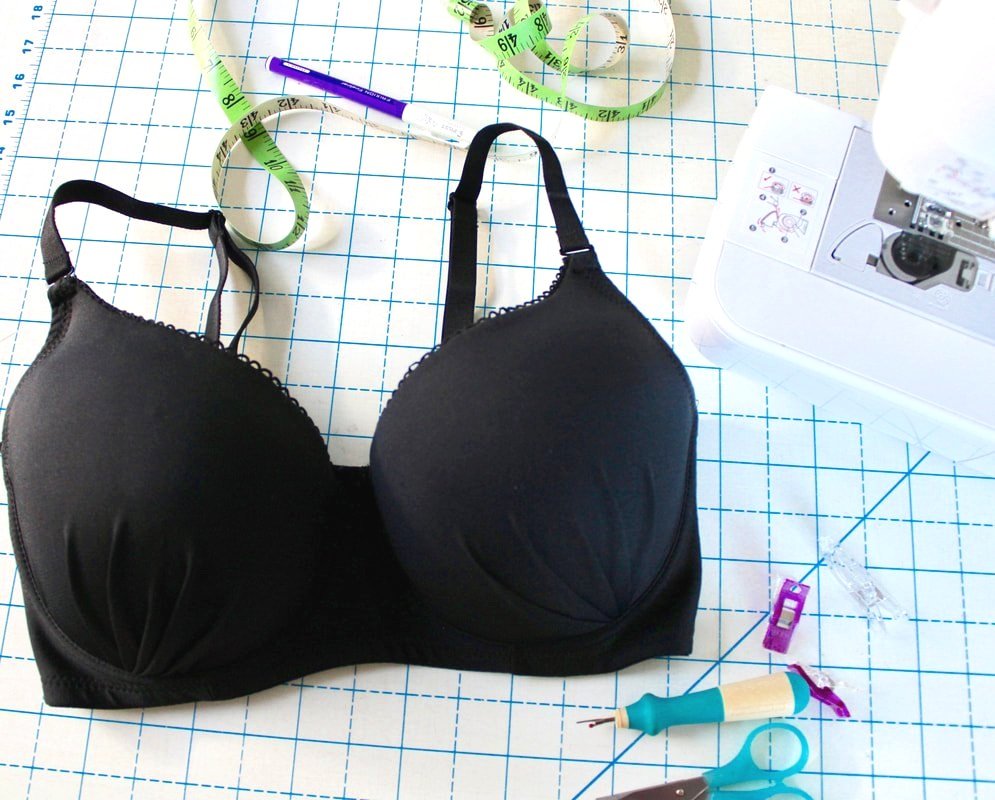
This post isn't about sewing bras or bras that I've made. Surprise! It's about Upcycling! Yep, you read that correctly. I'm going to show you some quick, easy alterations you can make to a brand-new store- bought bra, to fit you! Sounds scary? Don't fret! Grab your seam ripper and scissors. It'll be fun, I promise.
First, I'll share some backstory about my own bra journey. I wear a weird size. I can't walk into Target, Wal-Mart, or Macy's and just buy a bra. I have a small ribcage and large... um... blessings. So, I order bras online and pay a ridiculous amount for them. They aren't made any better than what you can find at Victoria’s Secret, etc. But, the internet carries more unique sizes, so I go with that route. I made my first bra a few years ago and it was mind-blowing! It was also extremely easy, cost-efficient, and even fun (once I got the fit, down).
Up-cycle Your Brand New Brassiere
A few weeks ago, I was walking through Dollar General and grabbed a large bra. I said to myself, “I bet I could alter this band size to make it smaller”. I held the foam cup up to me and it seemed to be the right cup size. I gave the cashier my $7.00 and drove home. When I got home, I tried it on and had my husband mark where I would cut the band. Eureka! This is the coolest bra hack ever and I needed to share it!!
Side note: I don't think this will work as easily if you need to increase the bra size. This is more of a cut-and-slash downsizing bra project. I wear a small band, large cup bra. If you have a small cup, it may be more difficult to do this bra hack.
Here's What You'll Need:
Clearance or cheap Bra that has a larger size band than you normally wear
Scissors
4" long piece of ribbon, twill tape, or similar material that is 1/2" wide
Sewing machine with ZigZag stitch
Stretch or ballpoint needle and matching thread
Chalk marker
Zipper foot, if needed
Plan of Attack
Try the bra on. It should be too big in the band, but fit in the cup area. If this is not the case, you'll need a larger band size.
You'll want a friend to help you with the next part.
When you're back at home, put the bra on. Click the hook and eyes to the middle row. Have your friend pinch the band and mark with chalk where it should fit you. It should feel snug, but not uncomfortable. Take it off and get dressed. It's GO time!
Cut off the extra fabric you don't need.
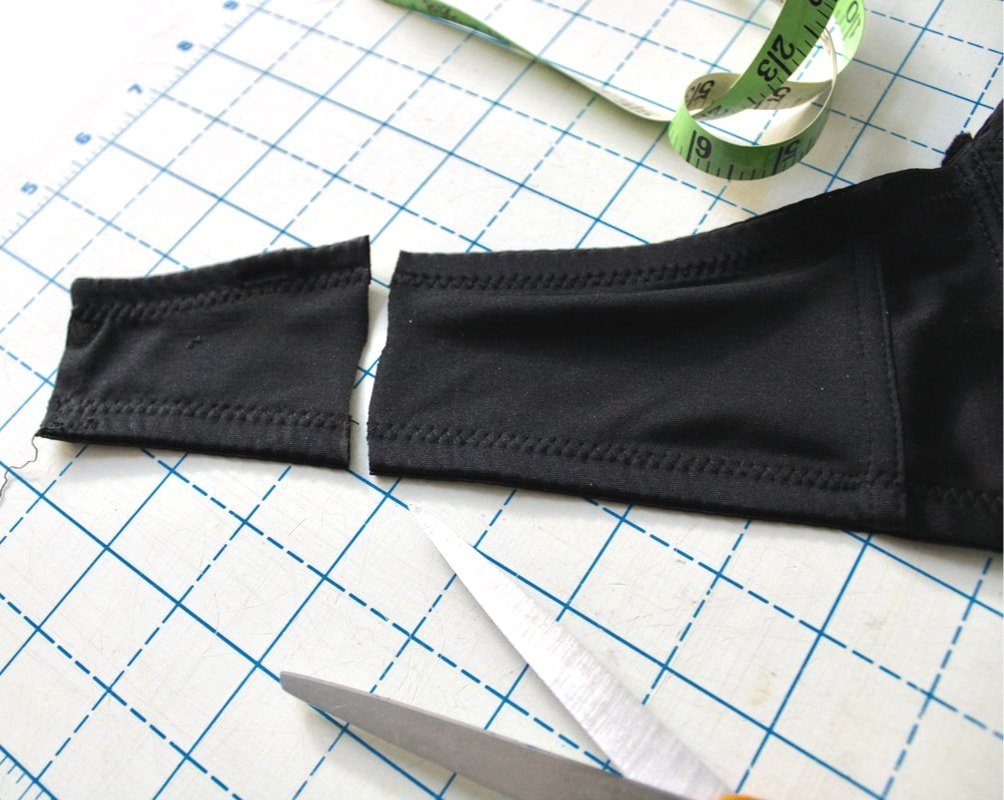
Open the bra up and lay it on the table. Measure from the side seams to make sure the chalk marks (made by your friend) on both sides are even. You don't want to cut 2" off one side and 3" off the other side. Unless you're going for the lopsided look. ;) After you measure and they are even, cut the ends off. It's that easy! Set the excess bra band pieces you cut off, aside.
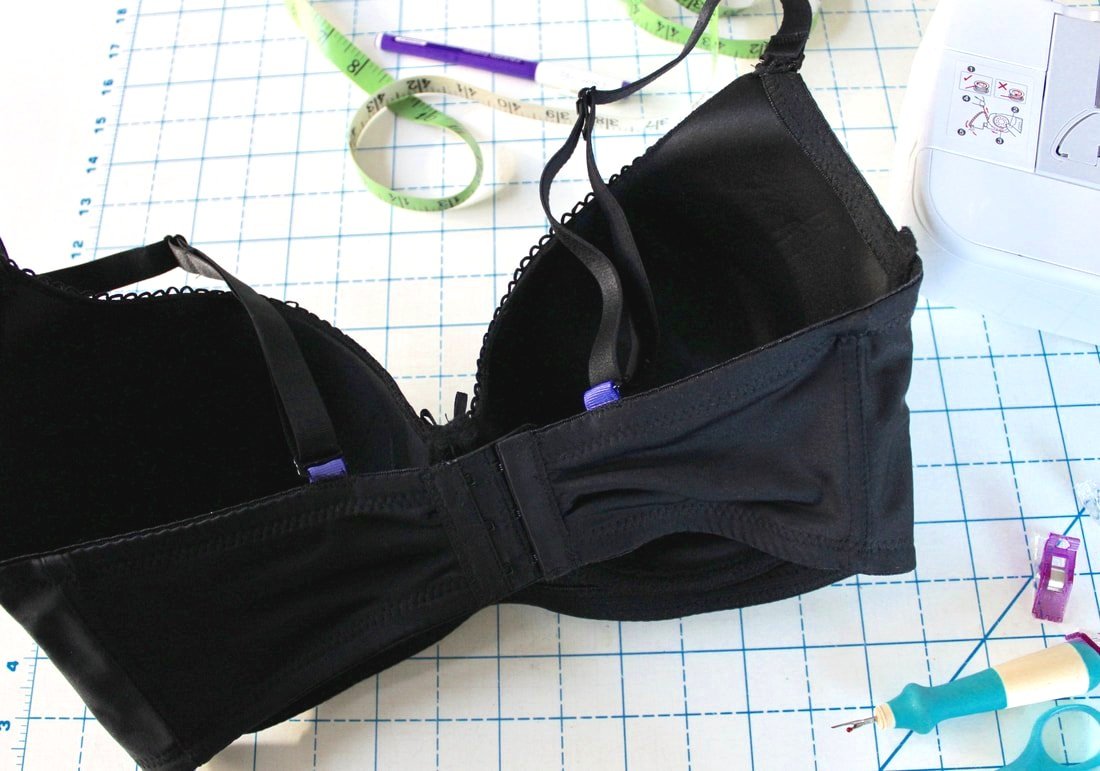
Now, get that handy dandy seam ripper and go to town. You'll rip the stitching out from the hook and eye pieces, and set them aside, you're going to reuse these. It's all zigzag stitching, so it's easy to rip out. The hook and eye have an opening at one end, that's where you'll stick the band inside to re-attach.
Now it's Sew time. Install your stretch or ballpoint needle into your sewing machine. Thread your machine with matching thread and set it to a ZigZag stitch. I set mine at 2.5 widths and 2.0 stitch length. Practice on the band piece you cut off, to get the stitch the length and width you want.
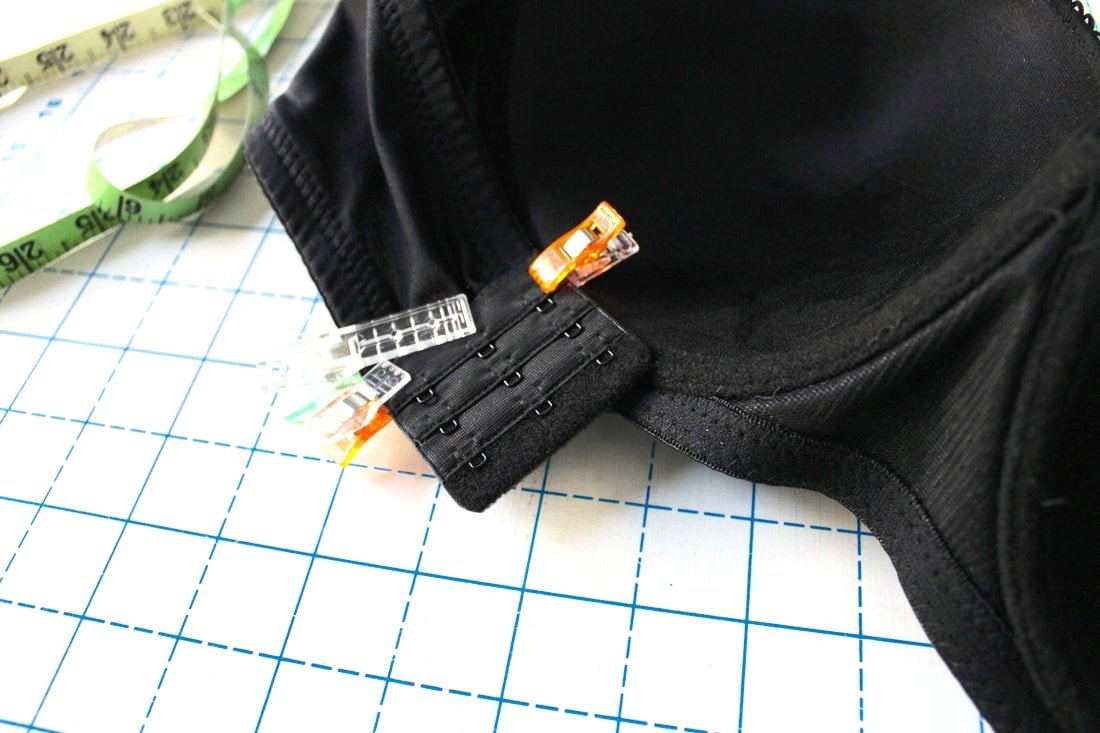
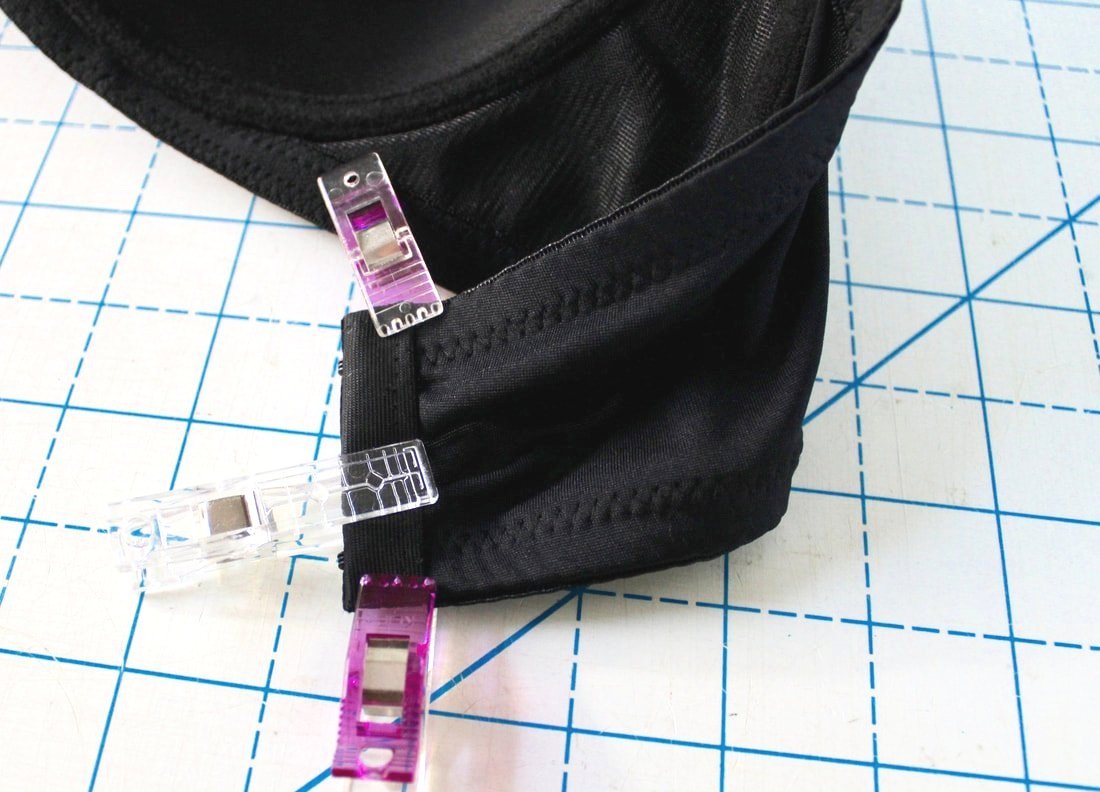
Align your hook and eyepieces to the band. My band was a tad larger than the fasteners, but I made it work. Align the top band to the top of the hook piece, then line up the bottoms. I ended up with a small gather in the band, but it was fine. Hey, it's a $7 bra! I usually pay $100 each for my bras. Ugh! Clip the fasteners to the band to keep them in place. I used 3 to hold the gathered band inside the hook pieces.
ZigZag over the open area where the pieces overlap. I went back and forth twice, just to be safe. Do this on both pieces. It helps to use a zipper foot for the hook portion, my regular foot is a tad wide and had a hard time getting in there. Your machine may or may not have an issue with this. The loop side was easy. Don't forget to backstitch.
Zigzag sew your fasteners to the band.
Re-attach The Straps
I used purple grosgrain ribbon for my strap loop. Use a piece of ribbon or fabric. You want to make sure to use something that won’t unravel.
Now that the band is done, we need to sew the straps back on.
If you're lucky enough that the bra straps didn't get cut off, Yay! You're done. You just made a bra that fits! Try it on and sing praise for making a great-fitting bra for cheap! Super easy!!
However, if you need to attach the straps, keep following along.
Grab your ribbon piece and cut it in half. You should have 2- 2-inch pieces now. These are going to be your new strap fasteners. You won't need the full length, but it helps to have more wiggle room. Fold one piece in half and pin or clip it to the band spot you'd like the strap to be at. Try it on to decide where you want your strap to end up.
Maybe you have a special dress or top and you don't want your straps to show, this is a perfect opportunity to make a custom bra for that garment.
You can make the loop as big or small as you want. I made my loop 1/4", I wanted it the same size as the previous loop. Thread the ribbon through your bra strap loop and pin it to the bra band. Sew over the folded loop with a zigzag stitch. I went over mine twice. Repeat with the other side. Don't forget to backstitch.
And.... you're done!! You made a bra! Bra-making is really easy and fun. I know this was more of a bra hack, but it's a great starting point to dive into bra making.
Bra making is all about the fit- as all garment sewing is. Once you get your fit down, you can make tons of bras. As long as you have a machine with a zigzag stitch, you can make a bra. I hope this sparked some interest in you for bra making. If you're curious to learn more, I'll walk you through my first bra making adventure in the next post. Stay tuned!
So, what do you think? Are you going to try this bra-sewing hack? Maybe your mother-in-law or sister has a unique bra size. You could try this out with them. Let me know in the comments below if this is something you're willing to try, or not.
Happy bra hacking,
Annette
Vacation Sewing. Do you do it?
Sewing for a vacation can be so much fun! Make some new bags or sew a whole capsule wardrobe. If you start early enough, it won’t be stressful.
Summer is here! It's hot and I'm loving it. Well, until I get sick of the heat. Then, I'll cry for cooler weather. I'm as bad as the kids I tell ya.
Ventura, Ca
But, for now, I'm enjoying the warm days and cool evenings. We like to sit outside at night counting stars and the occasional airplane.
Also, summer is a time for vacations. Whether you take the whole family or just a solo weekend away.
Yellowstone. We camped for a week and it was gorgeous.
My question for you is, do you sew for vacation?
Vacation is perceived differently by everyone. For me, its anywhere that isn't home. Head up to the mountains and camping in a tent. A week long trip at a nice resort. A quick weekend getaway. Those are all perfect vacations.
Things I've made for vacations in the past:
Travel bags for your clothing. Make sure you use a good-quality zipper.
Simple tops such as the Charms Pattern Rita Blouse by Gertie.
Maxi skirts are a must. Comfortable clothing is great when you're away from home. Knit fabrics work best for maxi skirts.
Hair scarf or headband. Make a few. They’re great for camping too, think dirty hair.
Toiletry bags like the one pictured above. Make one for yourself and your family members.
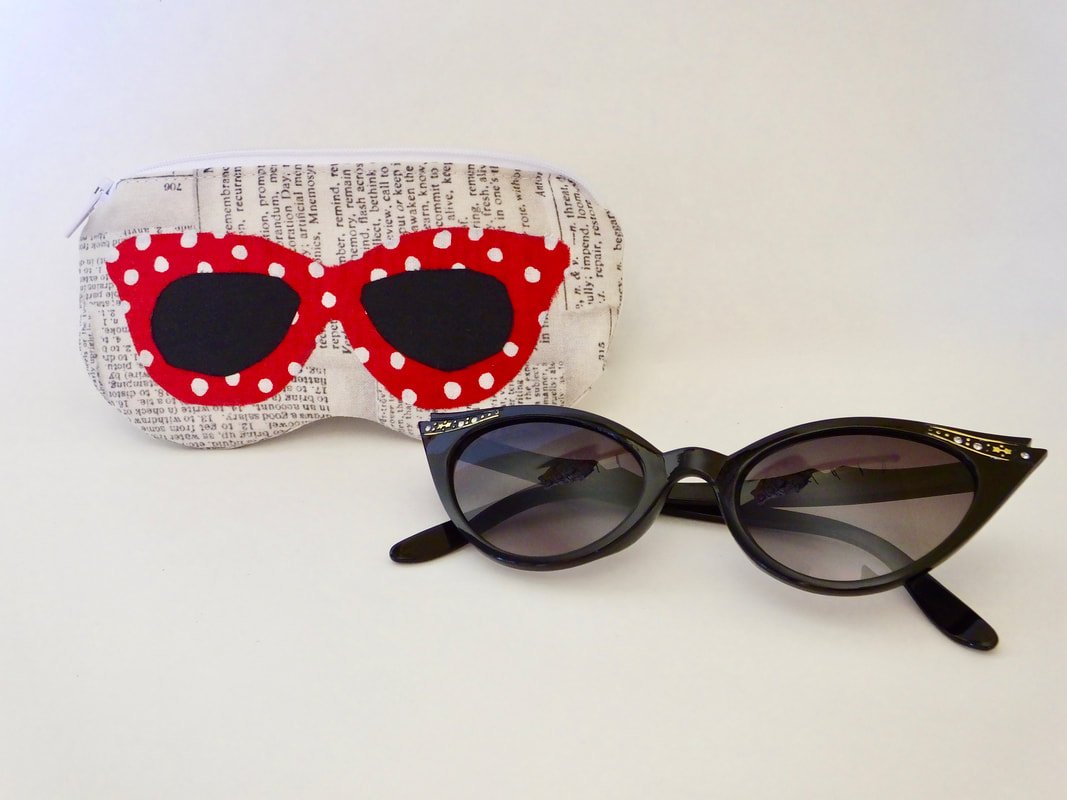
Make an eye mask. These are really easy. If you have problems sleeping anywhere but at home, this is an ideal make.
A fun pillowcase! Do you always take your own pillow with you when you travel? Make a fun pillowcase for it to use only while you travel. Satin fabric ones get extra points.
Straw bag. Do you love your stainless steel straws? Sew a quick and easy rectangle snap pouch for them.
A vacation purse like the one above. If you hand embroider or have an embroidery machine, make a fun quote for it. Tell everyone you're on vacation. You deserve to be there!
Infinity scarves are a great travel item. You can wrap it around your arms when you get chilly. Use it as an extra layer during cold weather. They take 2 yards of fabric and you get 2 scarves out of the fabric. Make one for a friend and yourself.
Skirts! These are my favorite vacation staple for warmer weather. They even work in cooler weather, just add tights.
If you don't have time to sew up something new, you can pack something from your arsenal that you've made in the past. It's always fun meeting a fellow sewist while out in the world. I can usually spot a handmade bag or clothing item and it sparks a fun conversation.
If you make anything for traveling, I want to know. Leave me a comment below and tell me what you make or plan to make for your vacation. If you don't make anything ever, tell me why.
Happy stitching and happier vacationing!
Annette
Clean your Sewing Machine in 5 minutes
Is your machine being naughty? Give her a quick cleaning and she’ll behave better, I promise.
Has your sewing machine been acting rude? Is she causing your thread to break, bunch, or nest? Is she being loud and unruly?
Well... It might be time for a quick cleaning.
I had a few minutes this morning, so I decided to give my machine a little cleaning session. When my machine starts to run a little wonky, I clean her innards and she's good to go!
What you need:
2-4 Cotton swabs
Table light (if your machine isn't in a well-lit area)
Sewing machine
I keep a few swabs stashed with my sewing notions so they're always handy when I need them.
Start by turning off your machine. Sounds silly, but you don't want to lose a finger or ruin your nails. ;)
Remove the needle.
Take your needle out. It gives you more room so you can get into the area without worrying about a poke. Turn the tiny black knob a couple of times and the needle drops down easily. Set it aside, don't lose it!
Remove the foot.
Remove the foot and set it aside. This machine has an easy button in the back that drops the foot. You may have to unscrew the foot to remove yours. Check your manual if you are not sure.
Remove the bobbin and everything around it.
Remove the bobbin cover and pull out your bobbin. This machine has a drop-in bobbin, you might have a different setup. Check your manual if needed.
Set the cover aside as well. If you have a small dish, it's nice to stick all the parts inside so they are kept together, and out of the way.
Now we're going to slide off the flat bed attachment if you have one. Easy peasy so far, right?
I made a pair of tweed pants and they left tiny fibers everywhere. I can't wait to see what's hiding inside of the machine.
Remove the needle plate cover. This slides out towards you easily, be gentle though. Set aside or in the dish with everything else.
Are you still with me? Hope so!
Here's where it gets fun.
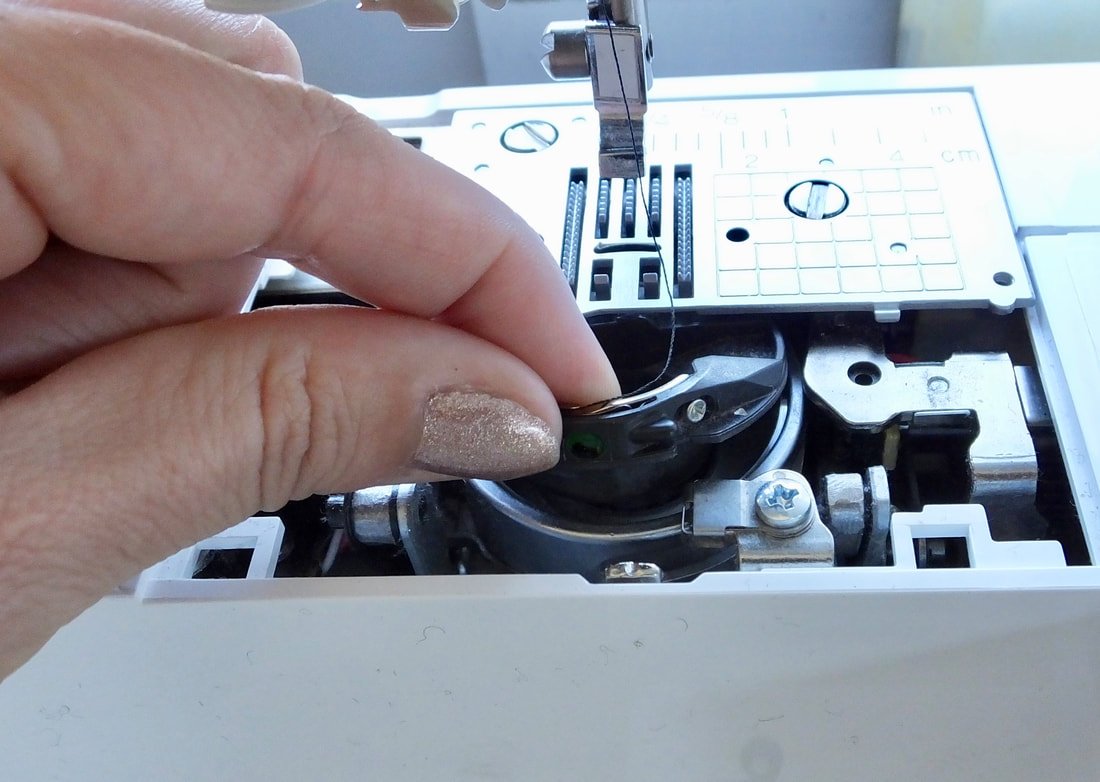
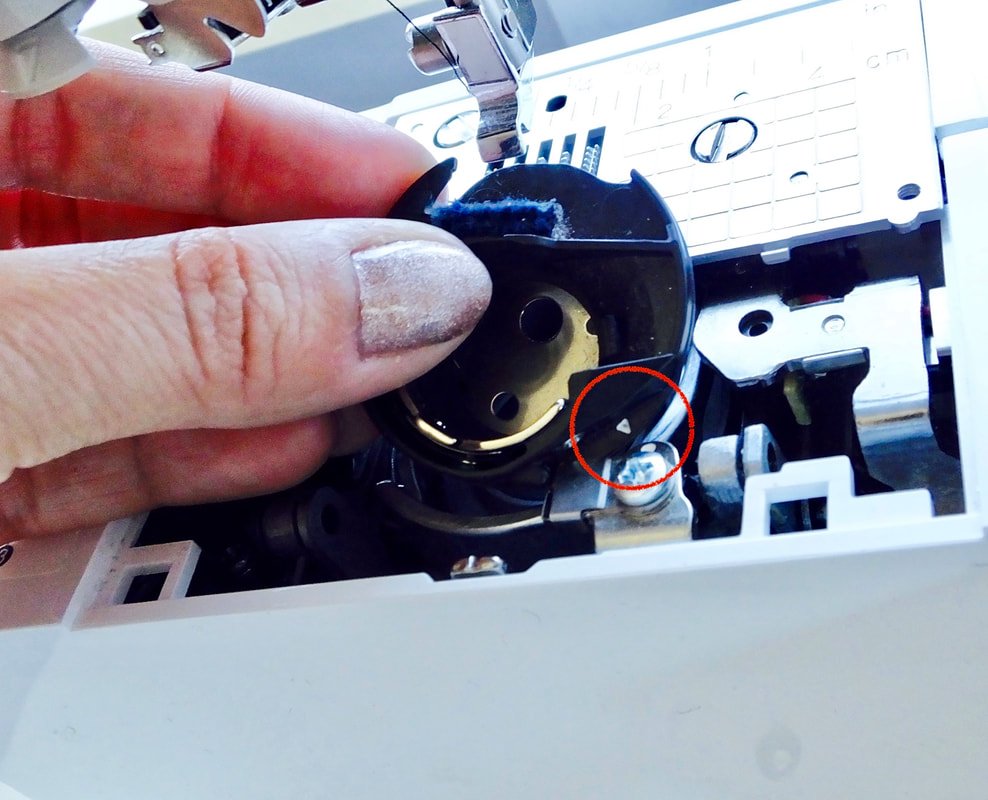
Remove the bobbin case by pulling it out.
Note the tiny white triangle on yours. Keep that in mind when we are putting everything back together. Set inside the dish.
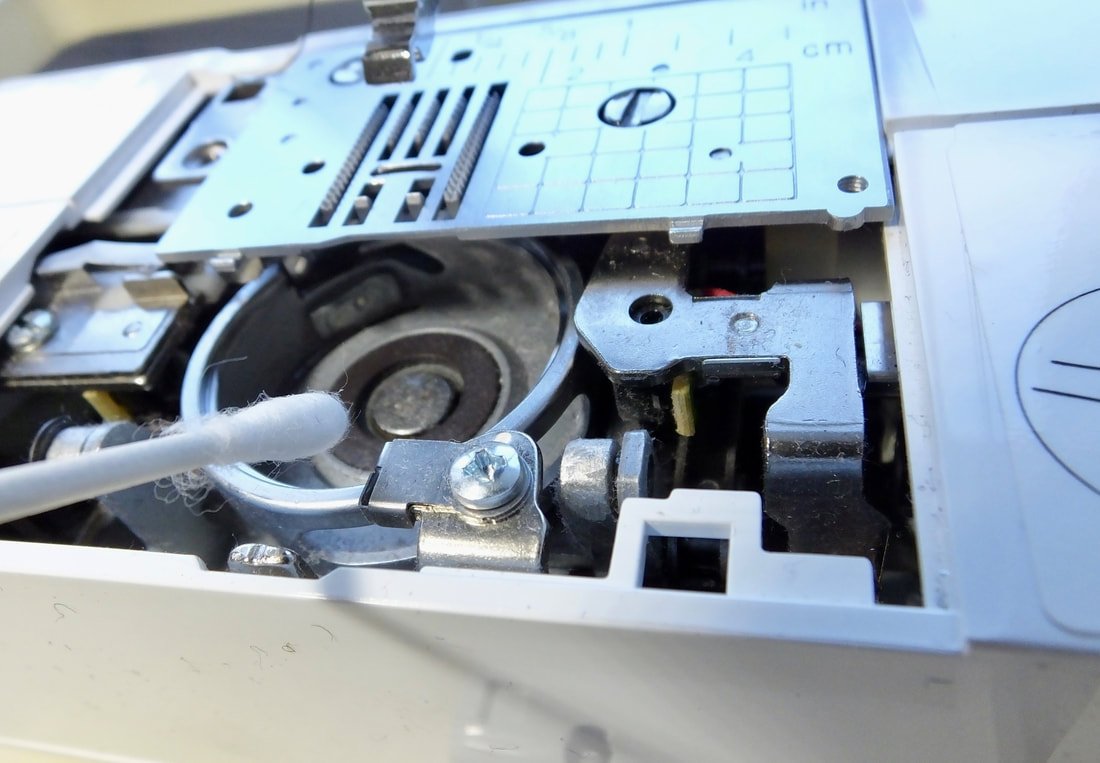
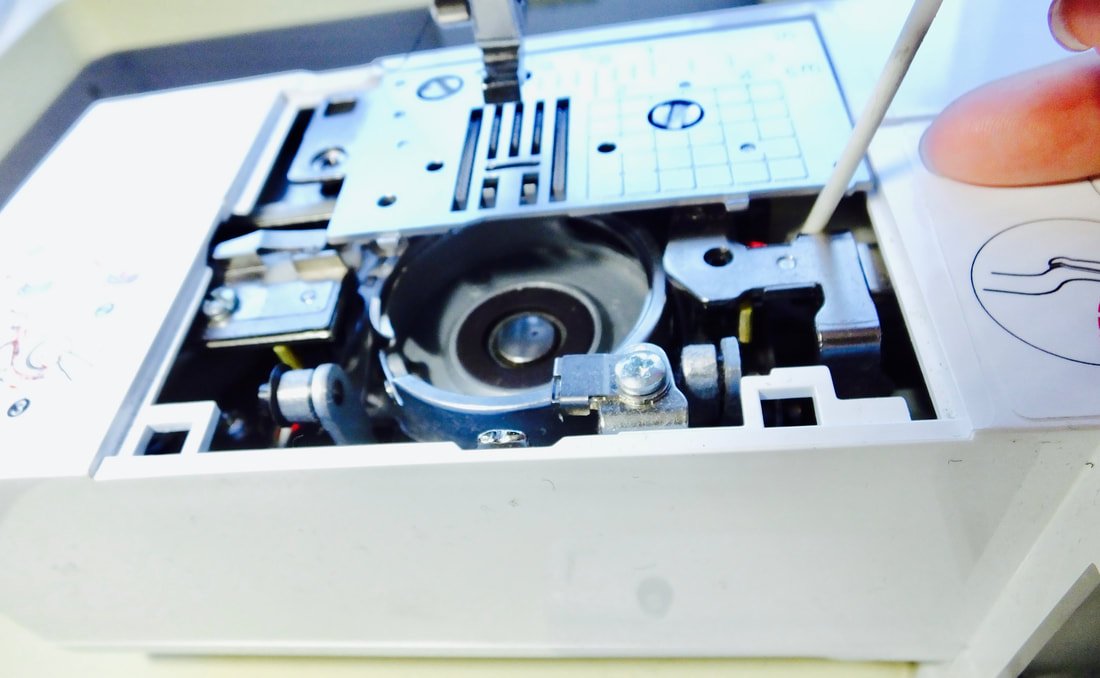
Swirl your cotton swab around everything.
Now it's time to go to town! Grab a cotton swab and look inside. Do you see little dust bunnies? You may or may not. Start by swirling the swab in the race (area where the bobbin case lives) first.
There's no wrong or right way, but try to be gentle. Don't jab it around in a stabbing motion, just slide and twirl it, gathering fibers and rogue strings. It's almost therapeutic.
Take your time, hand crank the hand wheel a little bit. It turns the race so you can get more hidden debris.
I do not use canned air. I only use cotton swabs.
However, if you're lucky enough to have those tiny attachments that came with your vacuum cleaner, by all means... get that sucker out and use it! Literally.
When you're all done, your swabs might look like mine below, give yourself a pat on the back. You've just done a nice thing for your machine. She will thank you and run a lot smoother.
This may not look like a lot of lint. But, I assure you, it is.
The machine I cleaned today is a newer machine and the manual says they are oiled for life. So, I do not add oil.
My vintage machines would get a drop of oil at this point. My Brother PQ1500SL would also get oil.
Okay, let's get your machine put back together so you can use her again. Do everything you did to take it apart but in reverse.
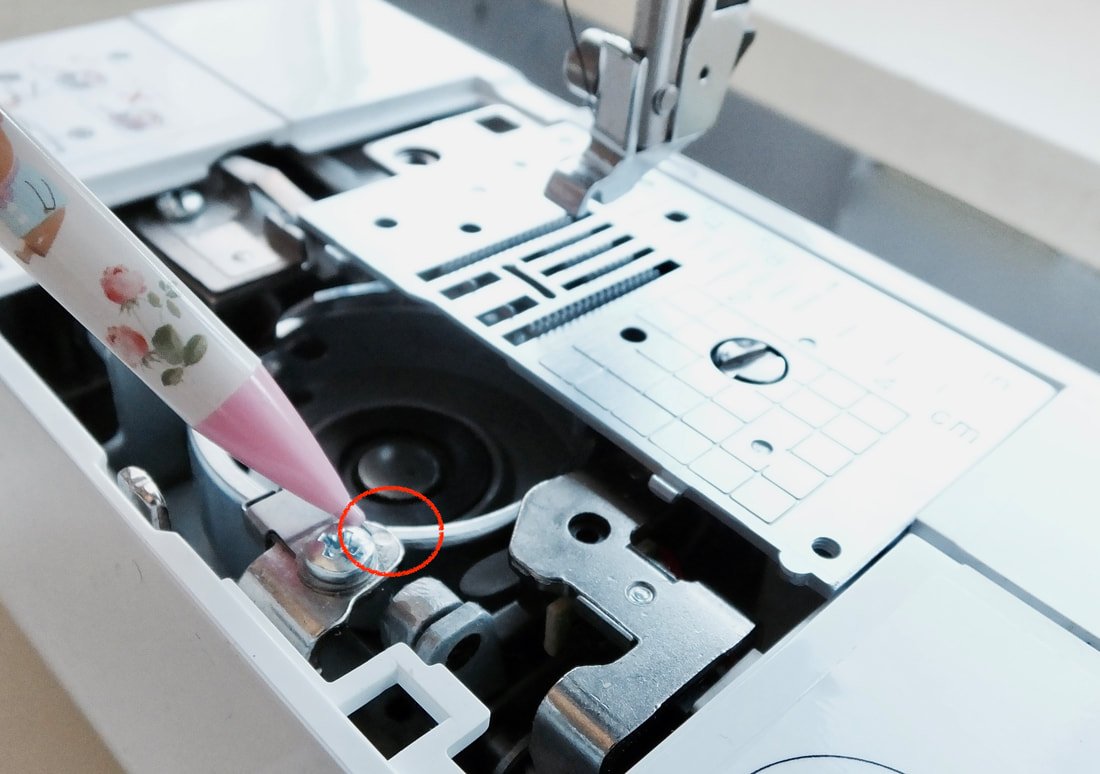
Find your tiny white triangle on the bobbin case. Match it up with the tiny white dot next to your screw. Pop the case back inside matching these 2 together. You may have to finagle it to get them matched up.
Match the triangle and dot. Your machine may not have markings, check your manual.
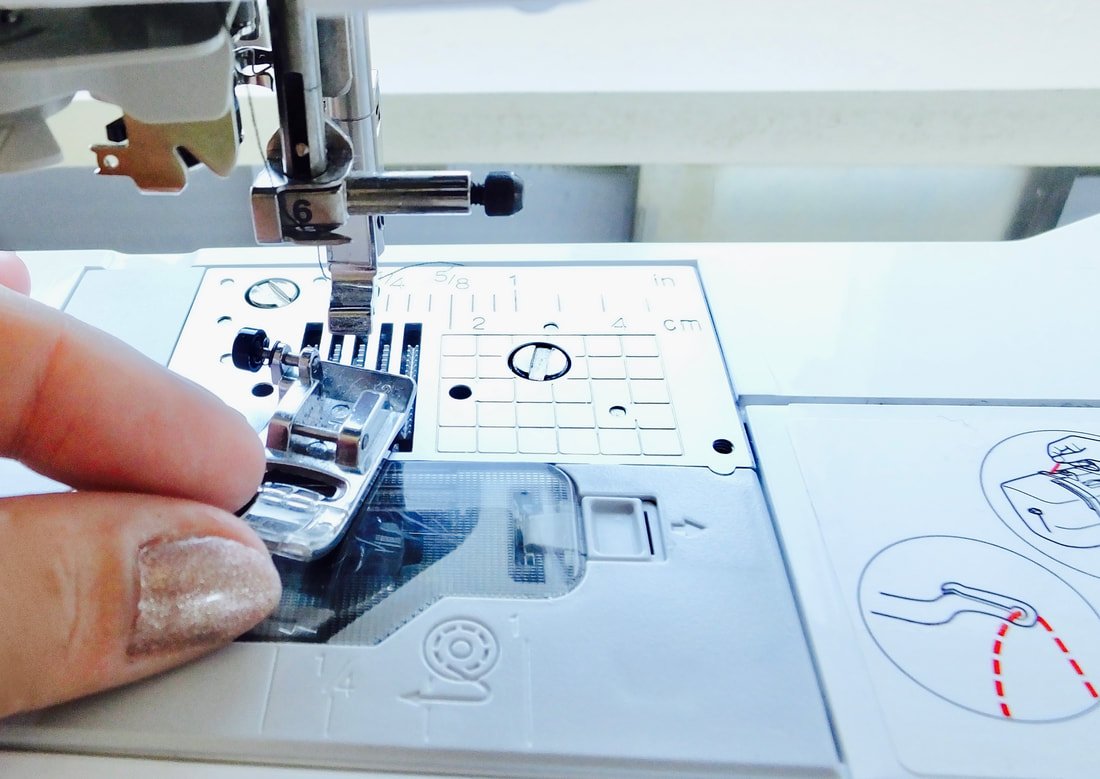
Slide the needle plate cover back into place.
Stay with me. We're almost done. I'm hopeful at this point, you're saying to yourself… "This was so easy!”
Slide the flat bed attachment back into place.
Slide the bobbin cover back on.
Add your presser foot and insert your needle.
You're back in sewing business!!
Add your pressure foot and needle.
If you have any parts left over, that is not good. Take a deep breath, sip of coffee, and retrace your steps.
I clean my machines whenever I notice them having little issues. This simple task will make your machine perk up and run more smoothly. I think it helps to make it last longer too.
You should also take the machine to a reputable sewing shop for a good cleaning once a year. They take the whole thing apart and fix any issues. I do my part by keeping the dust bunnies out.
Look at all that fuzz!
Let's take another look at the dusty, yucky cotton swabs. Yikes!! Don't forget to toss those dusty swabs in the trash.
Thanks for hanging out and cleaning with me. Did you time yourself? How long did it take you to clean your machine? Tell me in the comments, below.
Happy cleaning,
Annette


