
Pattern Reviews, Sewing Hacks, Tips & Free Patterns
Sewing Blog Besties
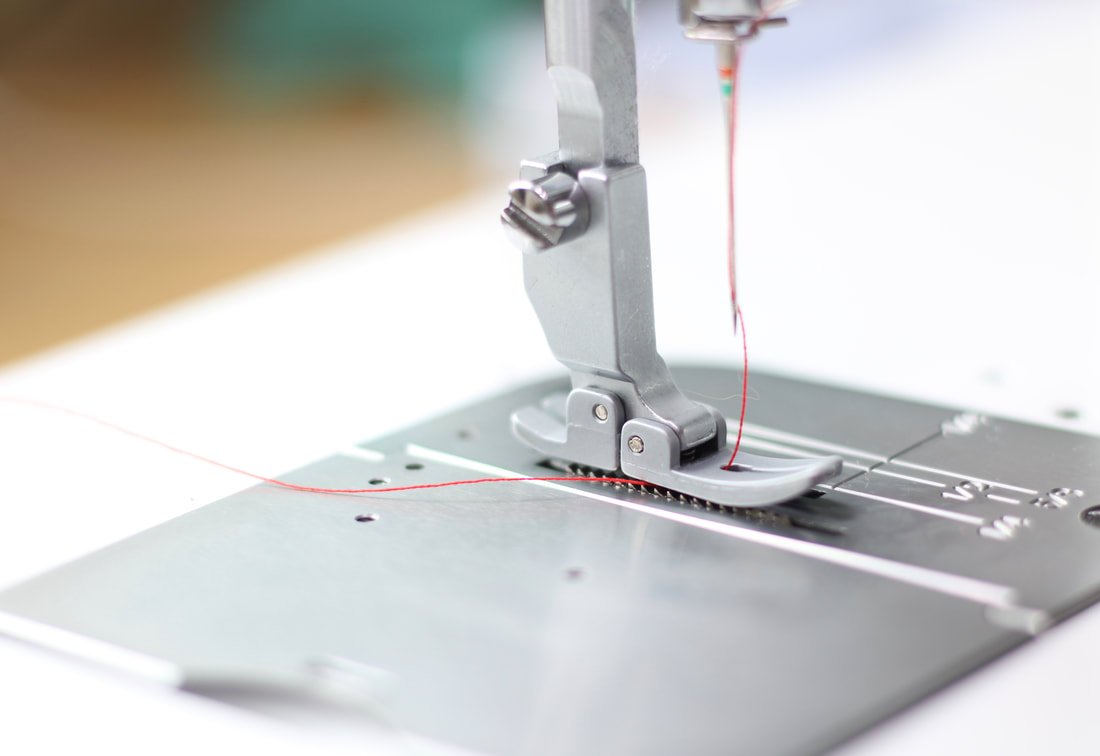
Clean your Sewing Machine in 5 minutes
Is your machine being naughty? Give her a quick cleaning and she’ll behave better, I promise.
Has your sewing machine been acting rude? Is she causing your thread to break, bunch, or nest? Is she being loud and unruly?
Well... It might be time for a quick cleaning.
I had a few minutes this morning, so I decided to give my machine a little cleaning session. When my machine starts to run a little wonky, I clean her innards and she's good to go!

What you need:
2-4 Cotton swabs
Table light (if your machine isn't in a well-lit area)
Sewing machine
I keep a few swabs stashed with my sewing notions so they're always handy when I need them.
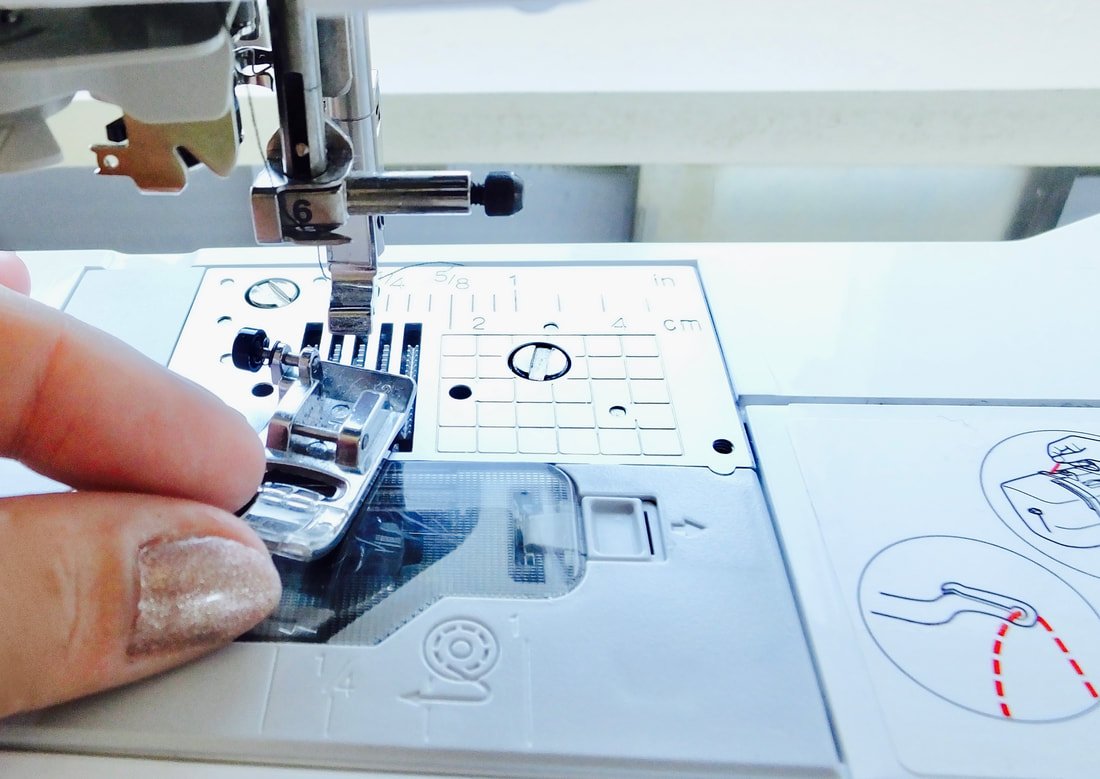
Start by turning off your machine. Sounds silly, but you don't want to lose a finger or ruin your nails. ;)

Remove the needle.
Take your needle out. It gives you more room so you can get into the area without worrying about a poke. Turn the tiny black knob a couple of times and the needle drops down easily. Set it aside, don't lose it!

Remove the foot.
Remove the foot and set it aside. This machine has an easy button in the back that drops the foot. You may have to unscrew the foot to remove yours. Check your manual if you are not sure.
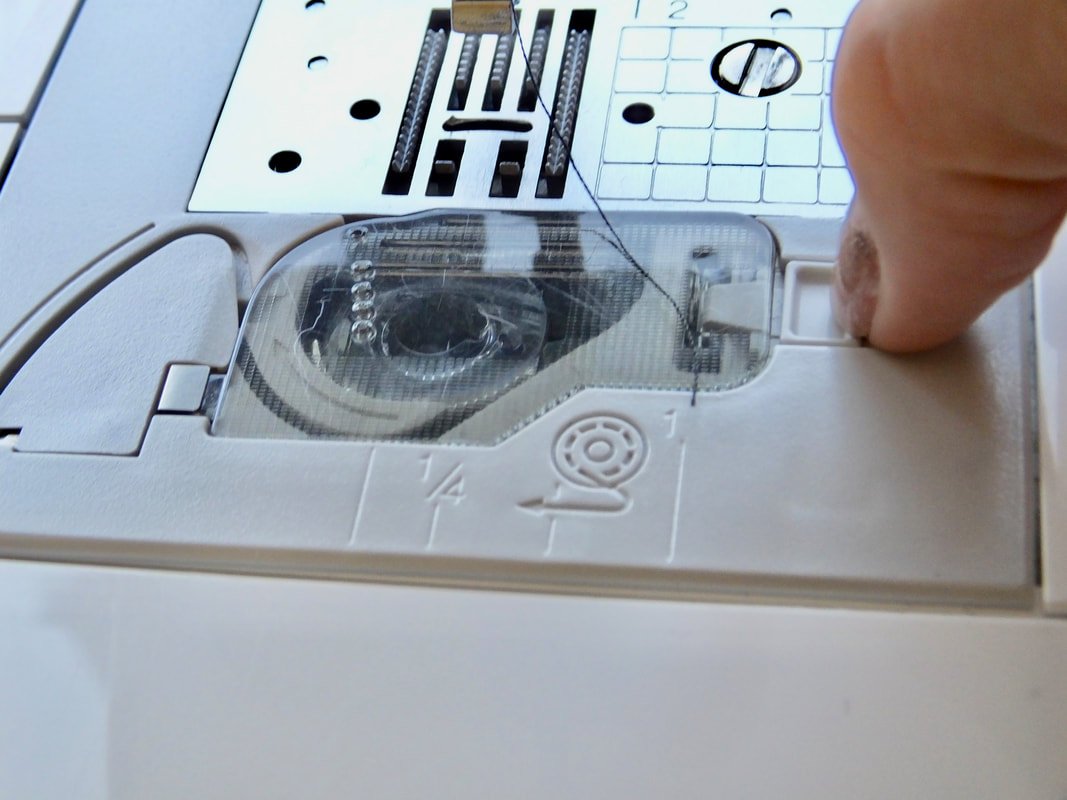
Remove the bobbin and everything around it.
Remove the bobbin cover and pull out your bobbin. This machine has a drop-in bobbin, you might have a different setup. Check your manual if needed.
Set the cover aside as well. If you have a small dish, it's nice to stick all the parts inside so they are kept together, and out of the way.

Now we're going to slide off the flat bed attachment if you have one. Easy peasy so far, right?
I made a pair of tweed pants and they left tiny fibers everywhere. I can't wait to see what's hiding inside of the machine.
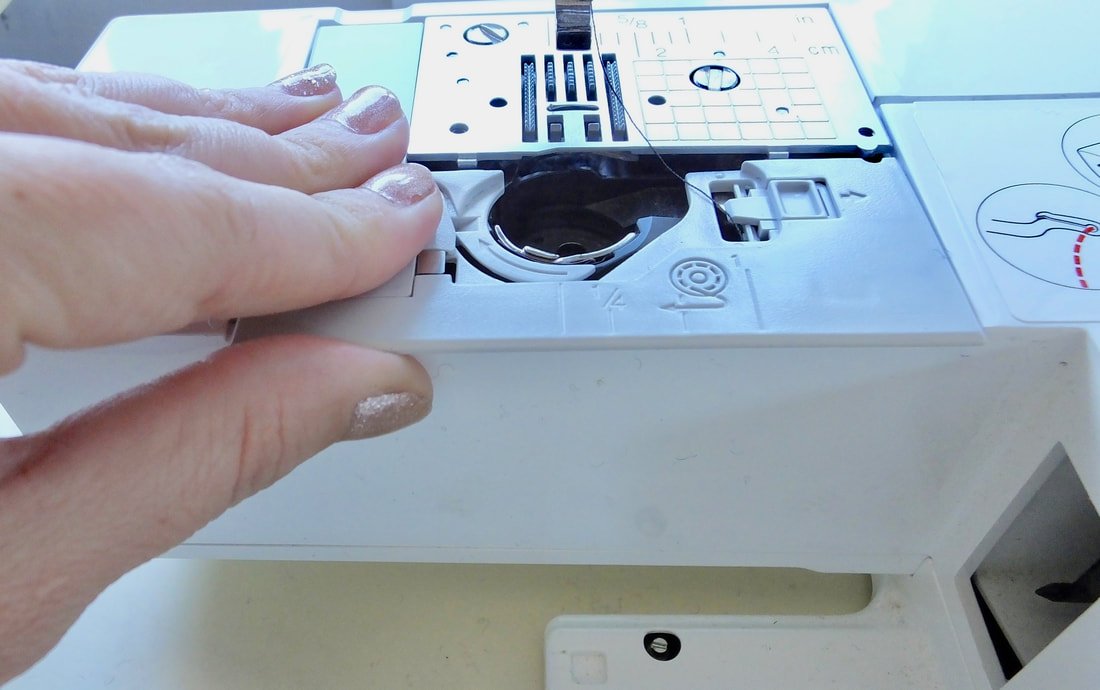
Remove the needle plate cover. This slides out towards you easily, be gentle though. Set aside or in the dish with everything else.
Are you still with me? Hope so!
Here's where it gets fun.
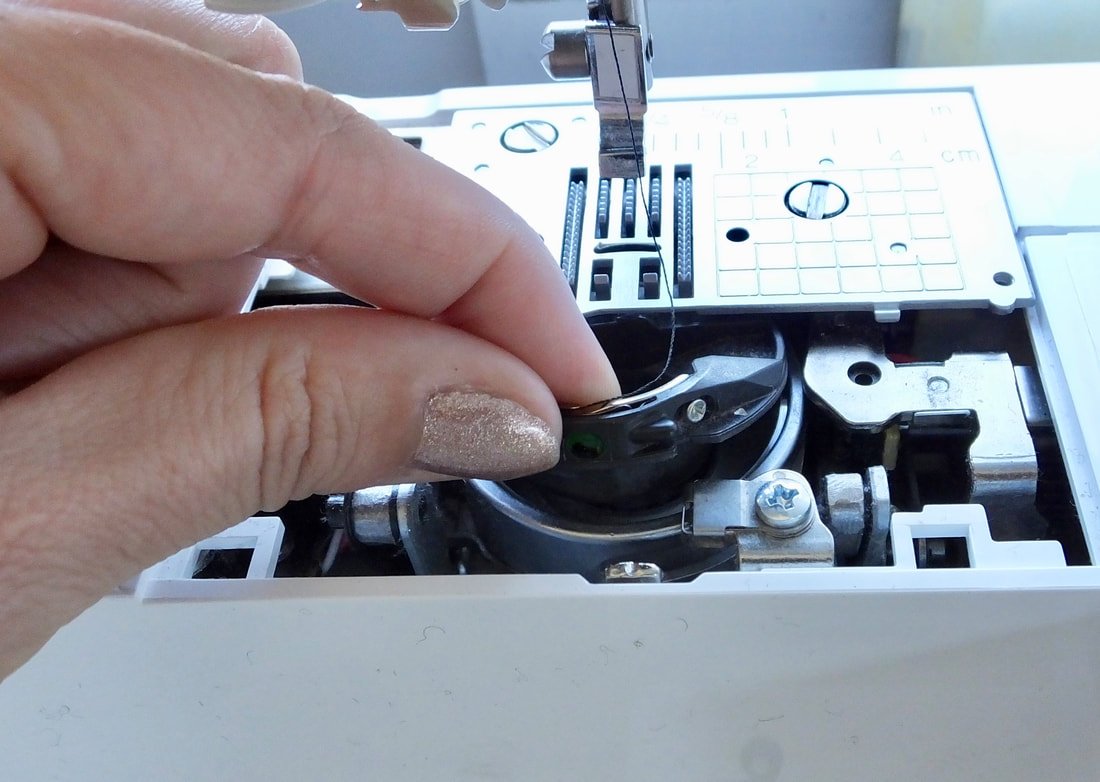
Remove the bobbin case by pulling it out.
Note the tiny white triangle on yours. Keep that in mind when we are putting everything back together. Set inside the dish.
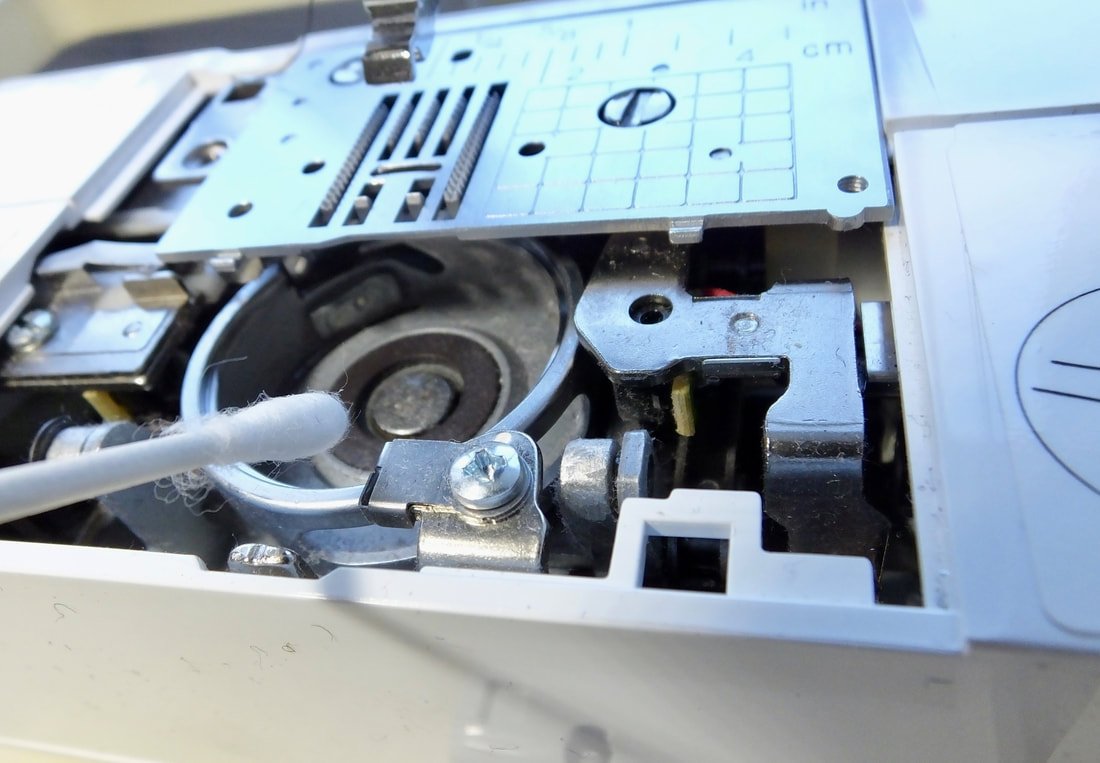
Swirl your cotton swab around everything.
Now it's time to go to town! Grab a cotton swab and look inside. Do you see little dust bunnies? You may or may not. Start by swirling the swab in the race (area where the bobbin case lives) first.
There's no wrong or right way, but try to be gentle. Don't jab it around in a stabbing motion, just slide and twirl it, gathering fibers and rogue strings. It's almost therapeutic.
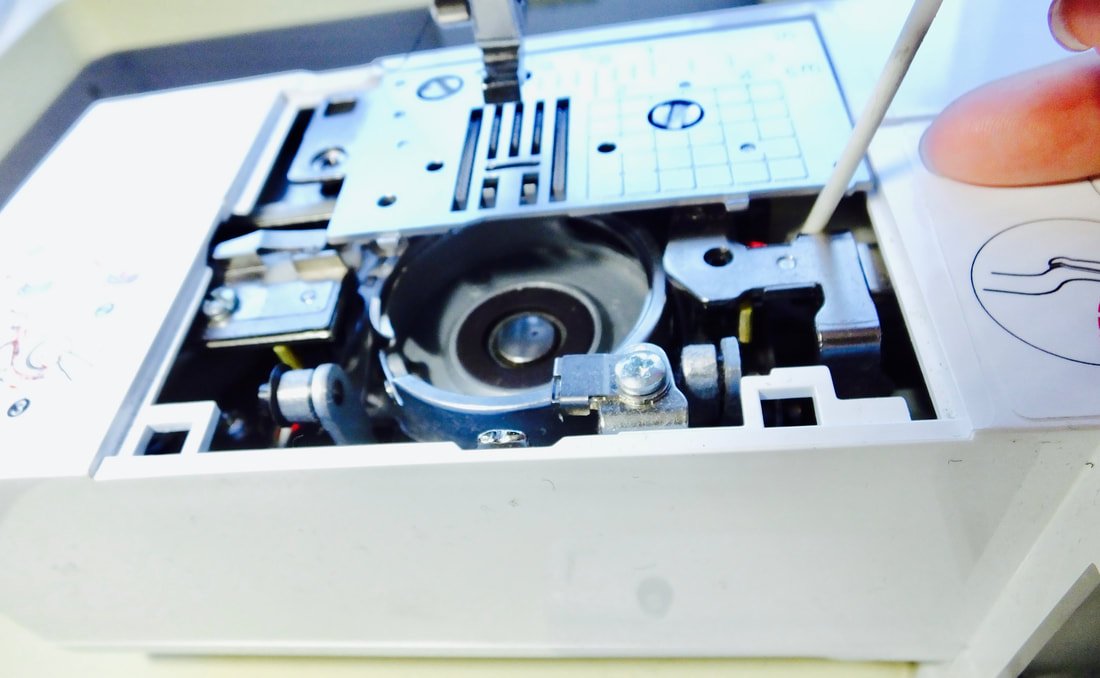
Take your time, hand crank the hand wheel a little bit. It turns the race so you can get more hidden debris.
I do not use canned air. I only use cotton swabs.
However, if you're lucky enough to have those tiny attachments that came with your vacuum cleaner, by all means... get that sucker out and use it! Literally.

When you're all done, your swabs might look like mine below, give yourself a pat on the back. You've just done a nice thing for your machine. She will thank you and run a lot smoother.
This may not look like a lot of lint. But, I assure you, it is.
The machine I cleaned today is a newer machine and the manual says they are oiled for life. So, I do not add oil.
My vintage machines would get a drop of oil at this point. My Brother PQ1500SL would also get oil.
Okay, let's get your machine put back together so you can use her again. Do everything you did to take it apart but in reverse.
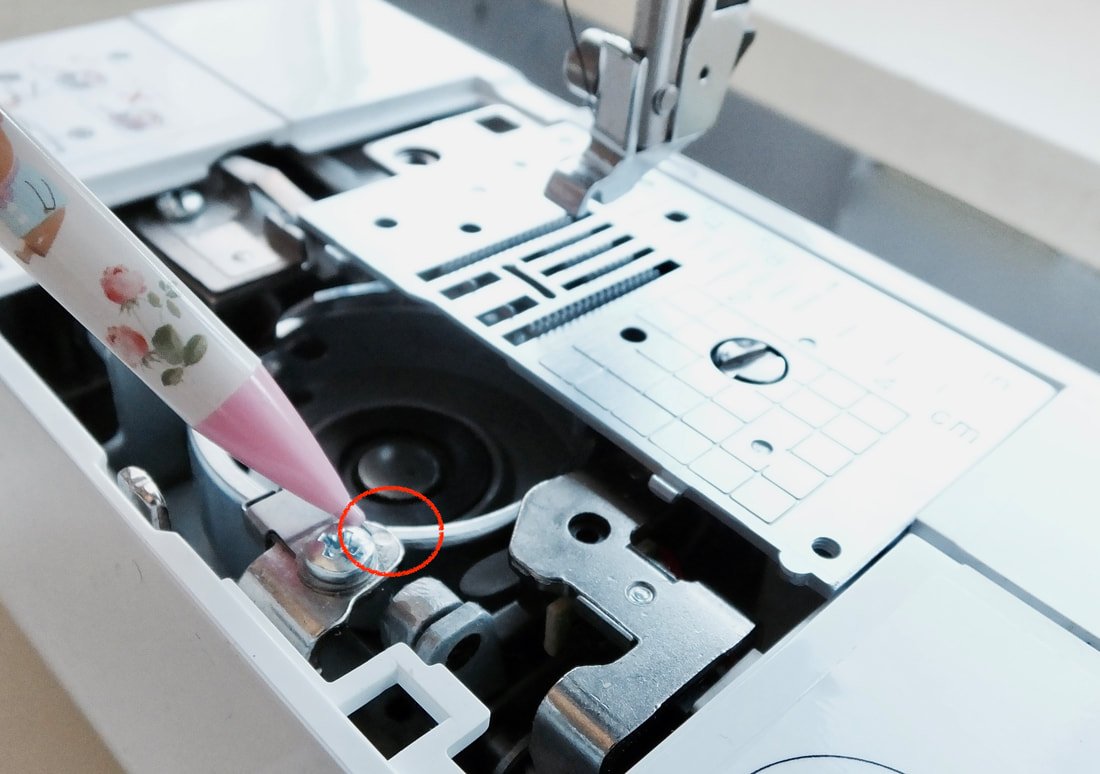
Find your tiny white triangle on the bobbin case. Match it up with the tiny white dot next to your screw. Pop the case back inside matching these 2 together. You may have to finagle it to get them matched up.
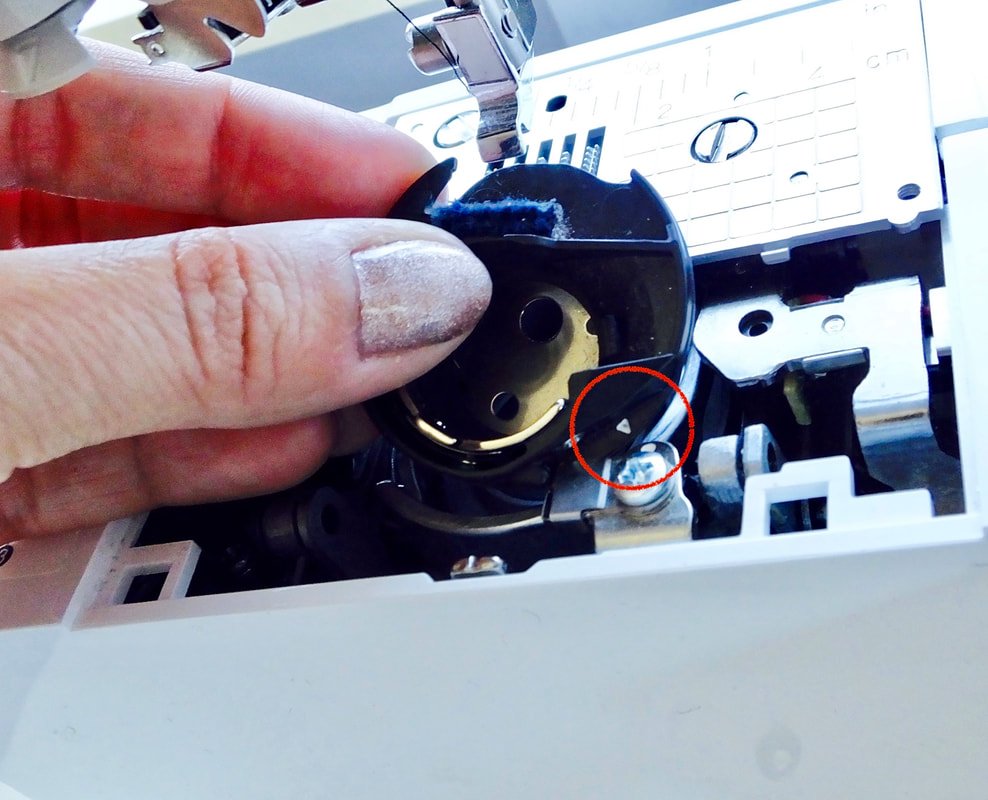
Match the triangle and dot. Your machine may not have markings, check your manual.
Slide the needle plate cover back into place.
Stay with me. We're almost done. I'm hopeful at this point, you're saying to yourself… "This was so easy!”
Slide the flat bed attachment back into place.
Slide the bobbin cover back on.
Add your presser foot and insert your needle.
You're back in sewing business!!
Add your pressure foot and needle.
If you have any parts left over, that is not good. Take a deep breath, sip of coffee, and retrace your steps.
I clean my machines whenever I notice them having little issues. This simple task will make your machine perk up and run more smoothly. I think it helps to make it last longer too.
You should also take the machine to a reputable sewing shop for a good cleaning once a year. They take the whole thing apart and fix any issues. I do my part by keeping the dust bunnies out.

Look at all that fuzz!
Let's take another look at the dusty, yucky cotton swabs. Yikes!! Don't forget to toss those dusty swabs in the trash.
Thanks for hanging out and cleaning with me. Did you time yourself? How long did it take you to clean your machine? Tell me in the comments, below.
Happy cleaning,
Annette
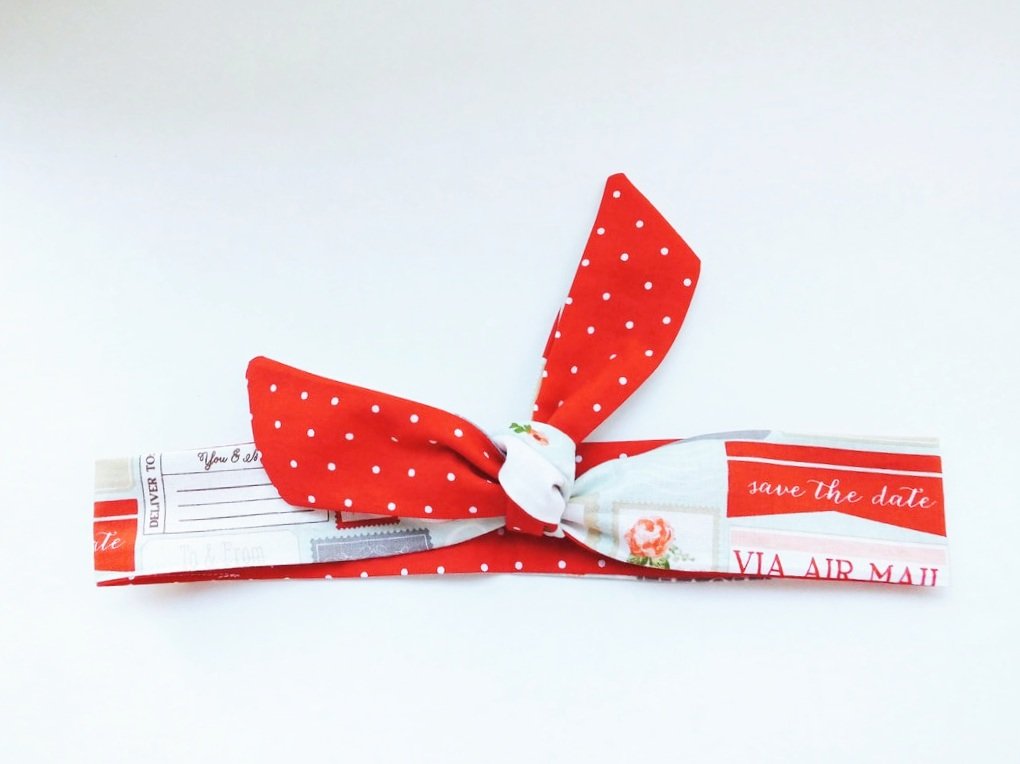
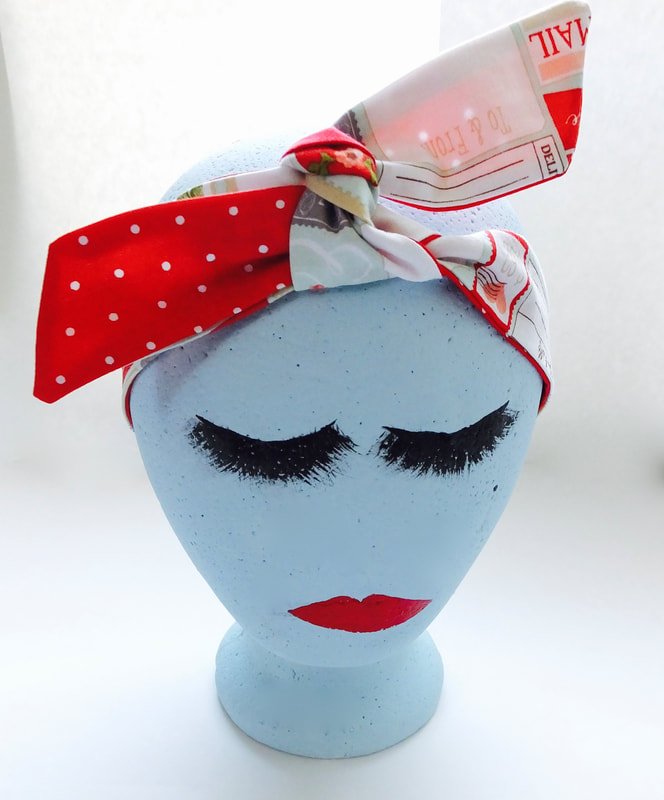
Rosie the Riveter Headscarf
Sew up the easiest 1950s-style hairscarf. Uses minimal fabric and is customizable.
When getting ready, is your hair the last thing you do? Laziness can set in hard when doing your hair, amiright? But, it can still be cute when done quickly. I want to share with you an easy hair scarf pattern and tutorial. Great for beginner sewists or seasoned ones. We could all use a little help in the hair department when we’re short on time. ;)
You'll look cute as a button if you’re having a bad hair day. Or maybe you want to sew up something quick and easy to give to a 1950s-loving friend? This is the perfect project either way.
Materials You’ll Need:

1/4 yard of cotton fabric
Ruler
1/2 yard of contrasting fabric
Chalk pen, or other marking tool
Matching thread
Measuring tape
Sewing machine
Chopstick, unsharpened pencil, or other turning tool
Scissors or rotary cutter and mat
Pins or clips
Instructions
Measure your head or the person you are making the headscarf for. Write it down to use as a size reference.
Take your outer fabric and cut a long strip of the outer fabric measuring 36" by 2-4" wide (your choice). You can add or take away length and width at this point. This is the starting size that I prefer.
Use your chalk marker to trace the rectangle shape onto the wrong side of your fabric. You can use scissors or a rotary cutter and mat to cut out the fabric.
Cut an angle off the short ends from top to bottom, this is easy... just eyeball it. (The angle will give the scarf some style when it's on your head and tied.)
Iron the 2 strips nice and flat to get all the wrinkles out.
Sew with RST, pivoting at corners. Leave a 2-3” gap for turning out scarf.
Place the fabrics RST (right sides together) and pin, pin, pin. I left a 2-3" gap about 1/3 of the way on one side for turning out. This is important. Mark with pins where your opening is.

Trim the corners. Be careful not to cut through the stitching. This will make turning out easy and the corners will be crisp.
Sew with a 1/2" seam allowance and 2.5mm width. Start at the end closest to you and backstitch. Take your time, this is a long seam, and you want it to be straight.
When you get to the corner, stop sewing, leave the needle down in the fabric, and put the presser foot up. Pivot your fabric. Put the presser foot back down and continue sewing until you reach the long side again. Repeat the pivot method.
Sewing, sewing, just keep sewing. When you've come back to the gap you left, backstitch. If you forgot to leave a gap, no big deal. Pull out the seam ripper and take out a couple of inches of your seam. Take a few seconds to check your stitching. Make sure both pieces of fabric are stitched together and you don't have any accidental openings.

Trim edges to make turning easier.
Use sharp scissors to trim away the excess fabric at your corners. This will take away the bulk and give you nice, crisp corners.
After everything is trimmed everything, grab a chopstick!
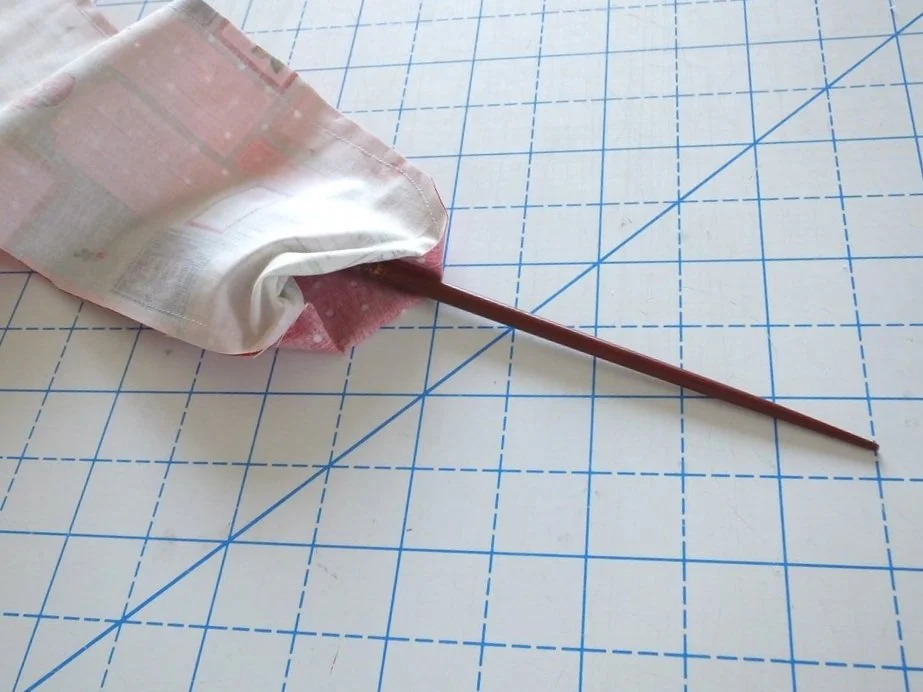
Start by poking the blunt end into a corner.

Use a chopstick or other blunt end tool to help turn your scarf.
It's time to turn the scarf right side out. Take the larger end of the chopstick, wiggle it into a corner, and gently slide the fabric over it. Once you get this tricky part done, it makes turning out easy.

Almost done. We just need to press and close the gap.
It's starting to look wearable. Woohoo!! If yours looks similar to this, yay! If not, uh-oh.

Iron your head scarf flat. If you need to, spritz water on the whole thing and iron away. Wrinkles be gone!

Ta-da! Looking good.
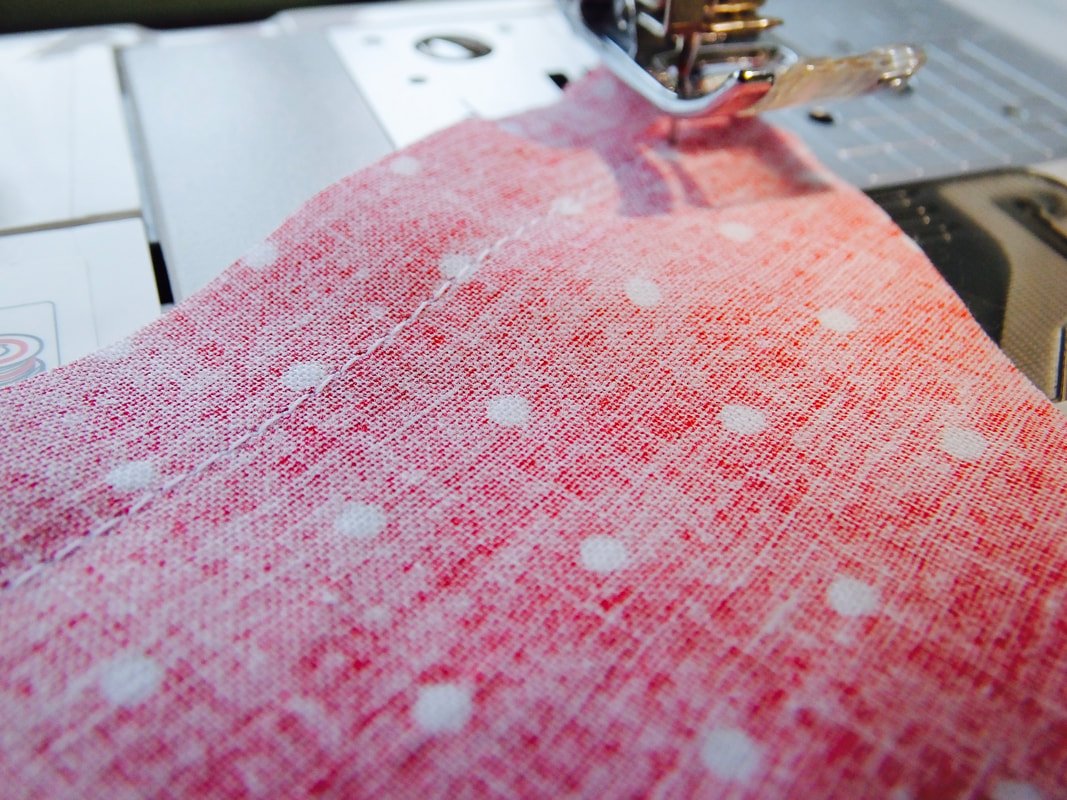
Now, stitch the opening closed. Fold the raw edges under making sure they are flush with the seam. Pin the opening closed. Take the scarf to your machine and topstitch the seam closed. Stitch 1/8" from the edge. Backstitch at the beginning and end. It will look like the photo below when it's finished.

Top stitch the opening closed, backstitch at the beginning and end.
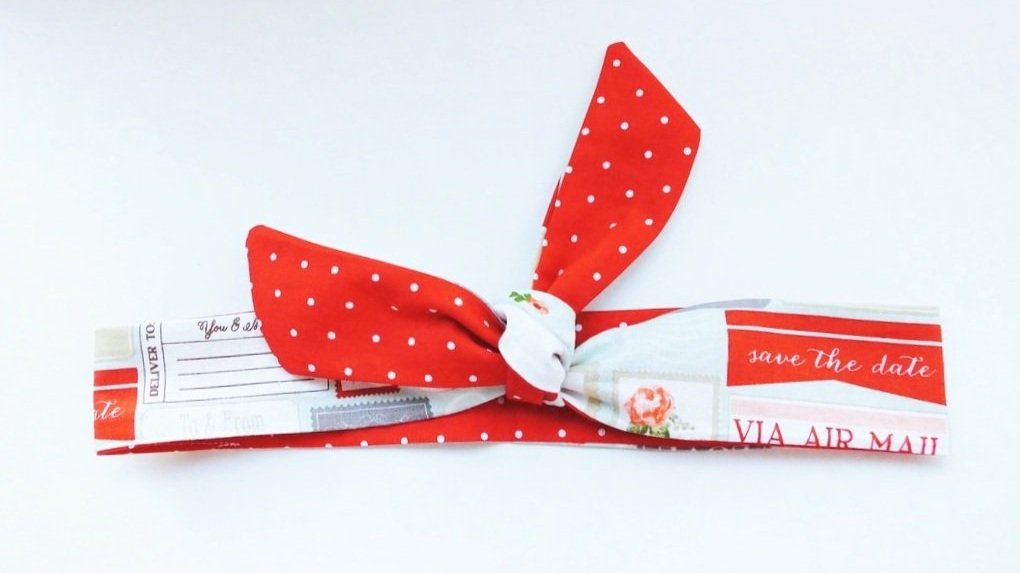
Yay!! It's finished. Where will you wear your new scarf first? Super easy, right? You can whip up quite a few of these from one yard of fabric. They make great gifts for others as well.
To Wear the Scarf:

Place on head, comfortable. Cross the ends over each other and tie.
1. Place the center at the back of your neck and pull the ends up towards the sky at an angle
Tie into a loose double knot. Add bobby pins above your ears if needed.
2. Tie a loose but, not too loose knot where you want the scarf to sit.
3. Complete the knot and add bobby pins to the sides of the scarf. The pins keep it from sliding off your hair.
Your 1950s Rosie the Riveter hair scarf is complete!
When you make one, tag me on Instagram. I want to see your version! @sewingtothemoon
If you have any questions or comments, leave them below.
Thanks for hanging out today, and happy sewing!
Annette

Fold your scarf into a heart shape. Yes, I have this kind of time. Haha