Pattern Reviews, Sewing Hacks, Tips & Free Patterns
Sewing Blog Besties

Brother PQ1500SL Sewing Machine Review
Brother PQ1500SL review. This industrial like, home sewing machine is great for sewing garments. Read my review here.

How are you? Safe and sane, hopefully. Things are crazy around here, but we're getting used to our new "normal". Will life ever go back to the way it was? Who knows.
Let's talk about mask making for a second. Whew! What a whirlwind that is, amiright? I've never made hundreds of one item before, until I decided to sew face masks. They were needed everywhere overnight. I've donated them, sold them, made them for friends and family, etc., just like most of us in the sewing community.
Just like many of you, I got tired of sewing masks. Making the same thing over and over takes a toll on you. Mind, body, spirit, and soul.
At some point in the midst of mask making, a new sewing machine was ordered, by magical fairies who love me, presumably. I had my eyes set on this particular one for a couple of years. It wasn't an essential item, but with all the necessary sewing going on, I allowed it.
They sent me the wrong machine at first, and then finally, 2 weeks later the correct machine arrived. Wheeee!! I was so excited.
Although, hesitation and fear kept me from opening it right away. What if I didn't love it? Maybe it was too advanced for me. It is a straight stitch only machine, after all. It sat outside for 24 hours to decontaminate before opening up the box and bringing it inside. Crazy, I know.

Let me start off by saying, WOW! She's a beast! She’s heavy and the box was huuuge!
My new Brother PQ1500SL sewing machine was here and itching to be used. And, holy cow, she exceeded all my expectations and some.
The machine came with a plethora of accessories and I totally nerded out on all of these, of course!
The machine has a large extension table that is dreamy. It came with multiple feet including a whopper of a walking foot.
Threading is as easy as pie. Winding the bobbin is easy as well.
It doesn't have a drop-in bobbin, which I thought would be annoying. However, it's easy to change because there are 3 doors that open up, making it convenient to change during a project.
A fun surprise that was included was a loaded bobbin. I've bought a few new machines in my almost 20 years of sewing, and they've never come with a loaded bobbin! This was exciting for me. It really is the little things.
Or I lost my marbles after making hundreds of masks, and any small thing was pure joy at this point. Who knows!
Once I received my new Brother sewing machine, I got a second mask-making wind. I was so antsy to use it. Give a kid a new toy, of course they want to play with it right away!

Sewed the first mask beautifully.
Nevermind the stack of things that I started and couldn't finish before the pandemic. I couldn't sew something for myself during a crisis, that just felt wrong to me. So, I made more masks. So many more masks. But, they were made with a big smile because I had a shiny new toy.

The machine came with a fully loaded bobbin! You wind the thread up and around to the cutter. So easy and convenient. No pulling the thread up with upper thread.
I'm a sucker for accessories! Do you love gadgets and get excited to use them? Here's everything it came with.

Feet galore
Zipper foot
invisible zipper foot
Walking foot
Rolled hem foot
1/4" foot
Pin feed foot
Free motion quilting foot
Seam guide
Feed pin and lining plate screws
Fabric Separator
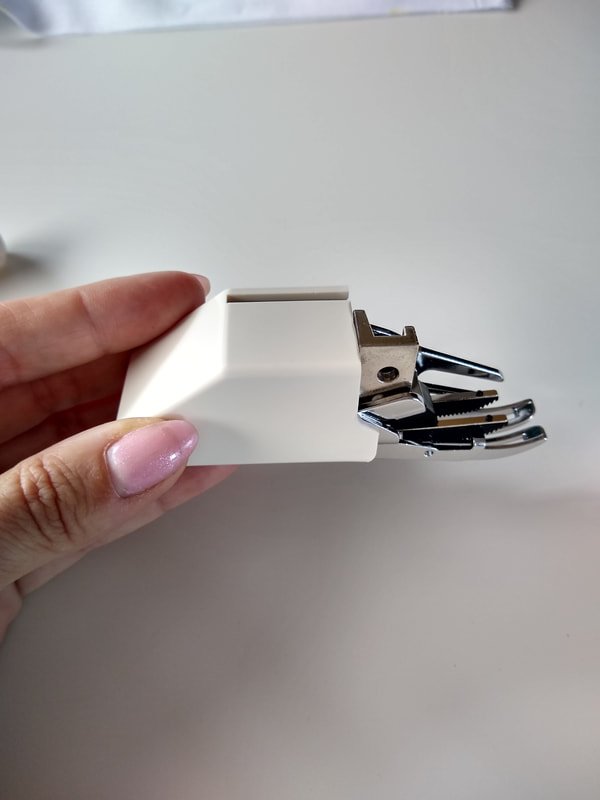
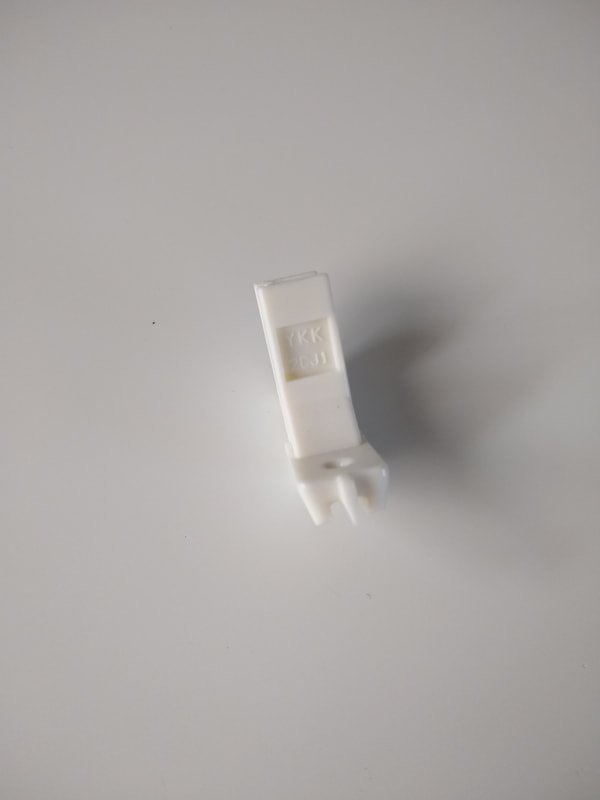
Walking foot to help with quilting and sewing many layers. A YKK invisible zipper foot.
That particular invisible zipper foot in the photo above is the greatest thing I've ever used! I sew a lot of invisible zippers into my clothes, I'm familiar with invisible zipper feet. But, my metal go-to foot has nothing on that plastic YKK beauty! It even looks different, see the pointy middle part? It's a game-changer. I didn't have to pull and yank and coax the zipper while I sewed it in. It just did its own thing and we sewed in harmonial bliss. It's a high-shank foot, so check what type of sewing machine you have before you order this puppy. But, if you use invisible zips often, get yourself one. You won't regret it. ;) I saw them on Amazon and online shops, look for a Juki invisible zipper foot.
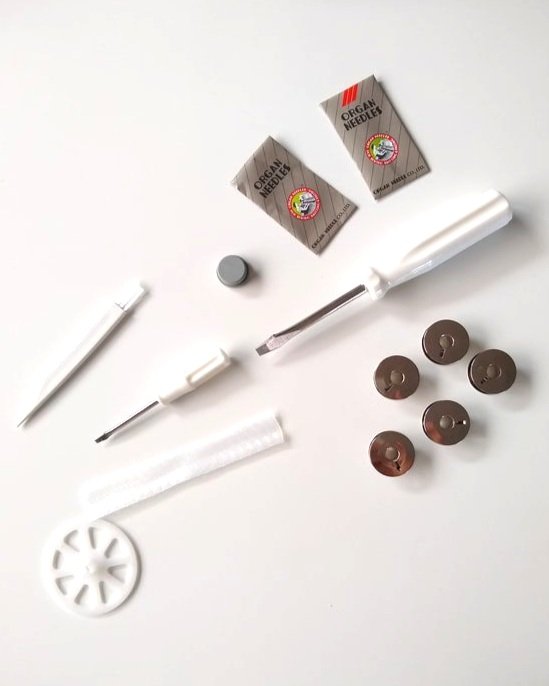
More Accessories
5 bobbins
6 extra needles
Lint cleaning brush
Small screwdriver and medium screwdriver
Spool cap and net
Feed pin changer
Extension table with measuring strip on it
Knee lift
Spool Cushion
Soft machine cover
Knee lift and fabric extension table


Sewing Machine cover. It only fits if you remove the table and knee lift.
The machine came with a cover made of vinyl and has a thin layer of foam inside the front and back. It's nice and roomy. It says "For Professional Use" on the front and that makes me feel all professional-like. No big deal. ;)
You have to remove the table for the cover to fit properly. But, I plop the cover over the machine and call it a day.

The machine without the table. I have come to absolutely love the knee lift. I don’t know how I ever sewed without it.
Onto the fun part, the actual sewing. Squeee!!
I had a minor hiccup in the beginning because the bobbin wasn't "clicked" in all the way. Once that was figured out, we were good to go. Just make sure it makes a loud click. If you get a new sewing machine or serger, it's good practice to load the bobbin and thread the machine a few times. It helps you get familiar with the motions. I loaded 2 bobbins and those went smoothly, a little louder than a plastic bobbin, but they wound quickly and evenly.
Threading the upper thread was easy. It's a tad different than my other home sewing machines because the tension discs are on the outside. The manual walks you through the process and even shows an alternative way to thread if you have tension issues. Thank you, Mister Manual Writer, or Miss. ;)
The Brother PQ1500SL does not alert you when the bobbin is running out. My other Brother machines make a warning beep when the bobbin is low. I thought this would be frustrating because let's be honest, it's nice to know when the bobbin is empty before you've sewn a whole pant leg. But... I prefer not to know! My other machine starts beeping at you and stops you from sewing, a good 2 feet of length before the bobbin is empty. I get frustrated and it's more hassle than it's worth.
Not knowing when I'll run out is much less stressful. I sew until I notice my seam is wonky. I take the bobbin out, load it, and pop it back in. Quick and painless. No annoying beep. Woohoo!!
This machine only sews straight stitches, nothing else. I will have to use another machine when I sew my bras and other things that need a zigzag. No biggy.
I cannot wait to sew a pair of pants on this machine, it's so fast and will sew a long inseam in a jiffy. 1500 stitches per minute (SPM) is life-altering! I used to count the seconds of my life go by while sewing with my much slower 400 SPM machine. LOL
The Brother PQ1500SL has a pin feed system and I honestly have not played with that part, yet. I'll update the post when I figure that all out. UPDATE: I’ve used it a few times. It’s made for sewing with velvet. I made two Gardner tops while using it. They turned out beautifully. Grab that post here.
But, it has a pin that feeds from below the feed dogs, upwards. It pokes the fabric layers and helps move them along. I assume it's similar to a walking foot, in theory. The manual says to use it with difficult fabric like velvet, leather, and suede.

I've sewn close to 100 masks and a Rita Blouse with the machine since it arrived.
I've test-sewn through a small variety of fabrics- super thin cotton, stretchy poplin, elastic, stretch knit, denim, and sheer fabrics. It didn't eat the thin cotton or sheer fabrics. It went over the mask pleats easily too, with no crunching sound like on my other machines.
Overall, I'm completely head over heels with this machine. I could kick myself for not buying it sooner. But, I had mom guilt. That guilt where you can't buy something nice for yourself because... kids.
If you're looking to elevate your sewing game, this is the machine for you! It's fast and powerful. I wouldn't necessarily recommend it as a beginner sewing machine. However, if you've been sewing for a while and need more power and more speed, this is for you! I sound like a car salesman, but I’m being serious. Give me all the sewing power and speed!
It doesn't have 400 decorative stitches like many other machines. It's a utility machine for sewing clothing and quilting. I don't quilt, so I can't recommend it for that. But reviews online say it's wonderful for quilting. UPDATE: I have made a few quilts with it and it sews through all the layers easily. It also does free-hand motion like a dream.
Disclaimer: I was not paid by Brother and I'm not sponsored - although I wish I was. Ha! ;) I bought this machine with my own money. And, oh my gosh, every penny was well spent!
Let me know in the comments if you have had your eye on this machine or already have it. Do you love it too?
Stay safe and healthy,
Annette

How to Sew a Custom Handbag
Sew a custom sized bag using your own dimensions. It’s sew easy!

I made this cute handbag as a fun little distraction during quarantine. I planned on using it sooner than later, but we all know how that turned out. Ha! Days turned into weeks and it's all a blur from there.
I had some marine vinyl leftover from another project and I came up with this little purse.
Want to make a cute little handbag for your next shopping trip?
Here's what you need:
1/2 yard of marine vinyl or other faux leather-type fabric
1/2 yard of cotton fabric for lining
Thread
Sewing machine and notions
Microtex needle
Scrap paper for making a pattern
Ruler and pencil
Interfacing if needed ( I didn't use any. Gasp, I know)
Purse feet (optional)

Cut 2 outer, 2 inner, 2 interfacing pieces.
Decide on your sizing
Start out by ironing any wrinkles in your lining fabric.
Grab some paper or cardstock, freezer paper is my go-to because it's inexpensive and wide.
Figure out how big you want your bag to be.
My pattern size is 9" tall x 14" wide.
Mark 2" square cutouts on the bottom of the pattern. Cut out the paper pattern.

Once your pattern is made and cut out, it's time to trace onto the fabric. Cut out 2 pieces of vinyl and 2 pieces of lining fabric. Iron on or sew in the interfacing to the lining.
Next, cut 2 strips of the marine vinyl 3" wide by 18" long. These will be your purse straps.
If you'd like to add a pocket, make that now. Decide on the size you want and cut a piece of fabric twice as long. You will fold the fabric in half RTS (right sides together) and sew all around leaving a 3" gap for turning out.

Press the pocket flat after you turn it out. I stuck my phone on top to figure out how wide I wanted my pocket widths to be. They aren't exactly the same width. Draw a line where you want the pockets to separate with chalk or a water-soluble pen.
Pin in place and stitch onto one lining piece. Sew in a "U" shape, do not sew the top you want it to stay open so your items can go inside. Reinforce the openings by backstitching a few times. Press.

Pin sides and bottoms together. Leaving tops open.
Using clips, clip the vinyl pieces, right sides together and pin the lining pieces RST. Sew the sides and bottoms using 1/2" seam allowance. Be sure to leave a 3" gap in the lining for turning out. Press the lining seams open. You shouldn't iron the vinyl, it may melt. Just finger-press those seams. Set both pieces aside.
Let's make the handles
Grab the 2 long strips of vinyl and all your clips. You do not want to use pins because they create permanent holes. Yikes!!
If you don't have fabric clips, use double-sided tape, chip clips, hair clips, your child’s teeth, or anything you think that will be strong enough.
Fold in half and carefully fold those sides into the middle. It takes some finagling, but you got this! Don't let the vinyl beat you. LOL!!
Clip along the end once you have it molded into place.
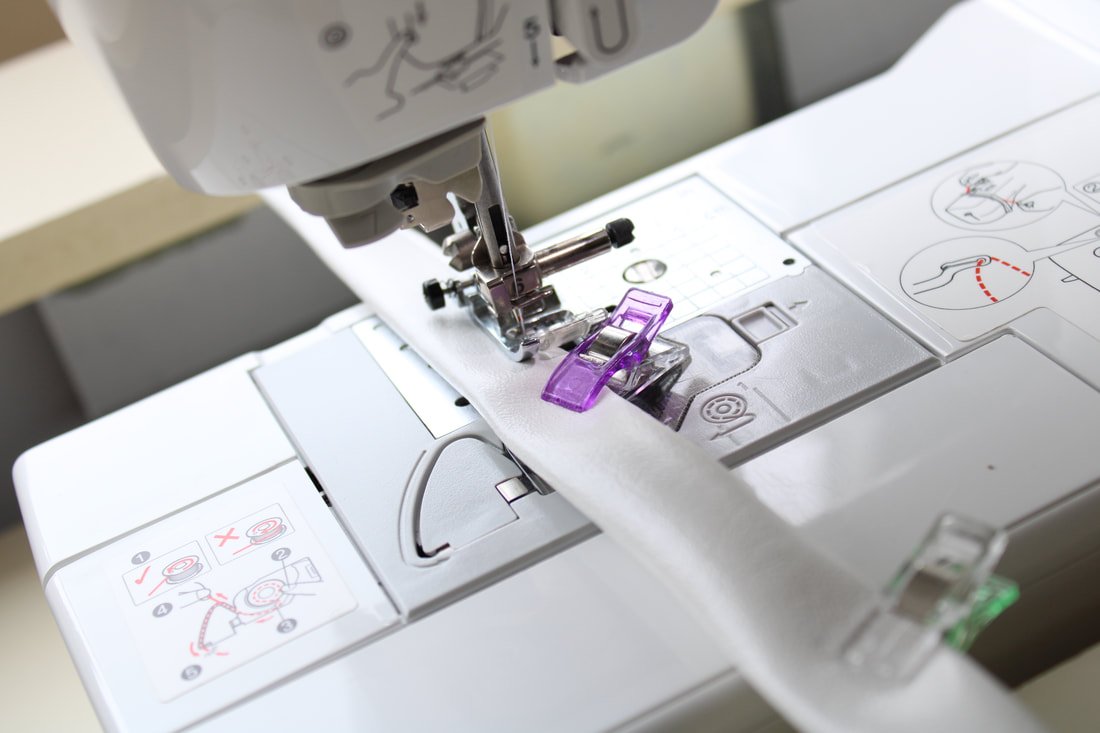
Sew the open edge first, then the folded edge.
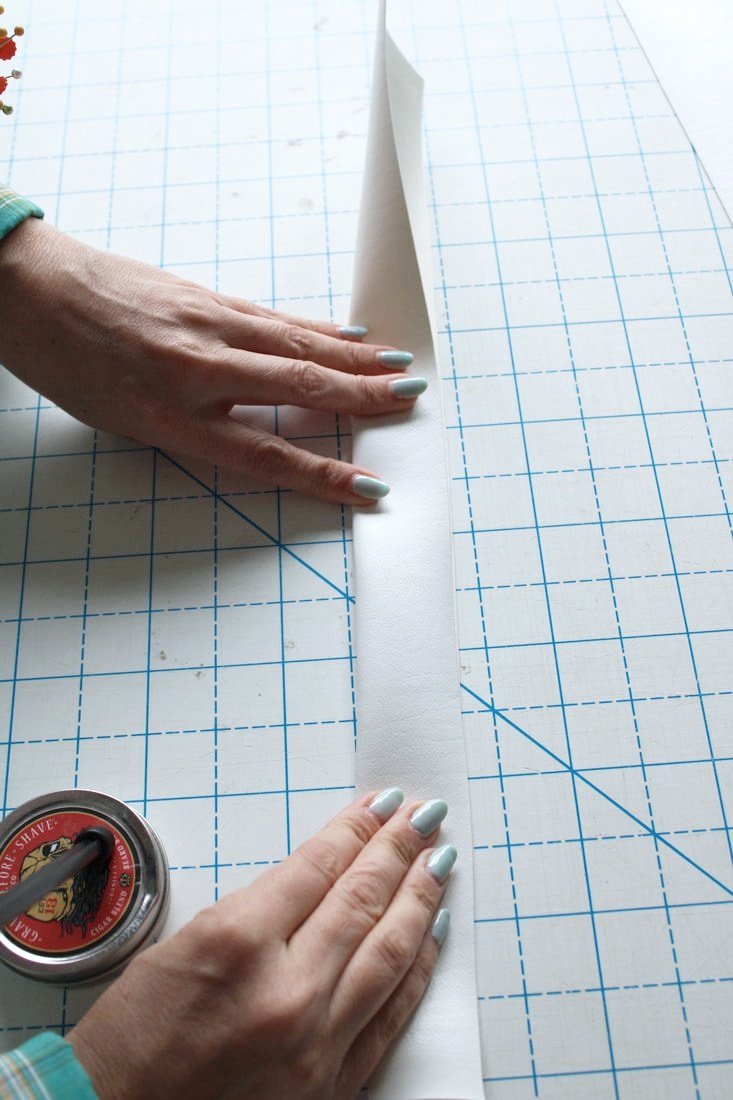
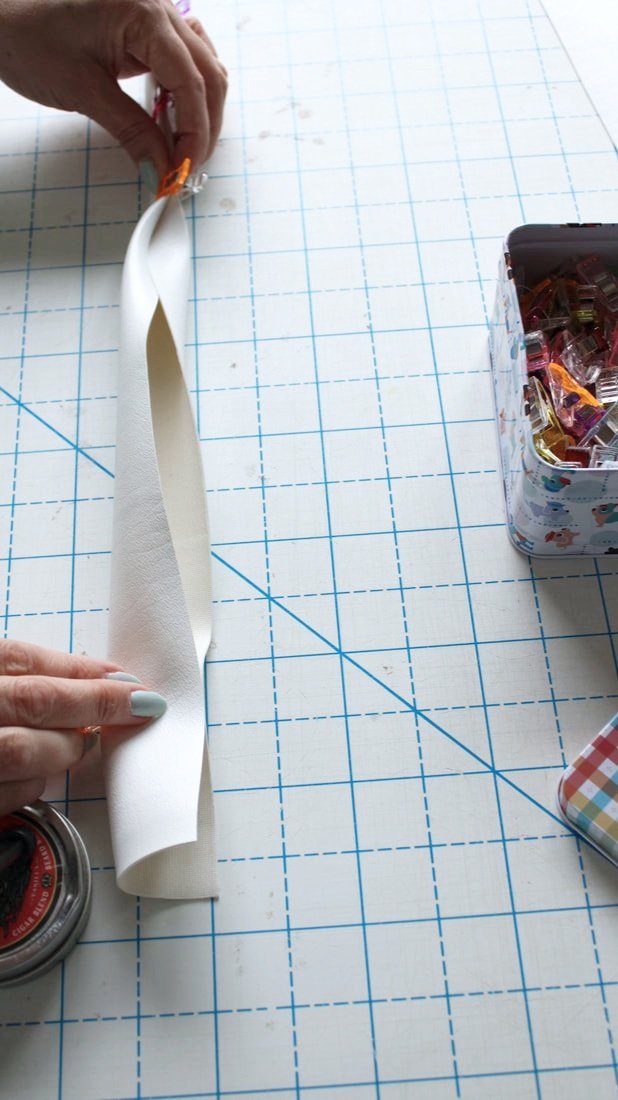
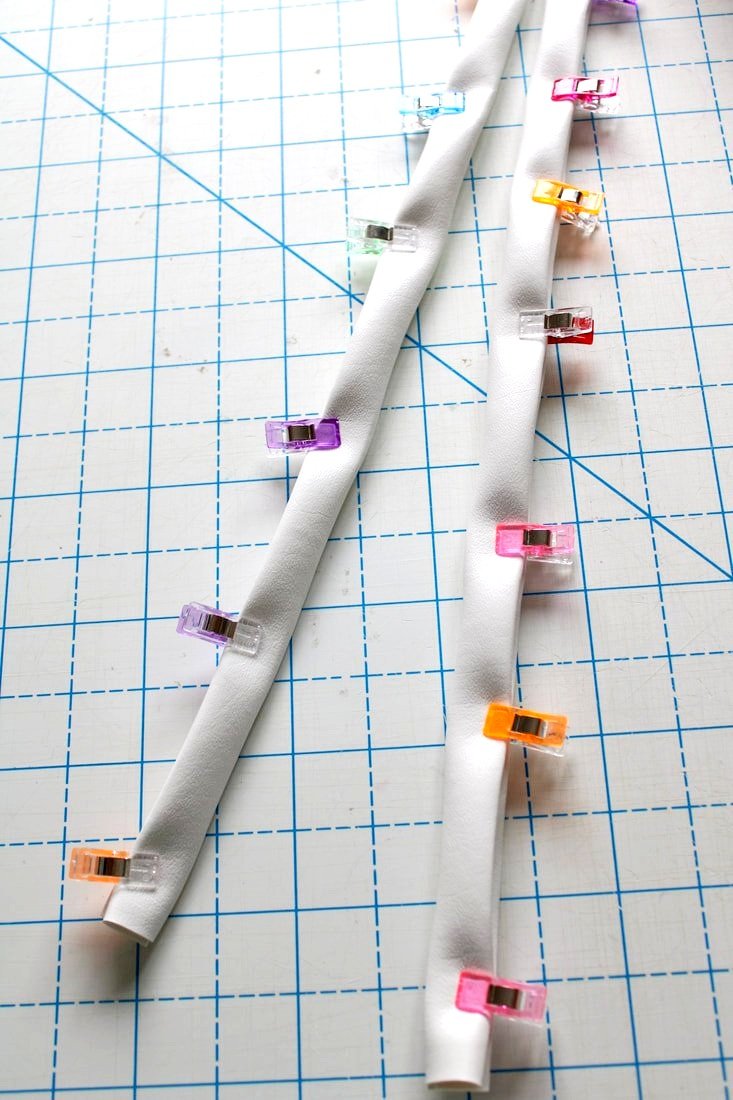
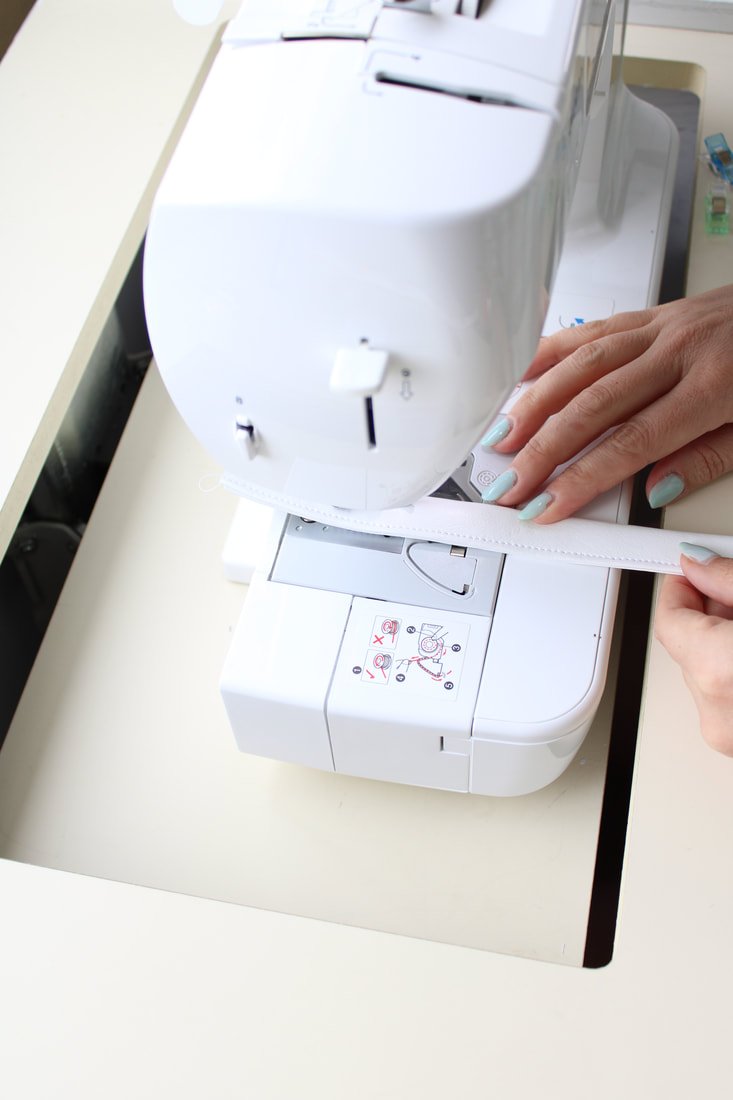

Scroll through the photos to see how to create your handles. I use this method for all of my purse handles.
Grab the purse's outer and inner pieces, you're going to box the corners before sewing everything together.
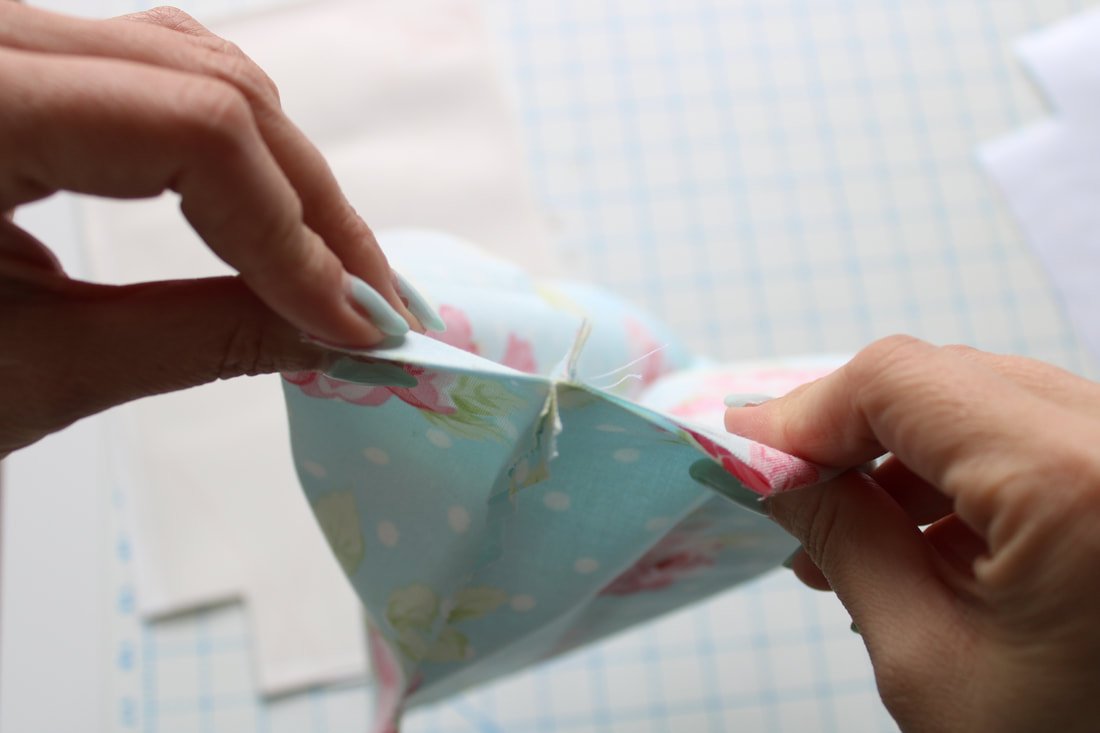
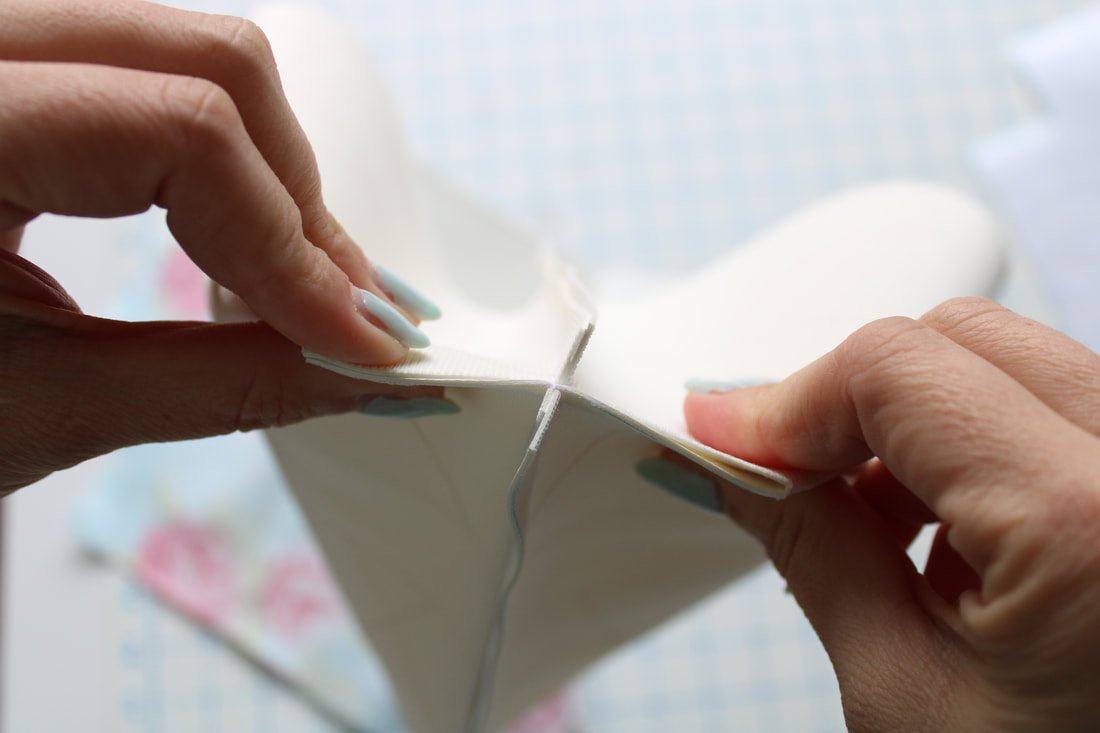

Boxing the corners is easy, pinch the seams together and sew 1/2" away from the edge. Do this with both lining and outer bag corners.
Your seams and corners should match nicely like the photos above. If they don't match perfectly, no biggie. You'll be the only one who knows and I'm not telling anyone. ;)
*If you have a set of purse feet lying around, you can add those following the feet instructions. I didn't have any, so I didn’t add feet to this purse. They do make a nice addition though. Next time.
Next, you're going to stitch the handles to the bag to keep them in place. Mark how far you want them from the edge. I positioned mine about 2" from the side seams. Make sure they are flipped the correct way and not twisted.
Base stitch them to the bag with a 1/4" seam. This is just to keep them from moving while you sew the bag pieces together.

After the handles are stitched in place, grab the lining piece. Keep the outer bag piece flipped inside out. Turn the lining inside out as well. Both pieces should be facing right sides together. This is important, check twice. ;) You should see the ugly sides of the fabric for both pieces.
Using clips, attach the lining to the outer matching the side seams.
Sew around the top with 1/2" seam.

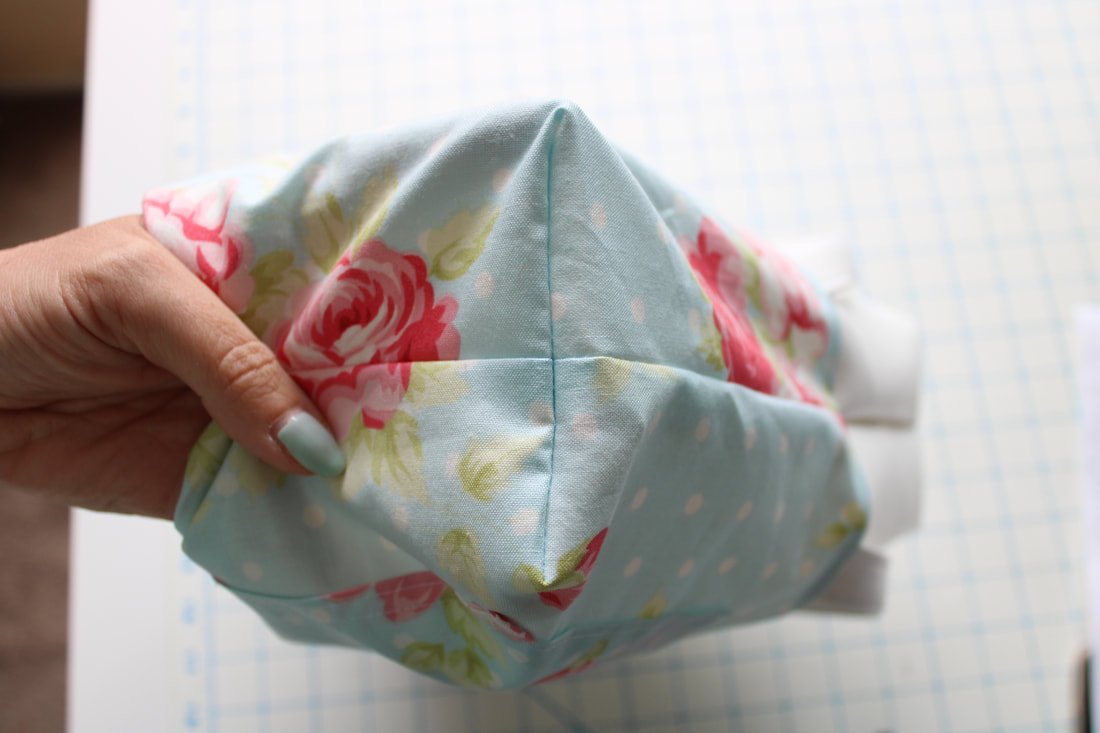
After you sew the lining to the outer, reach inside and flip the bag out. This takes a little more patience because the vinyl doesn't want to give. Just tell it who's boss and that it'll be happier once it comes to the bright side. It works, I promise!!


Bagging Out
Find the lining hole.
Reach through the hole and pull the bag through the lining.
Pull. Yank, lightly. Pull some more to get the vinyl out.
After you pull out the lining, push it back in and make sure everything fits nicely. Poke out all the corners.
Look over the handbag and nothing is wonky, and there aren’t any seams with holes, pull the lining out and sew the opening closed. You can do this by hand or machine.

Sew the opening closed.
Stuff the lining back into the bag, topstitch around the whole top, and you're done! Yay!!

I decided to keep the lining showing for an added pop. However, the lining doesn't sit in the bag perfectly after doing this. If you decide you like this look, add 1" in length to your lining pieces. This was a spur-of-the-moment sewing project which are my favorite because I can experiment. I like the bag size for a day out. However, I would make it 2-3" deeper if I used it as an everyday purse.
Oh, and I also added a little tie to the bag as well. If you have enough extra fabric, you can make one too. The white vinyl was just too plain and boring for my taste.

Cut a strip about 14" long by 5" wide. Fold in half and cut the short ends at an angle, if you'd like. Stitch the open ends, leaving a 2" gap for turning.
Clip your corners, turn out, and press. Stitch the opening closed and tie it onto your bag handle. Now you have a cute accent piece on your purse.

Where are you going to strut your new bag first? The mailbox? The grocery store? The living room? The possibilities are endless. Haha!
Oh, quarantine...
I think I want to try making this bag again but with darker vinyl. The white is fine because it'll wipe clean. But, I'm thinking bright yellow or blue for summer would be fun. Let me know if you make this bag. Remember, you can alter the sizing to your liking- make it taller, wider, shorter, etc. Sewing is the best, isn't it?
Thanks for sticking around for this tutorial!
Virtual high fives and hugs,
Annette


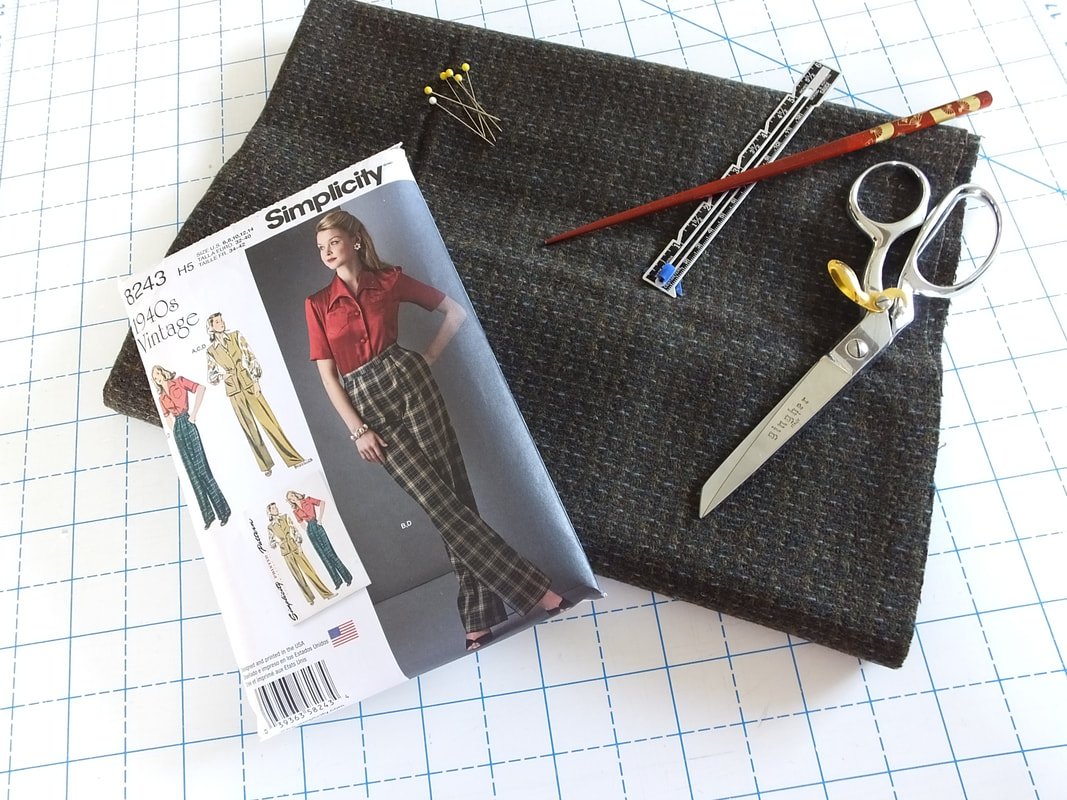
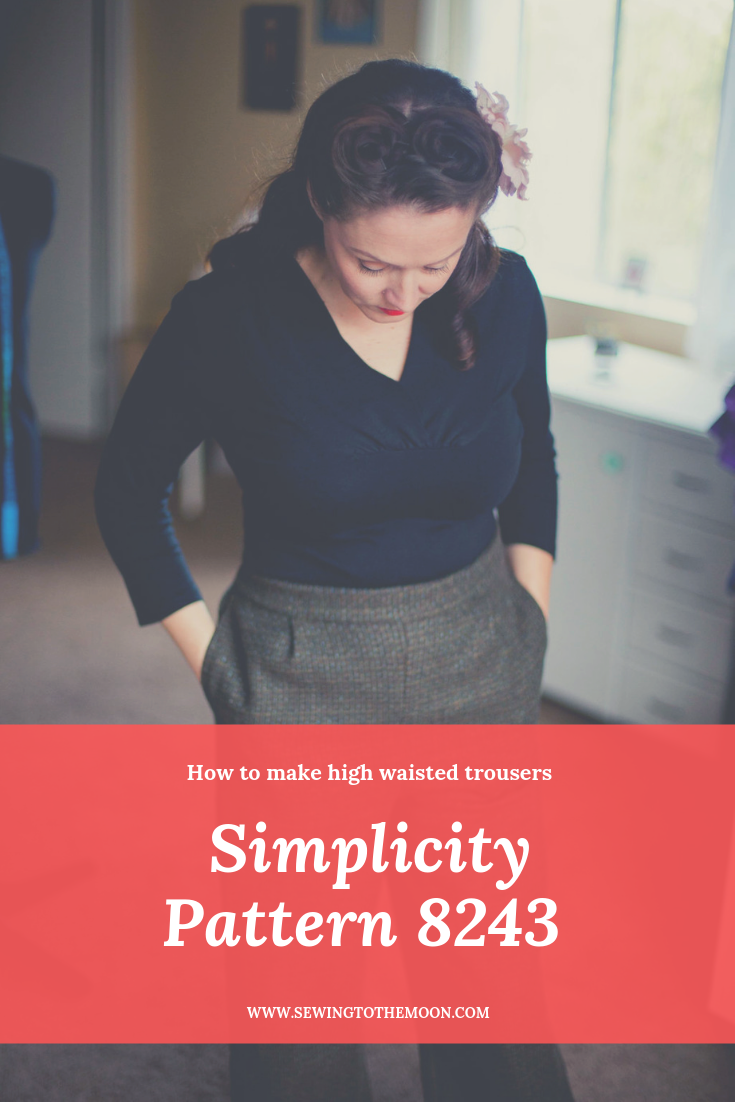
Simplicity 8243 Pants
Easy pants pattern with a 1940s style. Make a pair to fit your body.
Hope the weather is treating you well. In southern California, we've been lucky enough to enjoy warmer days and cooler evenings lately. As I type this, I'm listening to the birds sing and the leaves flutter on my Mulberry tree. The 3 tier pond in my backyard is bubbling away. This is what heaven sounds like to me-peaceful and serene. I live in southern California, but am not in Los Angeles. I'm far from it, actually. We live on a quiet little dirt road. I don't hear cars drive by. No basketballs are bouncing in a nearby driveway. I do however hear the occasional dirt bike ride up and down the hills.
I love where I live. I'm feeling extra thankful today for the beautiful things and landscape that surround me. I am also thankful you’re here and reading this.
Without further ado, grab a cup of coffee or tea, and let me walk you through Simplicity's pants pattern 8243 a.k.a. my favorite pair of pants.

photo by Erica Lancaster
This pattern was easy to cut. Easy to sew. I had zero fit issues as well. How often does that happen, you ask? Um... never! But, a tiny disclaimer, I don’t have hips or a booty. So, pants are easy to sew, for me. Tops are a whole other story though.
I bought the pattern on sale a few years ago, and it's been in my stash along with this fabulous tweed fabric. I made this pair of pants at the end of winter but, was able to squeeze a few wears out of them before summer hit. I live in the high desert, and our weather can be finicky.
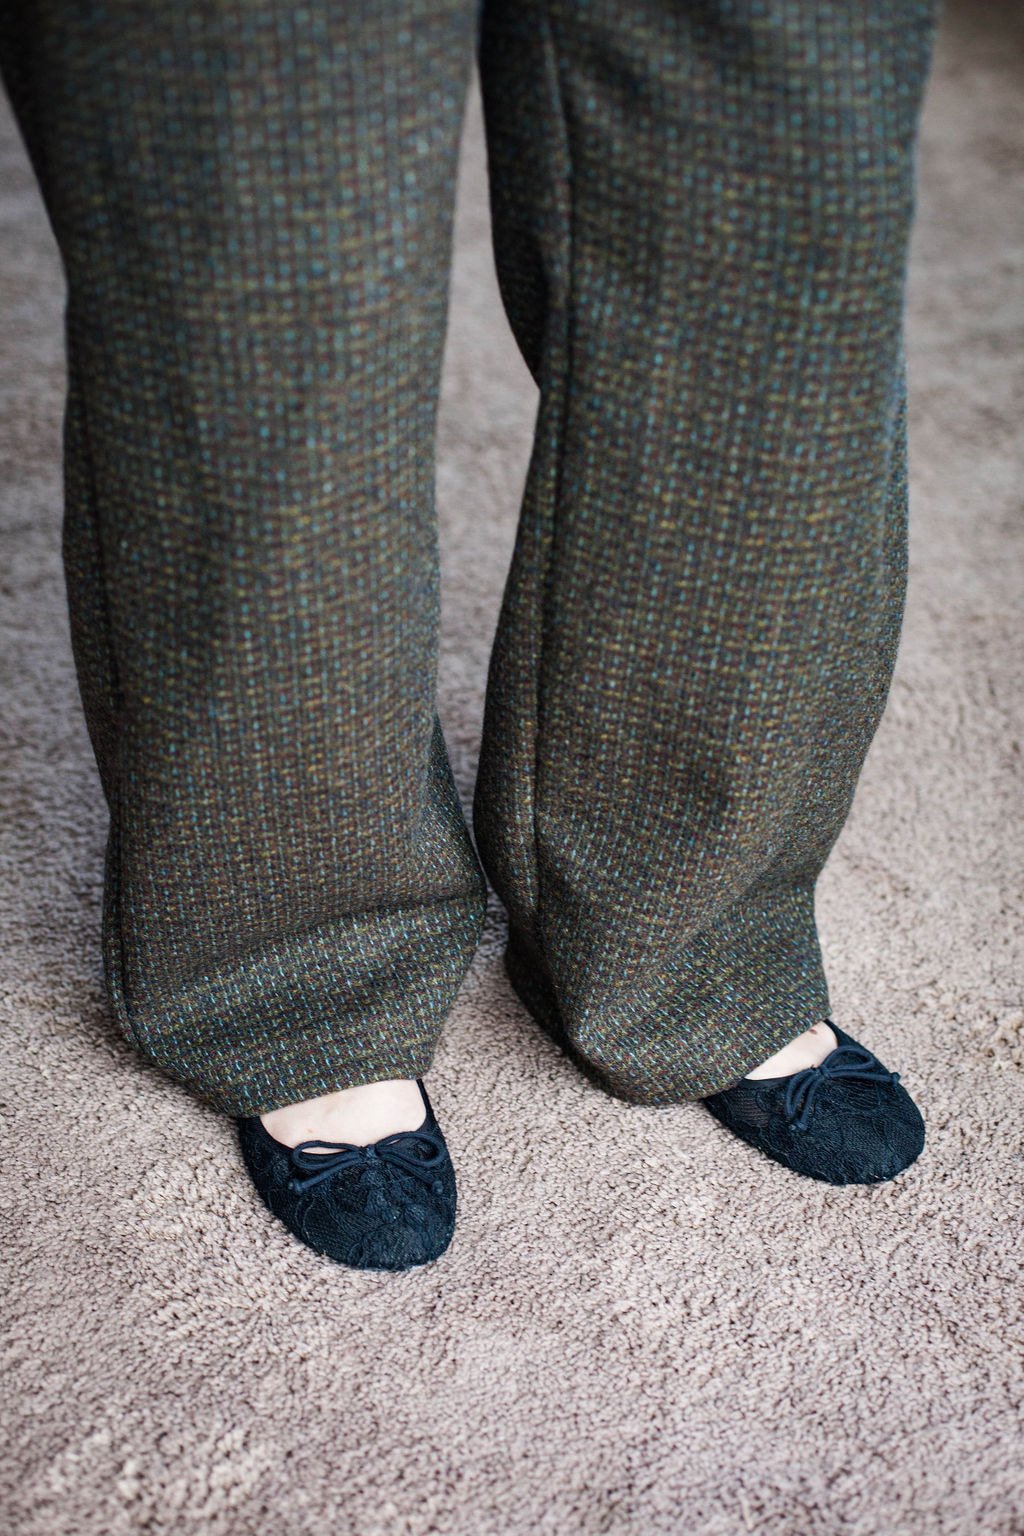
These pants are wide-legged and high-waisted. They are perfect for any 1940's fashion-loving gal. The pattern Simplicity 8243 has a shirt pattern I have not tried yet.
I did not prewash the fabric first because tweed is made with wool fibers. I planned on dry-cleaning these after a few wears. One thing I did not think about before I made them was the fact that they are made with tweed which can be itchy. The fibers don't bother me at all, luckily. Although next time I sew with tweed, I'll make a lining. Eeep!!
This post isn't a step-by-step tutorial, but more of a simple guideline. I didn't take photos every step of the way, but hopefully, there are enough photos to inspire you to make a pair.
Gather your sewing tools and let's get started.
Cut out the pattern pieces according to your measurements. For pants, I always stick with the waist measurement. I don't have hips, so that's not an issue.
I stabilize anything that will need interfacing at this point as well.
Sew the darts on both front and back pieces.
Sew your stay stitching along the top.
Now, apply your invisible zipper. This always feels wonky to me. I use my chalk pen to mark the zipper tape. When I sew the other side, I match my markings and I get a seamless invisible zip every. Single. Time. #sewinghack

Invisible zipper set up

Mark your zipper tape with chalk

Pins will be your best friend with all zippers. I pull mine out at the last minute. It also helps to line the zipper up with the edge of the fabric.

Your invisible zipper shouldn't show at all. If it does show, take a sip of tea, eat a cookie, rip it out, and try it again. Pay no attention to my stay stitching that is uneven. LOL

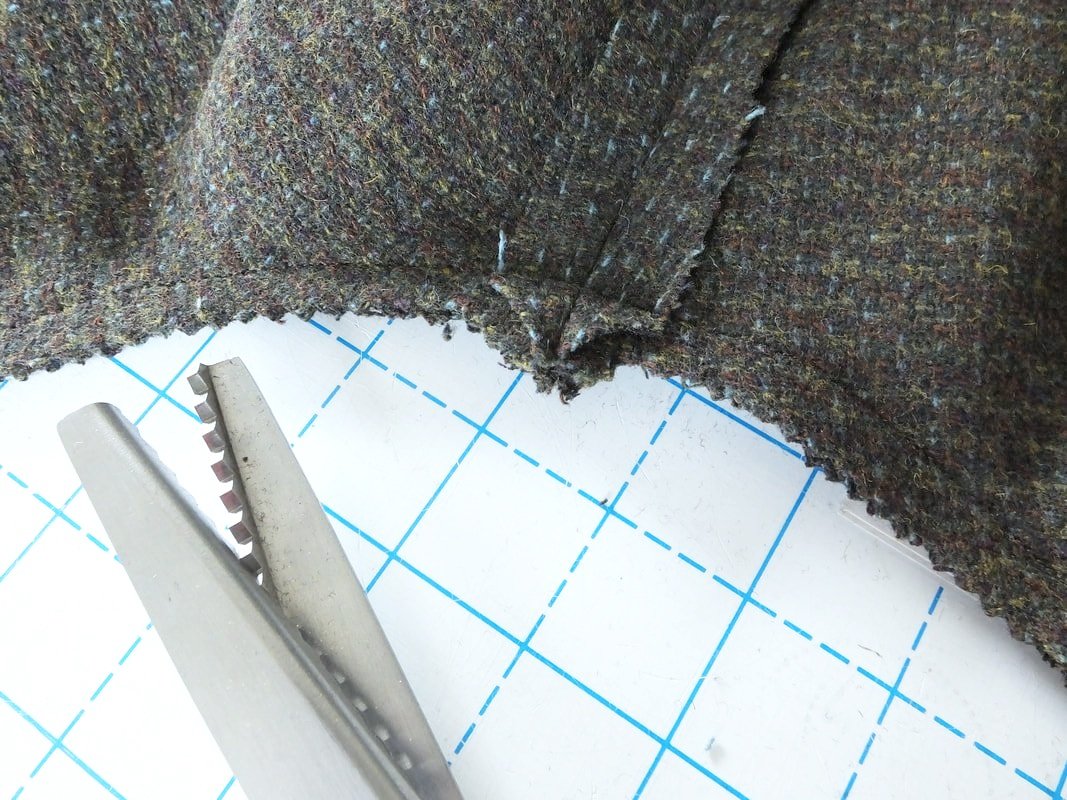
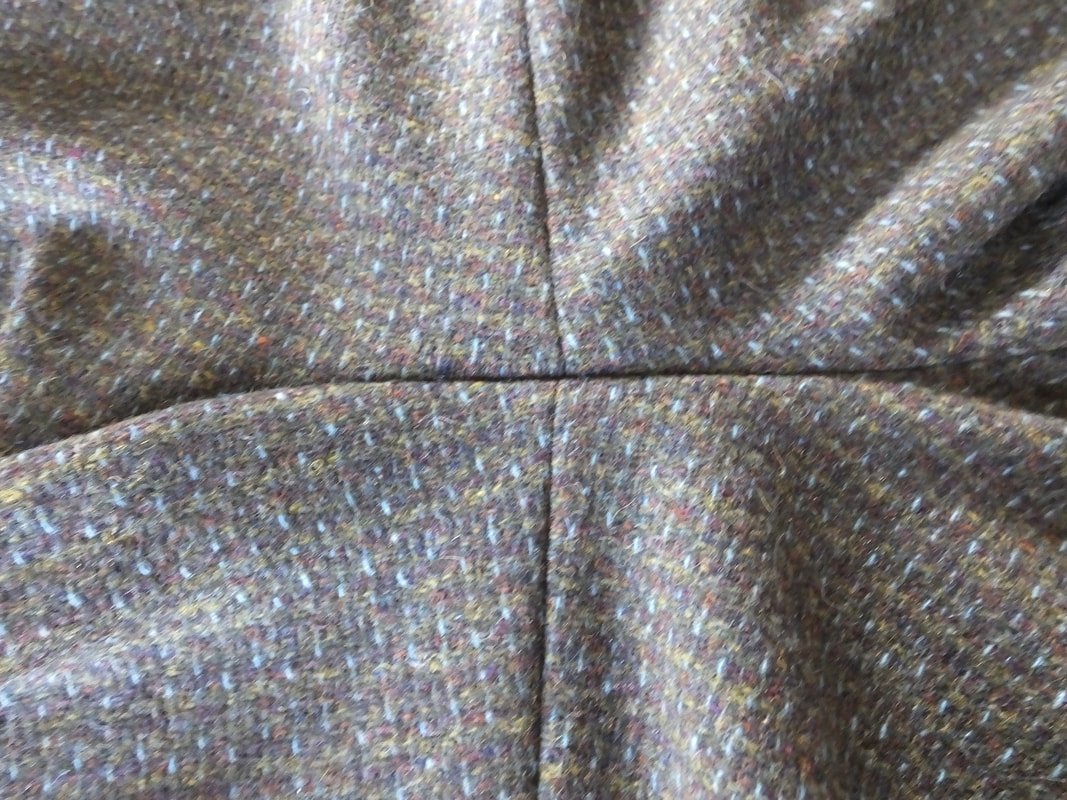
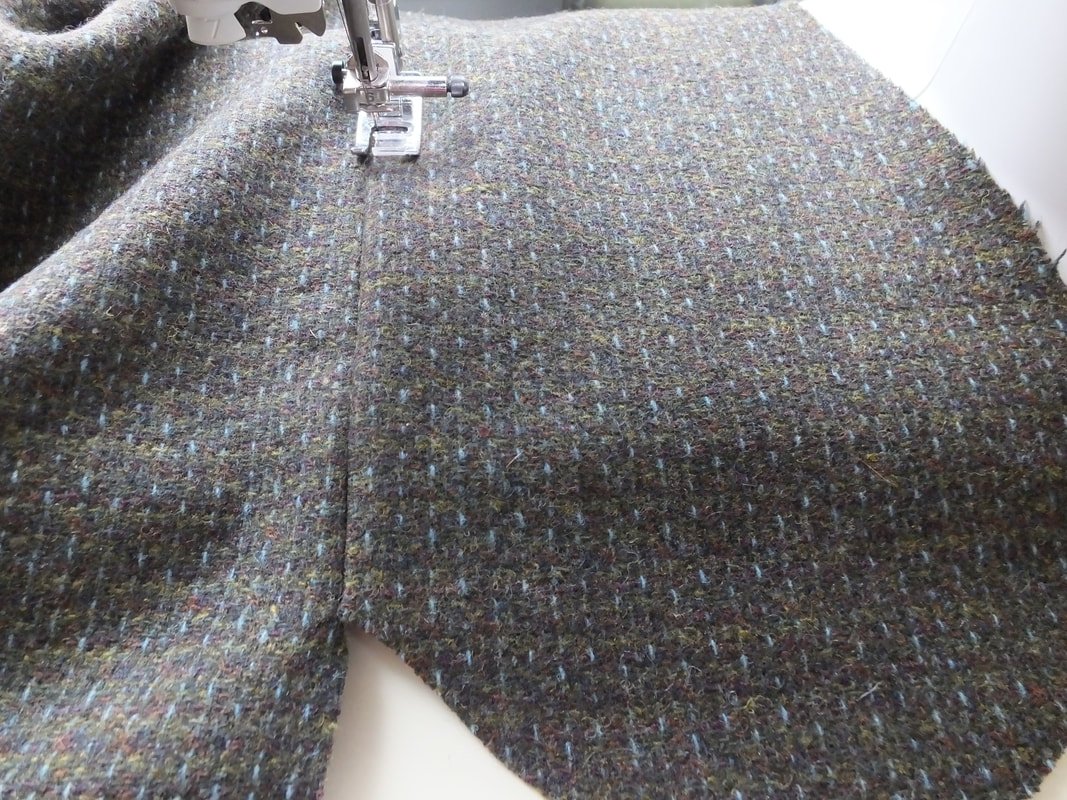
Once your zipper is in, it's time to sew up the crotch seam. You're going to sew the inseam area first. Again, pins are your friend here.

After you sew up the front and back inseam, trim your seam allowances. I used pinky shears for this pair. They have a nostalgic feel, so I didn't serge them. I also trimmed the crotch seam to create less bulk.

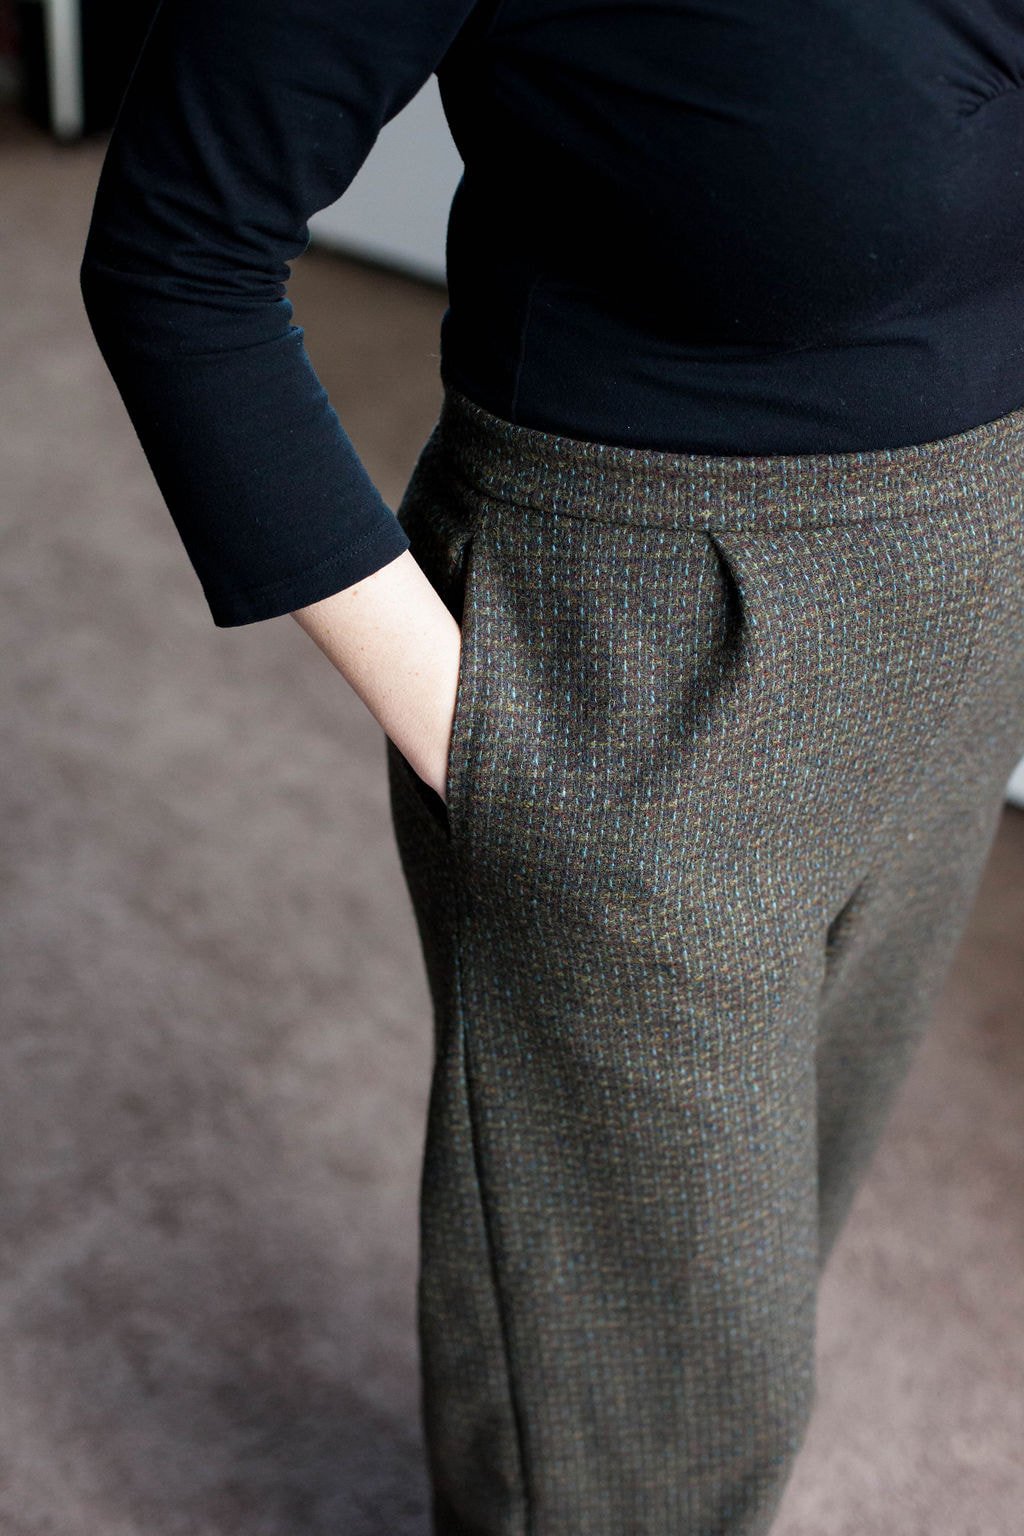
The pattern has you sew the outer seams and pockets in one swoop. I started following the instructions but then went rogue. I like to clip the inside corner of my pockets to allow them to move freely inside the pant leg.
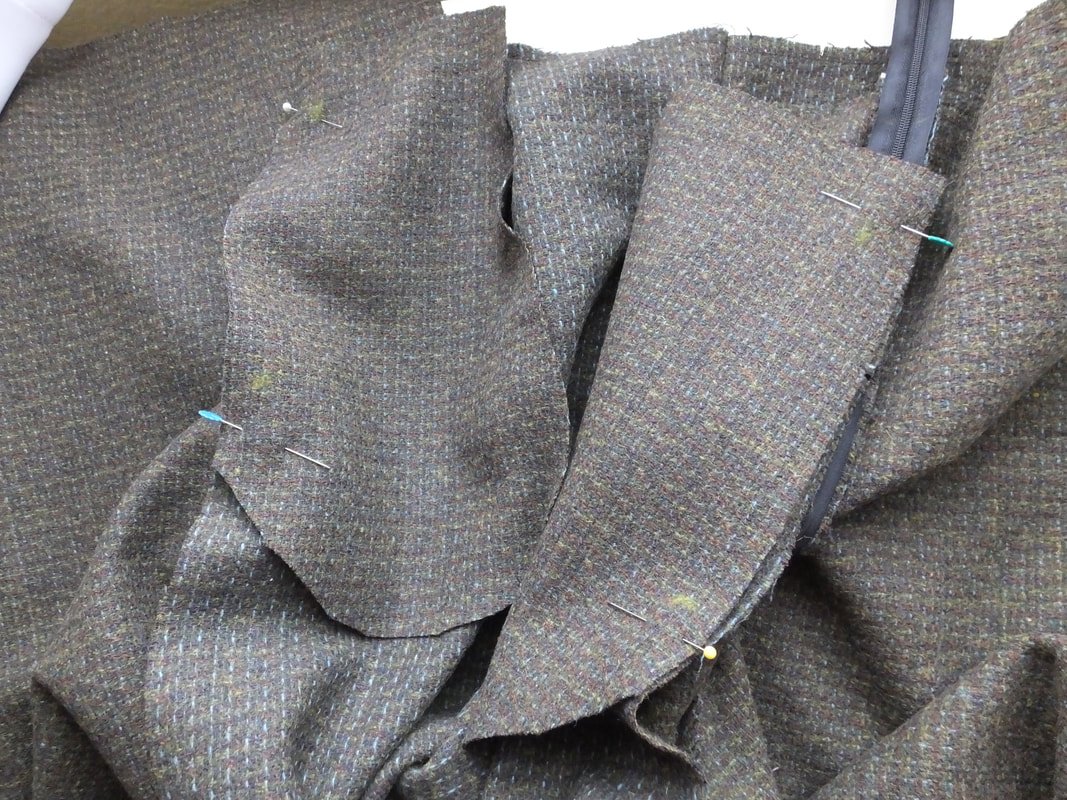
Time for pockets. Follow the pattern instructions, or, if you have your own way of doing pockets, choose that route. I did my own method. The instructions were a bit confusing for me.
After the side seams are sewn up, it's time for the waistband. We're almost done! Woohoo!!
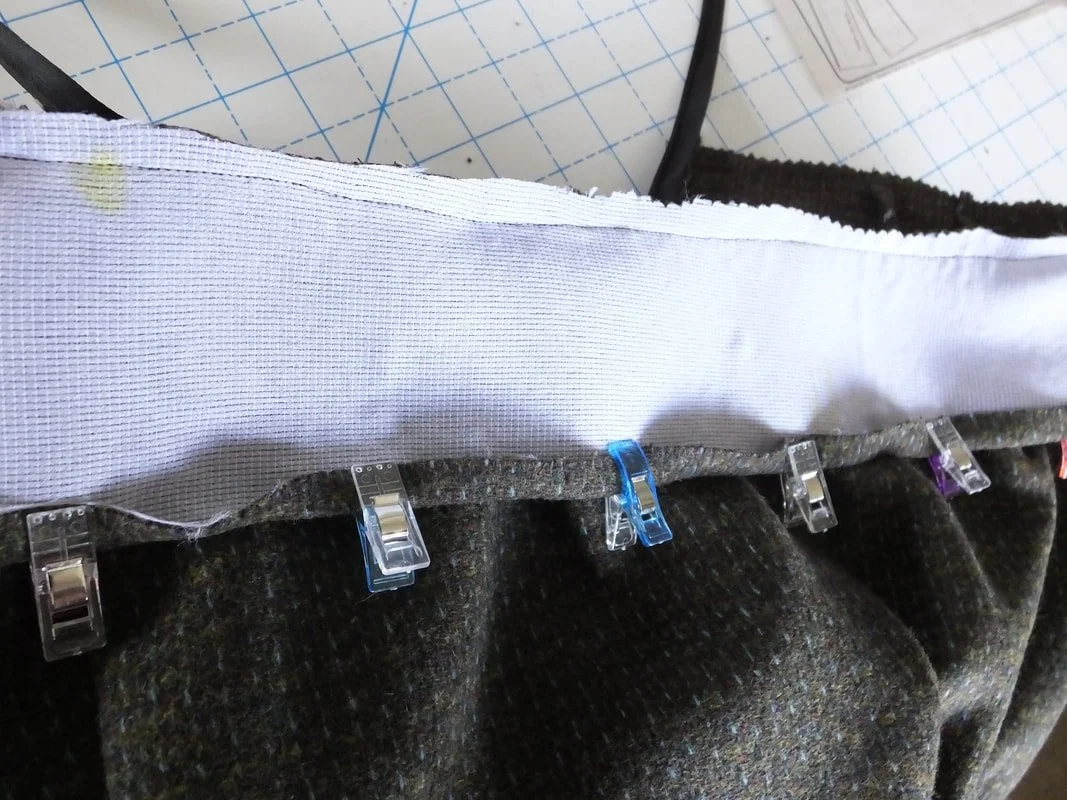
Attach your waistband and then fold the seam allowance under. I used clips because tweed doesn't really hold a crisp edge.
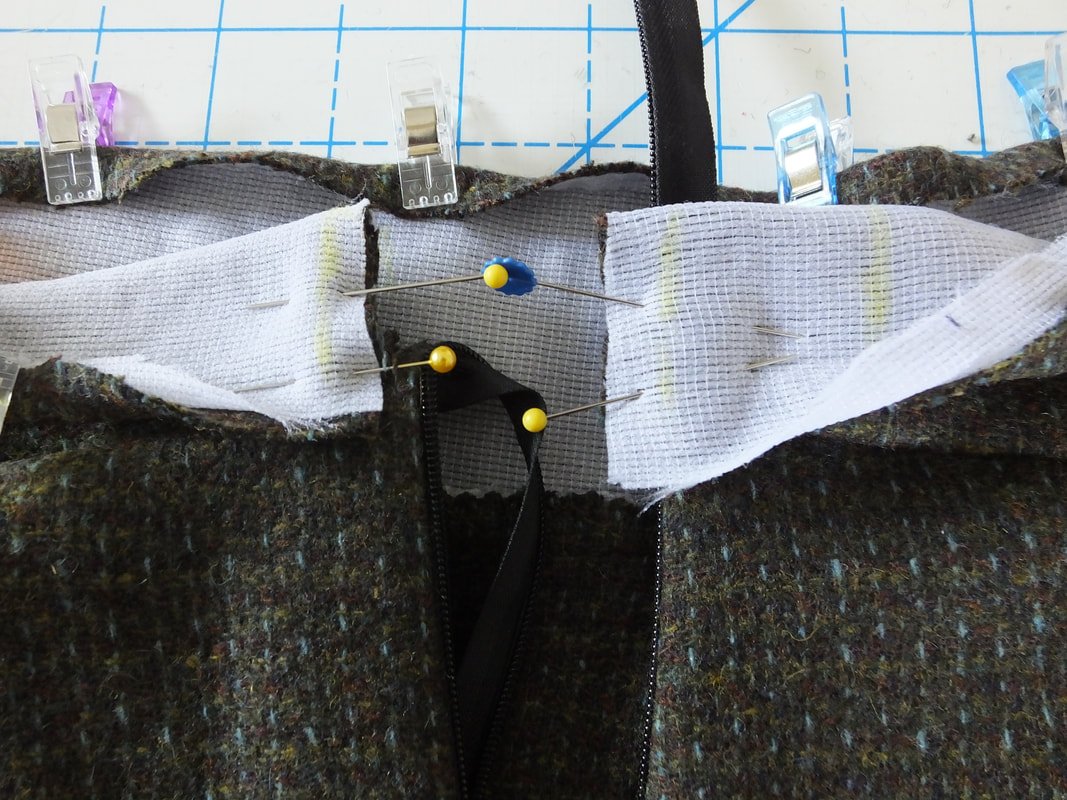
I marked with chalk where I needed to fold over the waistband seam. Attach the waistband to enclose the raw edge.
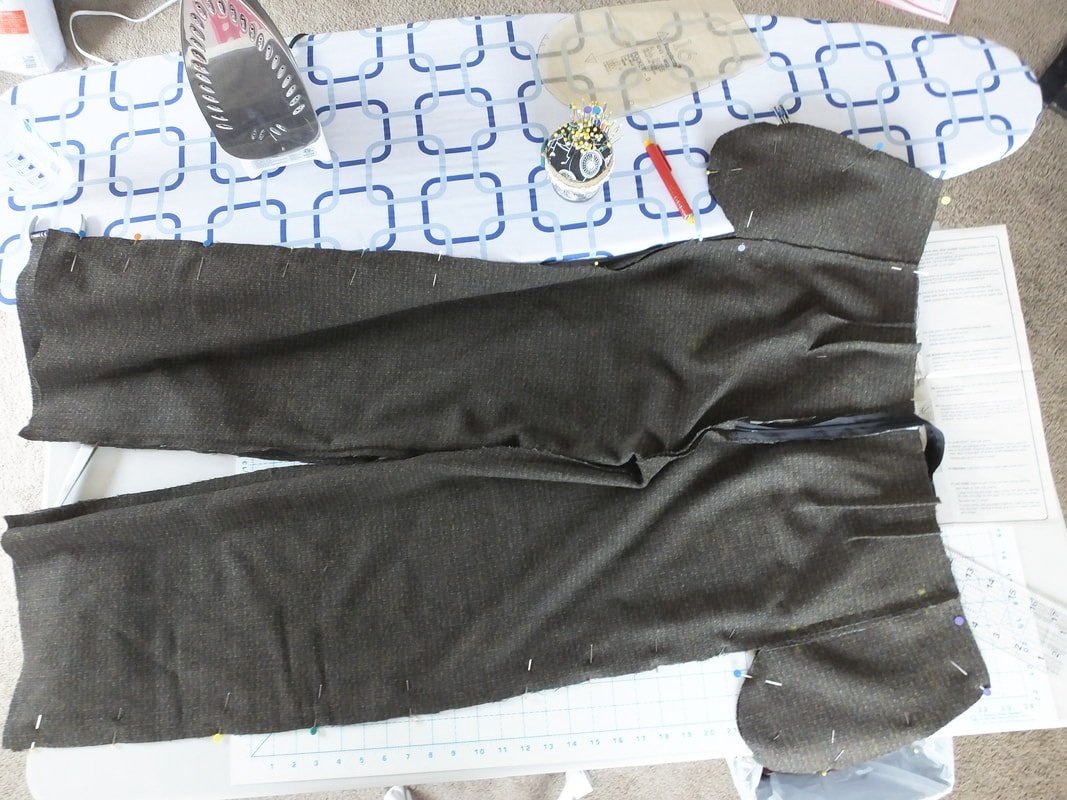
Try the pants on and mark where you want your hem to be. I had my husband help with this part. My worst fear is having uneven hemmed pant legs. Ahhh, the horror!!
Give it a once-over press, and then apply the hook and eye. I cut the waistband a tad short but was still able to finagle it. The hook and eye worked beautifully. I hand-sewed that portion while I sat in the car waiting for after-school pickup.
I wanted to wear these pants to a birthday party that same night. It was a cold night and the wool tweed kept my legs warm.
Oh, the sewing life. Am I right?
Overall, the pattern was easy to make. The tweed I chose has multicolored fibers. They are brown or green depending on the light. So, I did find it difficult to find a matching top. I love the fit and love how easy they were to make. I can’t wait to make a few more pairs.
Have you made these pants? Is the pattern in your stash or on your list to purchase? I definitely recommend sewing these for a quick project. I see more pairs of these in my future.

Photos of me are by Erica Lancaster
Thanks for hanging out and following along. Leave a comment below if you love these. Sign up for my newsletter to stay updated on my posts as well.
Hugs,
Annette

Easy Tips for Storing Fabric
Store your fabric neatly and discreetly. Organize it by type, color, or project.

Fabric, glorious fabric. We stash yards and pieces here, there, and everywhere.
Are your closets bursting with bags or stacks of fabric? Maybe they are still in the shopping bags from the store. Or, you have everything nicely folded and organized in plastic bins.
Take a second and think about your fabric. Is it hidden and out of site? Is it rolled up in the linen closet, boxed in the garage, or maybe you have all your ducks in a row and it looks as pretty as a peach?
Heck, maybe you're not a fabric hoarder and none of this pertains to you.
Welp! I'm a fabric lover. I love feeling it, buying it, and then trying to decide what to make with it. Hi, my name's Annette and I'm a fabric addict/ hoarder/ stasher.
Cue the audience: "Hi, Annette."

Photo by Erica Lancaster
Stash-busting projects are always my go-to for gift-giving. Use what you already have on hand. All that fabric took precious time to shop for. Use it, if you can. If you can't use 40 yards of fabric on one gift, then make sure it is accessible to you and stored properly.
Do you prewash your fabric? I'm guilty of not doing this. I'm ashamed to admit it too. There's nothing worse than diving into a sewing project and spending time and energy making something, only to find that it doesn't fit after it got washed.
So, I have started washing my garment fabrics right when I buy them. As soon as I get the fabric home, I launder it. That way, everything gets preshrunk, clean, and ready to be transformed! I do not prewash cotton fabric if I'm making non-garment items, I prefer the stiffness of the fabric while sewing. I should probably wash everything, but.... hey, I'm not perfect.

photo by Erica Lancaster
“I collect vintage machines that I find beauty in. I’m a hoarder of all things sewing. ”

photo by Erica Lancaster
I'll save my collection of vintage sewing machines for another post though.
I am lucky enough to have a whole sewing space. It's not a room, just space. I share my sewing life with workout machines, game consoles, and the computer. The computer is okay to stay though, I use it daily. Some day I'll have a huge She-shed (or bedroom) and it will be decked out in all things sewing. One can dream, right?
Let's get back on topic.
After my fabric is washed and dried, I'll hit it with the iron. No, not literally. Get rid of those pesky wrinkles and you'll have an easier time folding.
I buy 2 yards or more when shopping for garment fabric. 2 yards is a good amount to make a skirt or most tops like my Rita Blouse. The fabric is usually 60" wide as well. Fold it together lengthwise (hot dog), then again so you have a really long and narrow piece. Now, this depends on where you'll be storing your fabric so my particular method, might not work for you.


Take a wide quilting ruler that is 5" wide and use as a template. I've seen some people use comic book dividers, narrower rulers, etc. Use what you have on hand or make your own object out of cardboard. I then "roll" my fabric over the ruler and get the size I want. I store my fabric on IKEA shelves in 2 stacks. I can see everything I have.

I often find random fabric from the remnant section at my craft store. Friends and family who know I sew, give me bags of fabric and notions as well. I wash those pieces and fold what I want, donate what I don't want.
I'm constantly going through my fabric stash to donate as well. Things go out of style. You might be over that fairy cotton print you planned on making something for little Suzie with- who is now 30. Life is a cycle and change is good. Donate what you don't want. It'll make room for new pretties.
I keep my smaller pieces in baskets. I also keep pieces that are leftover from previous sewing projects. This helps remind me:
A. I've already sewn with this fabric, so I must like that particular fabric.
B. This is an odd piece, so don't try and make a shirt with it. Use only for small projects.

Fabric scraps go in my big glass jar. These are where the tiny pieces the size of my hand go to die. Anything smaller, I toss in a bag to donate.
Leave a comment down below if you know of places that take scraps of fabric. H&M does, but that's the only place I'm aware of.

I organize other fabrics that I don't reach for on the daily, in a more discreet way. I do have an Etsy shop and sell handmade items as well. I used to make custom baby items, so I have minky, fleece, and flannel for that. I keep those fabrics folded nicely, but hidden. They take up a few drawers that I can pull out and find what I need quickly.
I also keep felt pieces in a drawer, less organized but it works.

If you don't have a designated sewing space, and you use a temporary space to sew in. Store your fabric in clear bins and stack it in a nearby closet. You will see everything you have and it will be convenient to grab. Make sure they are folded neatly so you can tell what everything is.
I store all my items that are ready to sell in clear bins for my shop. It keeps smells out of the fabric and I can see my inventory.
If you'd like, take it one step further and organize fabric by type. Store knits together, quilting cotton, etc. Or store by color. Whatever makes it easier for you and gets you sewing will take loads of stress off your shoulders. Sewing is supposed to be fun! And fabric storage should be too. ;)
Leave a comment on how you plan on storing your fabric. And, where you donate scrap fabric. We all have fabric we could donate.
XO,
Annette

The popover Dress
The Popover dress by Gertie is the easiest dress to sew. It is a fabric hog but is comfortable and flatters the figure. The pattern is from her book, Gertie Sews Jiffy Dresses.

Yay!! I finally made Gretchen Hirsch's Popover dress from her book, Gertie Sews Jiffy Dresses.
Let me first start by telling you NOT to use a one-directional fabric. Holy moly, I learned that lesson the hard way. The book says you'll need 3 1/3 yards of fabric. I bought 3 1/2 yards to have extra to make a matching hair bow, purse, accent on a bag, etc. As I cut into the fabric I thought, oh shoot, I'm going to need much more! A big face-palm moment there. Ugh!
I ran back to the store and bought another 1 1/2 yards- totaling 5 yards of fabric. OMG!! Thank the fabric gods I had a 50% off coupon to use for both shopping trips. Lesson learned! Next time and there will be a next time, I will buy a multi-directional, busy print fabric. Jebus! (If you get my Simpson's reference, I love you).
Aside from my fabric choice mistake, the dress pattern was crazy easy to transfer. It basically has 1 piece. I always use freezer paper when I trace patterns. It's a good-sized roll and you get a lot of bang for your buck.
The pattern has the main dress, an armhole facing, a shoulder bow, and ginormous pocket pieces to trace. Easy peasy! I opted out of using the pockets and shoulder bows for this particular dress, but I transferred the pattern pieces for future use.
After you wash, dry, and iron your fabric, you'll cut it out. I usually like to trace the pattern while the fabric washes one day and sew it the next day. But, this dress was so simple and quick, that you could trace and sew it in an afternoon. It took me around 2 hours to sew- including making tea and a snack for myself and the kids. #momlife
I didn't let the dress hang for 24 hours before sewing up the hem- I know, I’m ashamed. But, it was going so smoothly that I wanted to just get it done so I could try on the essential tent. And boy, is it a tent. Ha!
I stuck an elastic waist belt on and WOW! Transformation doesn't even describe it. When I put on my crinoline, it was a Wowsa moment! I was a 50's housewife goddess. Exactly what Gertie promised. Yep, I love the dress!!


My only gripe is the facings don't lay flat. It could be that I didn't cut it 100% perfectly or sew it exactly in the fold area. I'll play with that on the next dress.
And also, the front is a tad low. I've seen other bloggers complain about the low neckline as well. Luckily, I preach the motto "If you got it, flaunt it." But, I can imagine the low neckline being bothersome for some.
I didn't make a step-by-step tutorial on this post because Gertie does a fabulous job on her YouTube channel. Go give that a watch if you are a visual person. I went back and referred to it a couple of times.

Serge those raw seams before you stitch everything together.

Use fusible interfacing along the facings to help stabilize them.

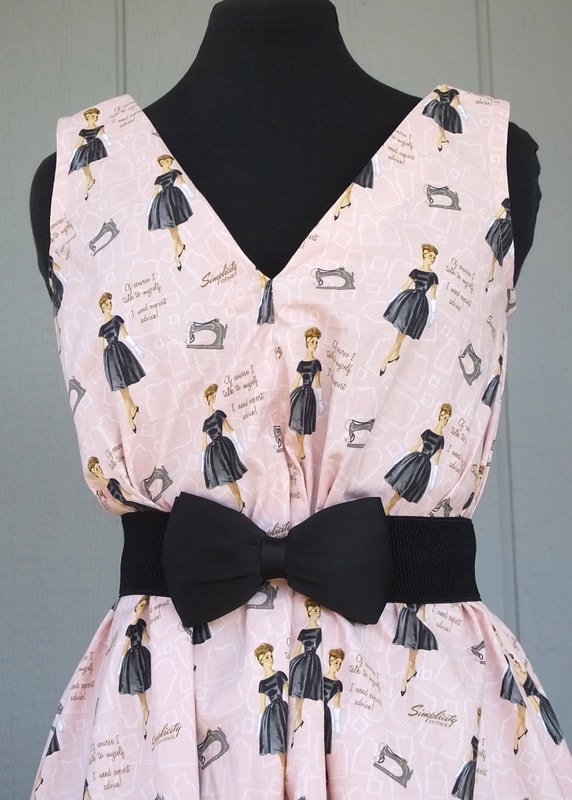
Isn't this fabric cute? It's from Joann. I love their new Simplicity line of quilting cotton and wanted to make a dress with this pink one
I am planning on making a few of these dresses for the summer. Hawaiian print, polka dots, and gingham fabric. Gimme all the carefree, fun, and flowy fabrics. I did buy 2 belts from Amazon- one black and one white. I figured they'd go with most everything because you do need an elastic cinch belt with this dress. She has an option in the book to make a shirred waist and I plan on trying that eventually.
Disclaimer: Many, many years ago I tried shirring a shirt and it was a huge disaster. Hoping to get the courage to try it again with the Popover dress.
I can see myself sewing up a few of these batch-style in a day. So easy, so comfy, and pretty darn cute too! Thanks for another great pattern, Gertie! You are amazing
So, what do you think? Are you game for making the super simple Popover dress? What other dresses do you plan on making in her book? Let me know in the comments below.
Happy Sewing,
Annette