Bra Making Hack
This is an easy and quick bra hack for busty gals. Make a cheap bra fit you in a pinch. An inexpensive bra can be hacked to fit you. Stop spending hundreds of dollars on bras with this hack.
This post isn't about sewing bras or bras that I've made. Surprise! It's about Upcycling! Yep, you read that correctly. I'm going to show you some quick, easy alterations you can make to a brand-new store- bought bra, to fit you! Sounds scary? Don't fret! Grab your seam ripper and scissors. It'll be fun, I promise.
First, I'll share some backstory about my own bra journey. I wear a weird size. I can't walk into Target, Wal-Mart, or Macy's and just buy a bra. I have a small ribcage and large... um... blessings. So, I order bras online and pay a ridiculous amount for them. They aren't made any better than what you can find at Victoria’s Secret, etc. But, the internet carries more unique sizes, so I go with that route. I made my first bra a few years ago and it was mind-blowing! It was also extremely easy, cost-efficient, and even fun (once I got the fit, down).
Up-cycle Your Brand New Brassiere
A few weeks ago, I was walking through Dollar General and grabbed a large bra. I said to myself, “I bet I could alter this band size to make it smaller”. I held the foam cup up to me and it seemed to be the right cup size. I gave the cashier my $7.00 and drove home. When I got home, I tried it on and had my husband mark where I would cut the band. Eureka! This is the coolest bra hack ever and I needed to share it!!
Side note: I don't think this will work as easily if you need to increase the bra size. This is more of a cut-and-slash downsizing bra project. I wear a small band, large cup bra. If you have a small cup, it may be more difficult to do this bra hack.
Here's What You'll Need:
Clearance or cheap Bra that has a larger size band than you normally wear
Scissors
4" long piece of ribbon, twill tape, or similar material that is 1/2" wide
Sewing machine with ZigZag stitch
Stretch or ballpoint needle and matching thread
Chalk marker
Zipper foot, if needed
Plan of Attack
Try the bra on. It should be too big in the band, but fit in the cup area. If this is not the case, you'll need a larger band size.
You'll want a friend to help you with the next part.
When you're back at home, put the bra on. Click the hook and eyes to the middle row. Have your friend pinch the band and mark with chalk where it should fit you. It should feel snug, but not uncomfortable. Take it off and get dressed. It's GO time!
Cut off the extra fabric you don't need.
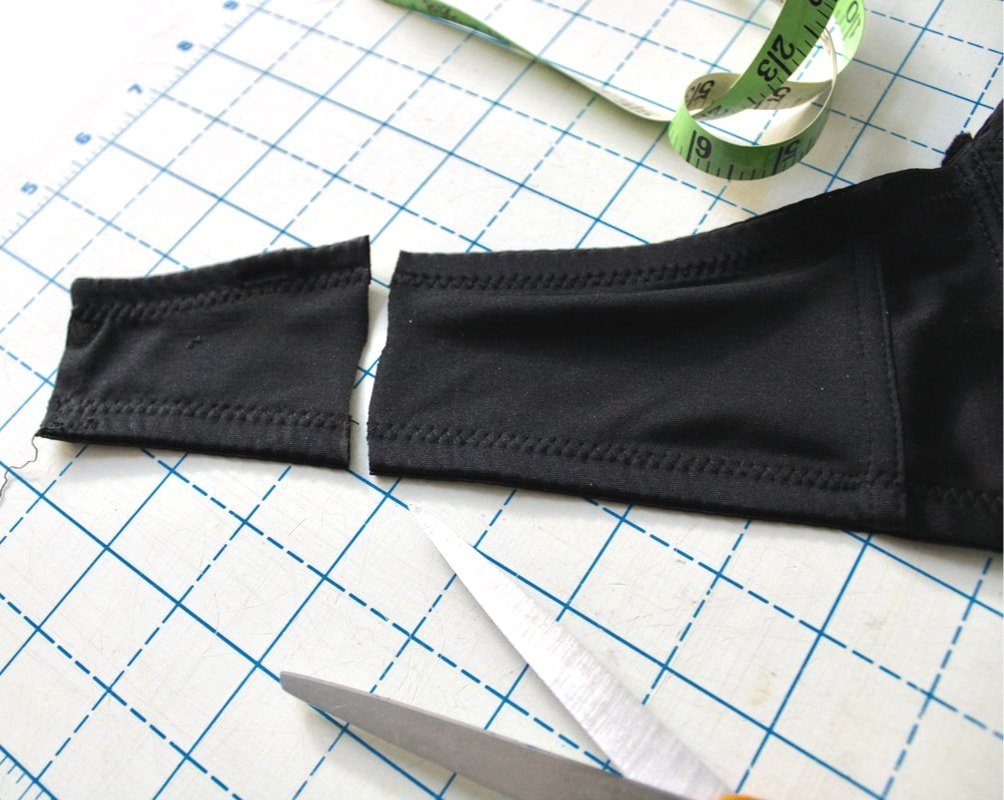
Open the bra up and lay it on the table. Measure from the side seams to make sure the chalk marks (made by your friend) on both sides are even. You don't want to cut 2" off one side and 3" off the other side. Unless you're going for the lopsided look. ;) After you measure and they are even, cut the ends off. It's that easy! Set the excess bra band pieces you cut off, aside.
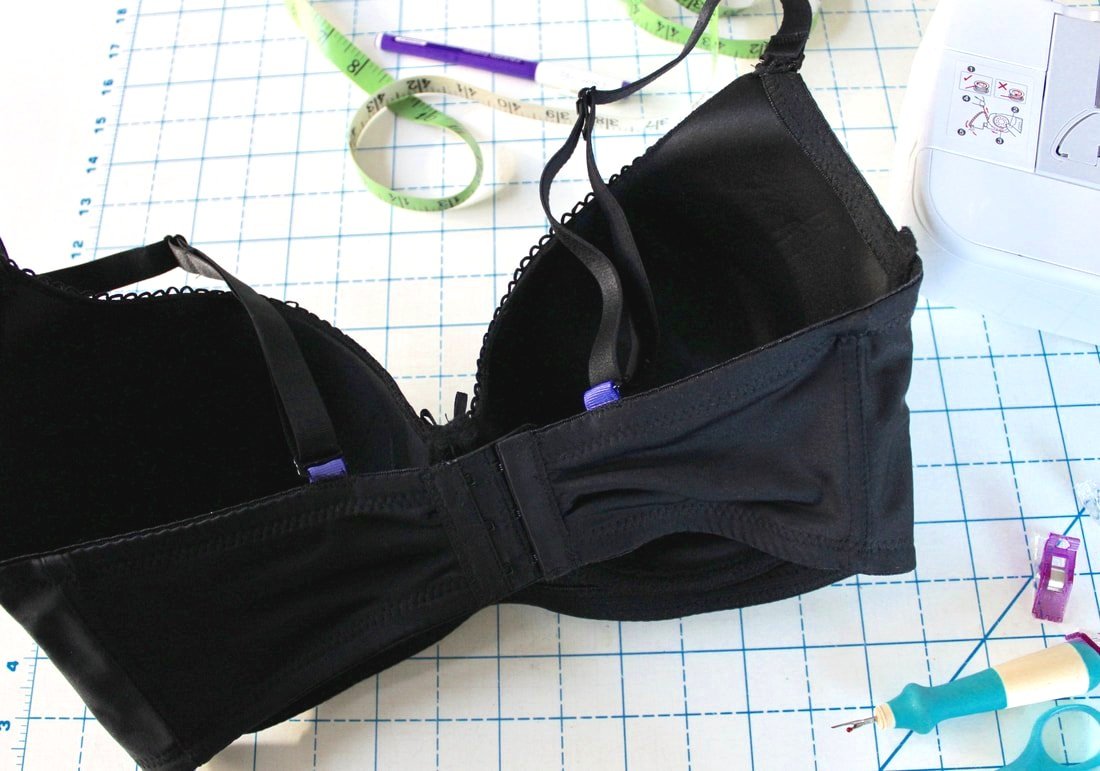
Now, get that handy dandy seam ripper and go to town. You'll rip the stitching out from the hook and eye pieces, and set them aside, you're going to reuse these. It's all zigzag stitching, so it's easy to rip out. The hook and eye have an opening at one end, that's where you'll stick the band inside to re-attach.
Now it's Sew time. Install your stretch or ballpoint needle into your sewing machine. Thread your machine with matching thread and set it to a ZigZag stitch. I set mine at 2.5 widths and 2.0 stitch length. Practice on the band piece you cut off, to get the stitch the length and width you want.
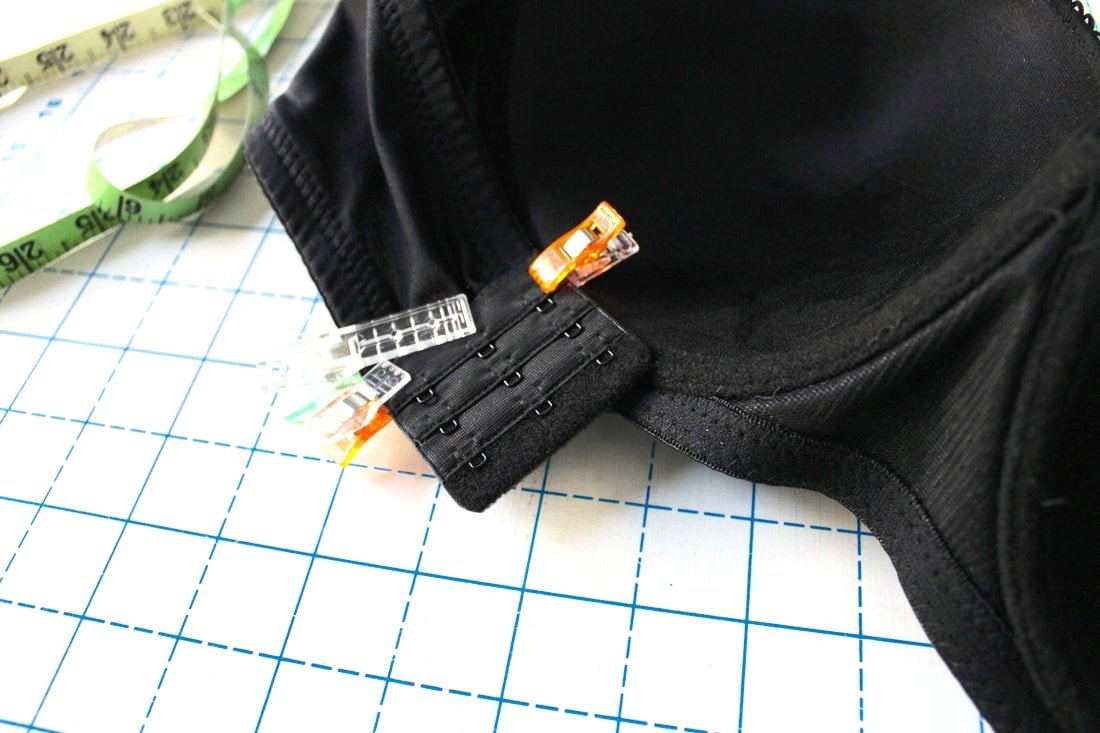
Align your hook and eyepieces to the band. My band was a tad larger than the fasteners, but I made it work. Align the top band to the top of the hook piece, then line up the bottoms. I ended up with a small gather in the band, but it was fine. Hey, it's a $7 bra! I usually pay $100 each for my bras. Ugh! Clip the fasteners to the band to keep them in place. I used 3 to hold the gathered band inside the hook pieces.
ZigZag over the open area where the pieces overlap. I went back and forth twice, just to be safe. Do this on both pieces. It helps to use a zipper foot for the hook portion, my regular foot is a tad wide and had a hard time getting in there. Your machine may or may not have an issue with this. The loop side was easy. Don't forget to backstitch.
Zigzag sew your fasteners to the band.
Re-attach The Straps
I used purple grosgrain ribbon for my strap loop. Use a piece of ribbon or fabric. You want to make sure to use something that won’t unravel.
Now that the band is done, we need to sew the straps back on.
If you're lucky enough that the bra straps didn't get cut off, Yay! You're done. You just made a bra that fits! Try it on and sing praise for making a great-fitting bra for cheap! Super easy!!
However, if you need to attach the straps, keep following along.
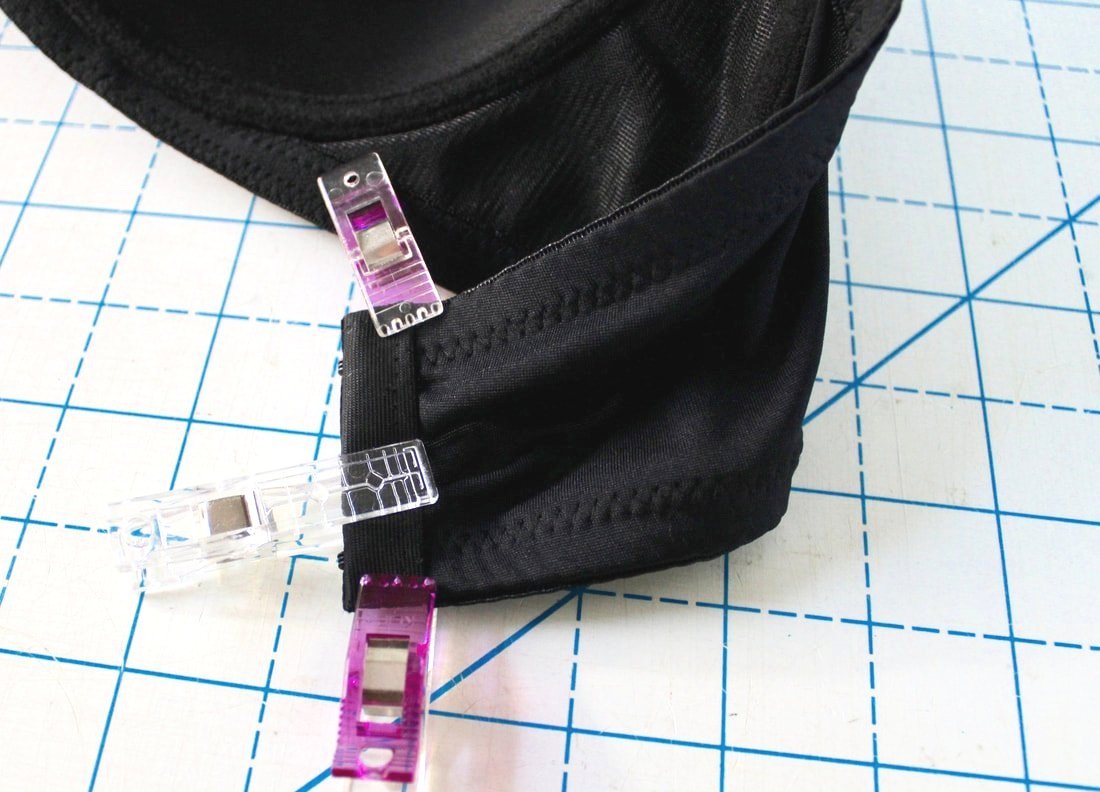
Grab your ribbon piece and cut it in half. You should have 2- 2-inch pieces now. These are going to be your new strap fasteners. You won't need the full length, but it helps to have more wiggle room. Fold one piece in half and pin or clip it to the band spot you'd like the strap to be at. Try it on to decide where you want your strap to end up.
Maybe you have a special dress or top and you don't want your straps to show, this is a perfect opportunity to make a custom bra for that garment.
You can make the loop as big or small as you want. I made my loop 1/4", I wanted it the same size as the previous loop. Thread the ribbon through your bra strap loop and pin it to the bra band. Sew over the folded loop with a zigzag stitch. I went over mine twice. Repeat with the other side. Don't forget to backstitch.
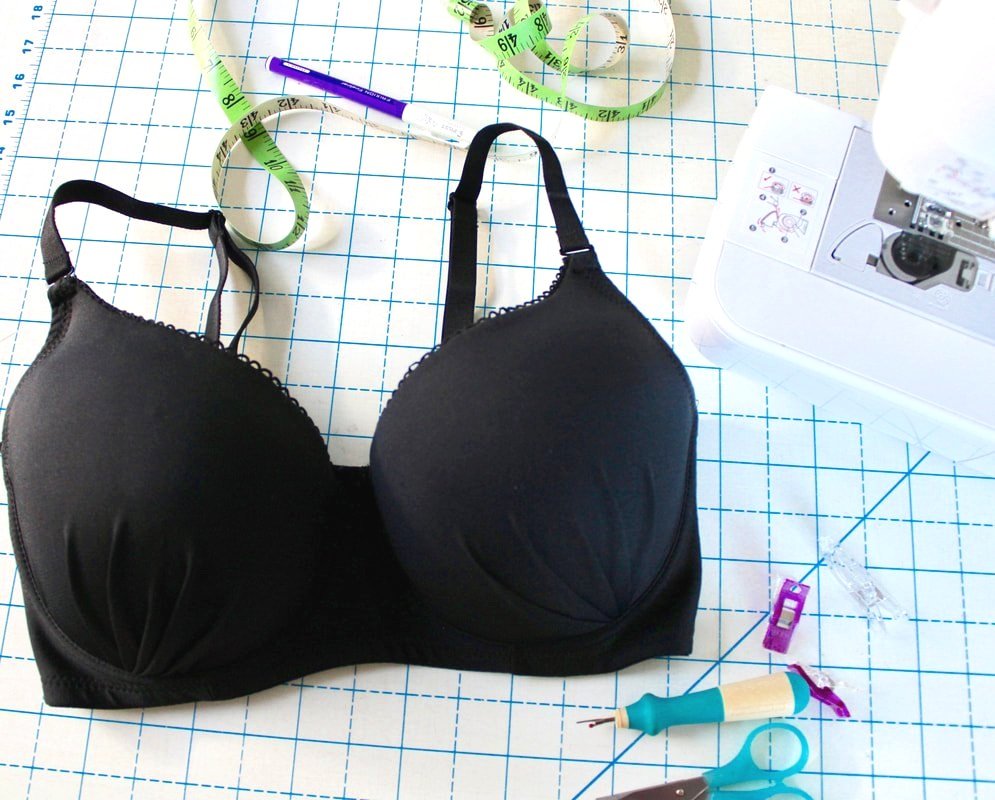
And.... you're done!! You made a bra! Bra-making is really easy and fun. I know this was more of a bra hack, but it's a great starting point to dive into bra making.
Bra making is all about the fit- as all garment sewing is. Once you get your fit down, you can make tons of bras. As long as you have a machine with a zigzag stitch, you can make a bra. I hope this sparked some interest in you for bra making. If you're curious to learn more, I'll walk you through my first bra making adventure in the next post. Stay tuned!
So, what do you think? Are you going to try this bra-sewing hack? Maybe your mother-in-law or sister has a unique bra size. You could try this out with them. Let me know in the comments below if this is something you're willing to try, or not.
Happy bra hacking,
Annette
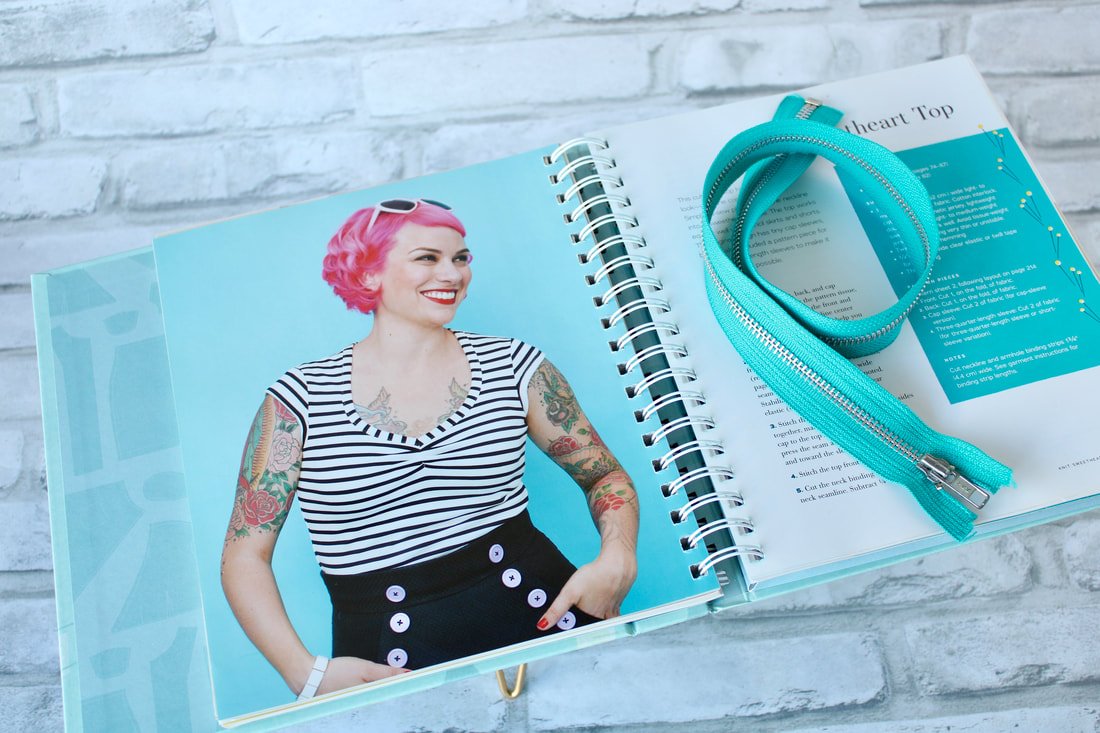
Gertie Sews Vintage Casual (patterns from her book)
Gertie sews vintage casual book sewing patterns, tutorials, and reviews. Let’s make some vintage casual outfits. This is her best book if you’re into tops and bottoms more than over-the-top fancy dresses.
Do you have a fabric designer or pattern maker you simply adore? Maybe you have a few.
Gretchen Hirsch aka Gertie is one of my favorites.
There are quite a few fabric designers I'm obsessed with! Almost stalker-status. ;) I love almost every piece they design. And I must own it all. Insert evil laugh! Haha
As you might know, my favorite pattern designer is Gertie. She is a one-woman show and encouraged me (through her blog, TV, and books) to start sewing things for myself. GASP! Moms can sew for themselves? Yes, yes we can.
I was watching a PBS sewing show and she popped up. I can't remember what she shared on the show. But, I couldn't get past the fact that she didn't look like a typical sewing lady. She was young and had a fun style. I was instantly hooked! I found her blog, bought her books, and started a new sewing journey for myself. I still sew for my kids and shop, but I LOVE making things for myself more.
Gertie has her own pattern company, along with fabrics designed by her. She also has patterns with Butterick and Simplicity. Charms Patterns, Simplicity, and, Butterick patterns. I love it all!
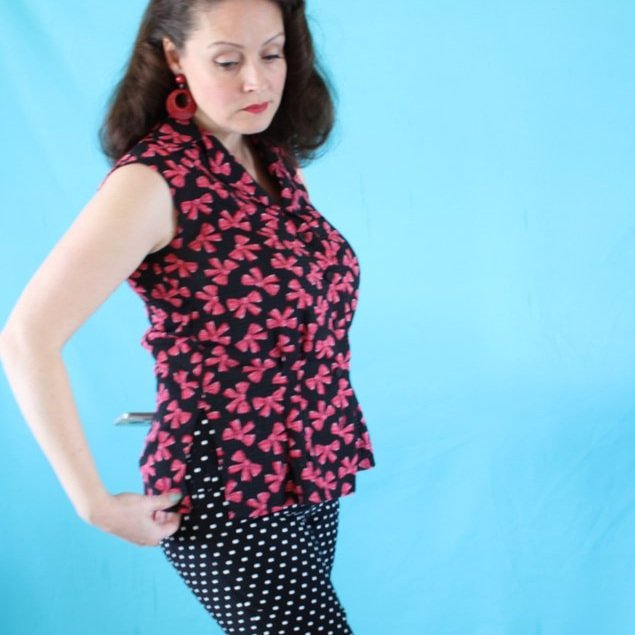
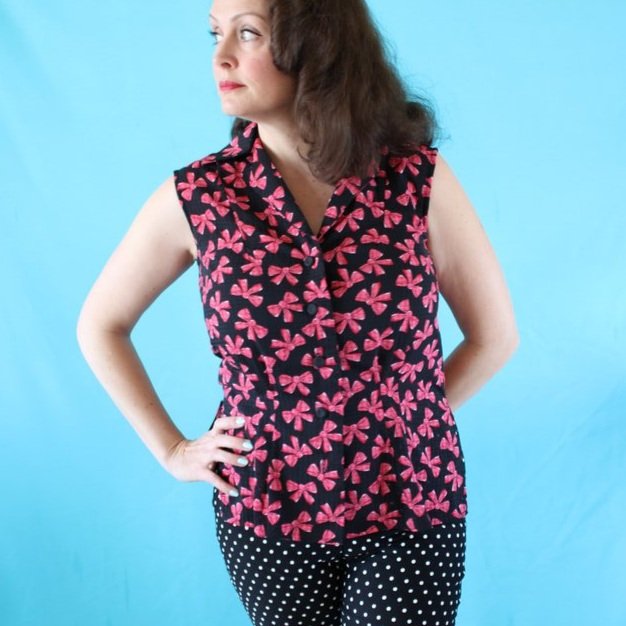
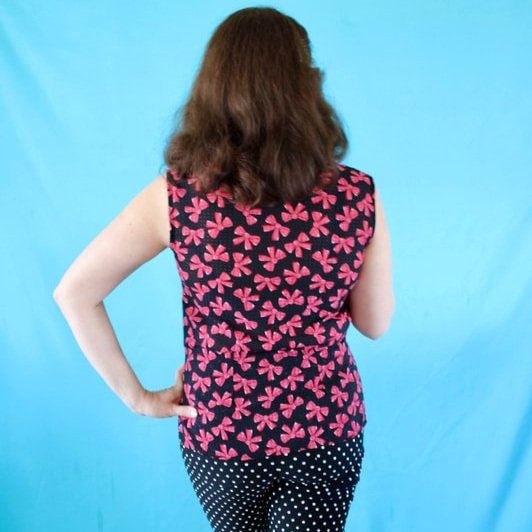
40s style Blouse from Gertie’s Book, Gertie Sews Vintage Casual.
40's Style Blouse
The top I'm wearing above is from the book, Gertie Sews Vintage Casual. It's the 40's-Style Blouse made using the Sleeveless Blouse variation, pg 134.
The fit is great in this top! Why haven't I made more? I don't know but, I need to.
It was an easy afternoon project. I made this top a few years ago. This was my first top with center buttons and a placket. As you can see, they should have been placed 1/2" closer to the edge.
Oh well. I still wear it all the time.
It's an easy style to wear over pants or tucked in. The darts are placed perfectly and make for a very flattering fit.
The fabric is semi-sheer in black with pink bows and was purchased from Joann Fabrics. It is from Gertie's fabric line.
Pattern changes
I increased the armscye area. I don't consider myself to have large arms, but her patterns are usually tight in my armpits, so I size up with sleeveless patterns.
Knit sweetheart top
Next up is the Sweetheart Top, page 151.
I made 3 of these in different variations. I love how easy the pattern was to sew up, plus it's soft and cozy.
I love the sleeveless knit top however, it's tight in the armpits. I could go back and unpick the bias bindings and make the armscye bigger, or just live in pain. I choose pain! I should just make another one because I have more fabric. That sounds waaay easier than unpicking. Amiright?
Scoop neck sweater made with sweater knit fabric.
Another scoop neck, made with sweater knit that does not have a lot of stretch.
I cannot tell you enough how much I love this pattern. It's comfortable and easy to make. I made all 3 in an afternoon.
The Scoop Neck Sweater is a variation, on page 156.
I made the Scoop Neck Sweater in a black sweater knit with fun doo-doo balls all over it. The fabric I chose didn't have as much stretch in it, as it should have, but I made it work. ;) I wear the black sweater top a lot during winter.
The Puff Sleeve Sweater is another variation, on page 158.
I made this version in a tissue-weight leopard sweater knit. I ordered the fabric online and had other plans for it. But, it was too flimsy for what I bought it for, so it got stashed away. The thin knit worked pretty well for this pattern. I would want something with more stability next time, but it works and I wear it often. Win-win.
Cigarette Pants
Onto a pants pattern. These were easy to sew. But, I don't usually have fitting issues with pants. I have a short torso and narrow hips/ booty.
I made the Pedal Pusher variation, on page 166.
I made a muslin first, just to be safe. They are form-fitting and very flattering. They give me curves. Yay! The instructions were a little confusing when it came to the pockets, but I figured them out and forged onward.
I did end up splitting the crotch seam at one point while wearing them, AHHH!! Came home and stitched over that seam multiple times. Yikes! Nobody wants a popped seam, especially there!
Black and white polka dot pedal pushers, yes please!
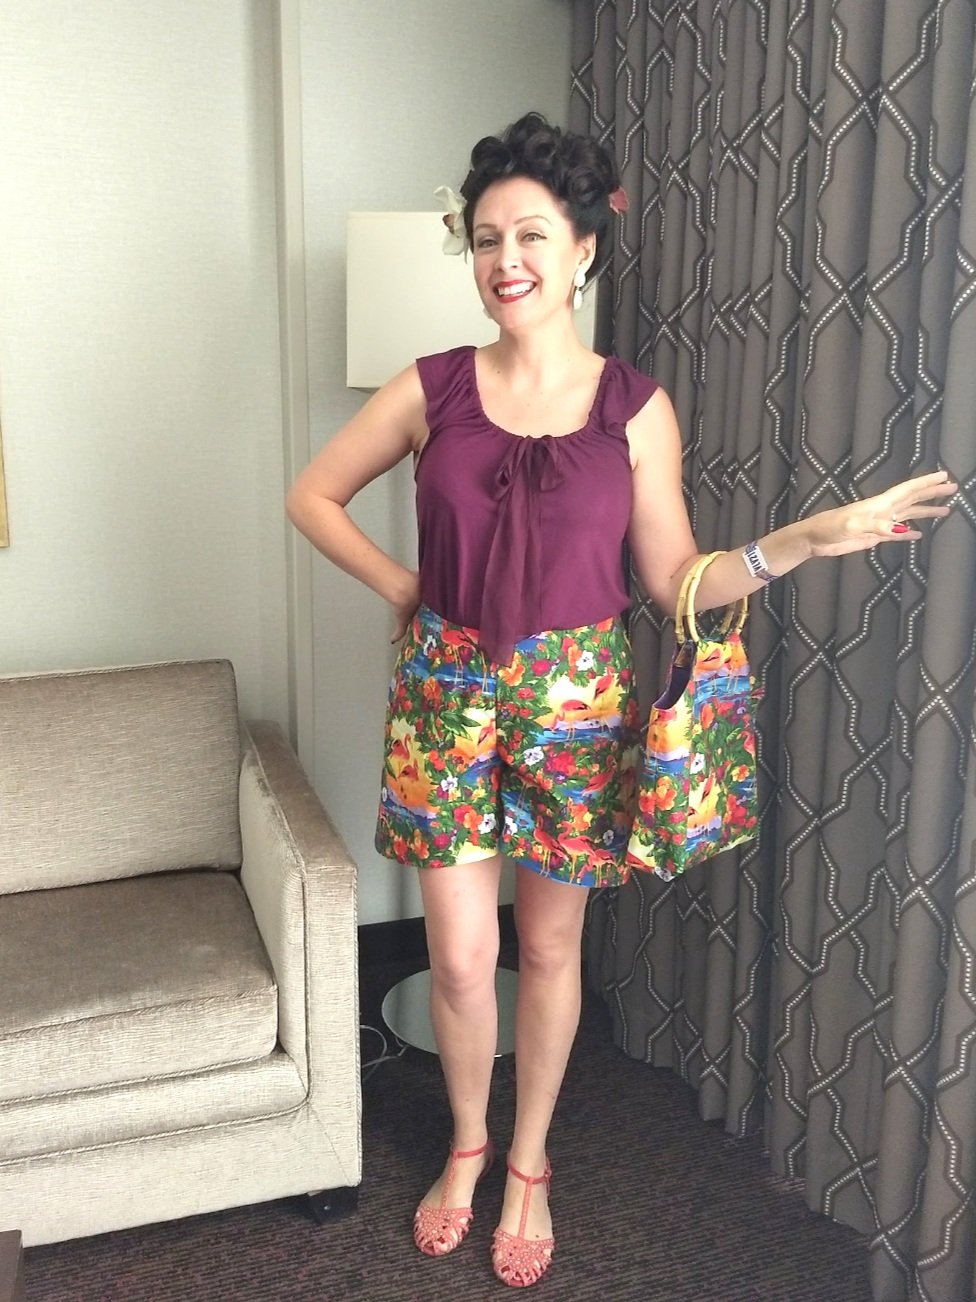
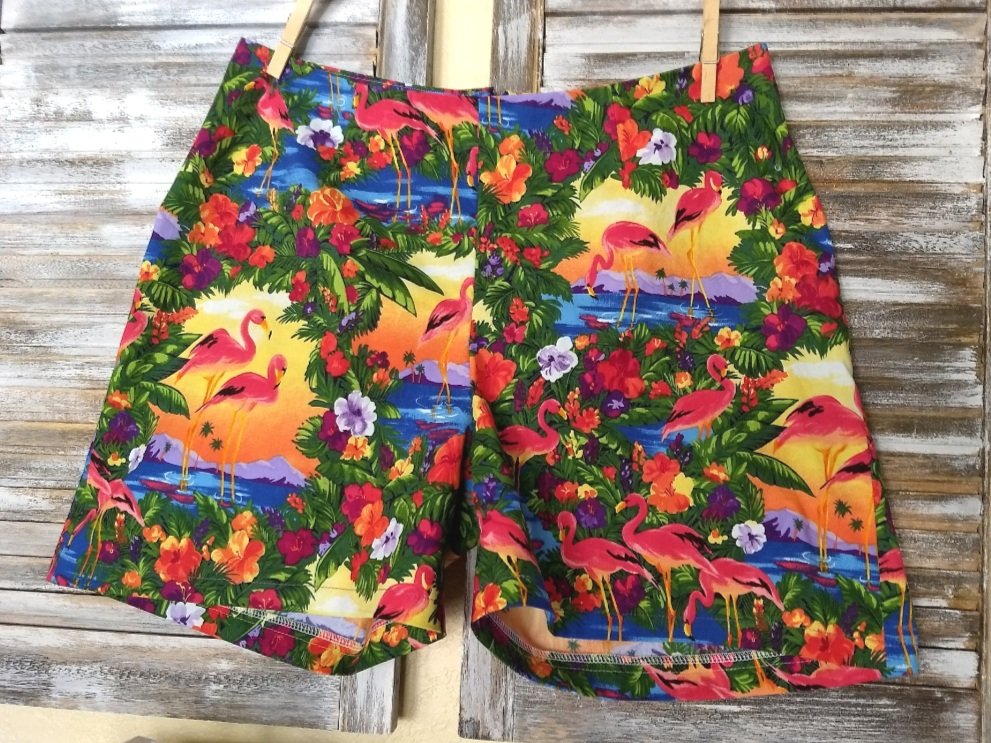
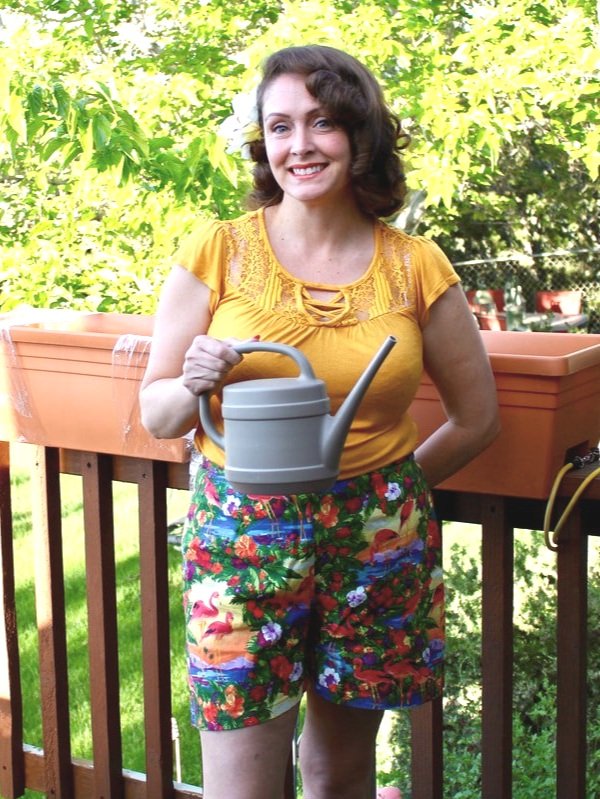
I also made the Flared Shorts Variation, on page 167. They are my favorite, can you tell?
I have a few pairs of these shorts and love the style and fit.
The flamingo pair has a tiki vibe and I didn't sew pockets in them. I regret that, of course. I made these to go on vacation, so I skipped the pockets. Don't skip the pockets. Haha
I made a red and white polka dot pair with pockets. I love these but don't reach for them as often. I usually pair the shorts with a black top and rock the Mickey Mouse look.
Well, that's it from this book. Do you have this book or any of her books? I reach for this book more than her others. I like a casual vintage style for every day.
Have you made any of these patterns? Or do you want to? Please share in the comments below.
XO,
Annette
Me Made May 2020
Me made May 2020. What are you wearing and making in 2020. Staying home required different me mades than the years in the past.
Can you believe it? It's May, again, already. The months seem to fly by quickly as I age.
You know the drill, #MeMadeMay is all about wearing something you made every day in May. Read my post I wrote from last year if you are wondering what the heck I'm talking about. You pledge to yourself and others to wear your me mades (handmade items). I played along last year and found that I didn't like it. Gasp! I know!
I did not like how it made me feel about my handmade garments. And, not in the way, you might think.
I usually get excited when I wear anything I make. Hair flowers, a purse, dresses, jumpers, rompers or pants, even my bras! I love it when someone asks if I made it and I get to scream "YES!" with a huge smile. It's exciting for me to wear my stuff and show it off.
During 2019's #MeMadeMay, I didn't get excited while getting dressed. It was more of a "have to" feeling. Not gonna lie, I wear something I make almost every day. I always have a flower in my hair- that I've made. My purses are made by me too. Oh and the days I don't leave my house, do not count. LOL
I'm a rebel in a sense I don't like being told what to do. And, the May challenge wasn't fun for me, because I had to wear my garments. Make sense?
Now with everything that is happening, I've been living in cozy clothes almost every day. I like being comfortable when I'm slinging string a.k.a. sewing. I've been sewing every day, so cozy clothes it is!
I feel happier about the challenge this year though because we're all homebound. We don't leave our house unless it's a run to the post office or get groceries. In which, I put actual pants on. Haha
I plan on playing along this year and have a new perspective. I'll be more inclined to wear my fancy dresses just because I can. They might not be the best to sew masks in, but... I'll wear them. It's almost a challenge for me to get dressed in real clothes every day. Amiright? LOL
And heck, if I don't wear a garment I've made, there's always a Me Made mask.
So, will you be participating this year? What do you think about ME MADE MAY? Share your thoughts in the comments below. Be sure to follow me on social media as well.
Stay safe and sane,
Annette
Face Mask Patterns
Making masks during the 2020 pandemic. Masks are needed for medical workers and everyone else to go out in public. Many designs and styles to sew.
Face masks. Are you wearing one? Have you made them for friends and family or to donate? I've donated more than I can count. Sent masks to friends and family. And I've made them for my own family. We are now required to wear them when we leave our house.
What a world we are living in right now.
I have made masks using a few different patterns and wanted to share with you, some on my favorites.
They don't require a ton of time or materials.
Materials Needed
Cotton fabrics
Interfacing- I used lightweight or sheer
Thread
Elastic- FOE, 1/8"-1/4", 3/8"
Bias tape, purchased or handmade
Ribbon, knit fabric straps, etc.
Floral wire & a pair of wire pliers
Sewing machine and notions
Seam ripper, because... sewing
Pinup cat masks
Sweet Red Poppy bias tape Face mask. This tutorial is easy and my favorite mask to wear. The mask is comfortable and forms to the face. It is not, however, a quick sew. If you want to batch-sew these, you deserve a trophy. These babies are no joke. Easy enough to make 3 or 4, but not so easy if you're making 50.
Made Everyday by Dana fabric face mask. Her pattern is super easy and makes for a quick sew! I've made tons of these for donations. I also used ribbons in place of the knit fabric ties. Check below for an altered option I used, to make these.
Melanie Ham 10-minute face mask. These are perfect for sewing tons. They're quick and easy. I personally have not made this exact pattern. I did, however, make one similar and used 9x7 measurements for the fabric. I also did 3 pleats. But, this is similar in construction.
Mask Video I found on Pinterest. This one is nice, it has elastic ears, nose wire, and a filter pocket. NOTE: can only be made with multi-directional fabric. I mostly buy one directional fabric, but I made one of these. It looks nice and fits well too. It has a very professional finish in my opinion.
Check Pinterest and YouTube for other patterns and versions. There are hundreds to choose from.
These are the exact ones I've tried, so I wanted to share. If you have questions, shoot me an email.
Sweet Red Poppy mask
Mask maker, mask maker, make me a mask. Is anyone else singing this song while making these things? Anyone? Please tell me I'm not the only Fiddler on the Roof fan. :D
Below, is my Made by Dana pattern that I've hacked. When the pandemic first started, the elastic was gone, sold out, and nowhere to be found. So, I improvised. I used FOE, fold over elastic. This is usually used for cloth diapers, headbands for babies, and other crafts. I used it to make the full-head masks. They are more comfortable to wear all day too. I cut 13" just like Dana says in her pattern. Easy peasy!
After you pin or clip the FOE in place, put on the top layer, RST. Sew around and leave a gap for turning. This is the easiest pattern for making batch face masks.
This is 50 masks in 4 hours. We (my husband, oldest daughter, and I ) made over 50 masks in 4 hours to deliver to his work the next morning. That was a crazy night. Once we found our groove, we worked flawlessly. These were all made with the FOE I was telling you about earlier.
Ignore the bad lighting, these were made at night.
Another early morning make masks to send to friends and family. What a time to be alive.
These masks were made following Sweet Red Poppy's tutorial. I love this style the best, but they are time-consuming.
Tiger King was a definite moment in our house. I had to make a face mask to honor his legacy. Free Joe Exotic!!
So, are you ready to make masks or are you burnt out like most of the sewing community? I gifted myself a new sewing machine, so I got a second wind of mask making. Stay tuned for my post on the new machine... she's fabulous!!!
Please share in the comments some mask patterns that have or haven't worked for you. Also, if you have places that are in need of donations, share those too.
Stay safe and healthy.
Warm virtual hugs,
Annette
Laundry Day Dress
Laundry day dress by love notions pattern review. The dress is perfect for beginner sewists and can be made into a pinup style with added accessories.
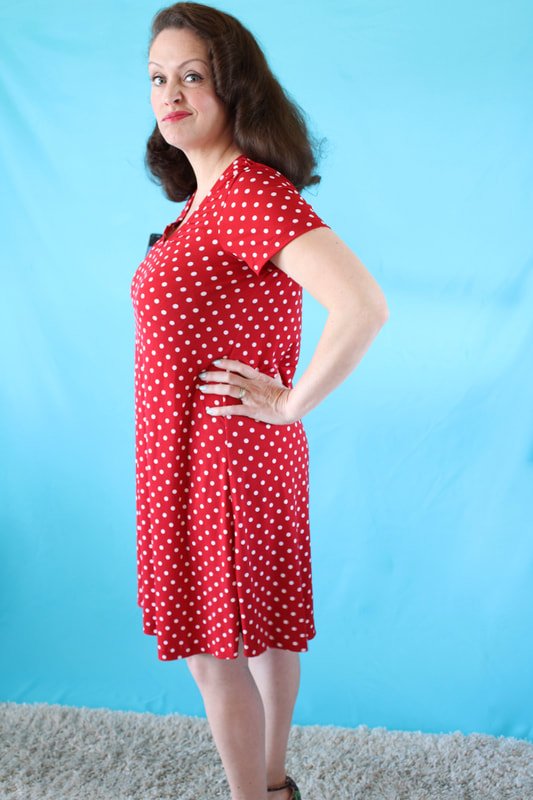
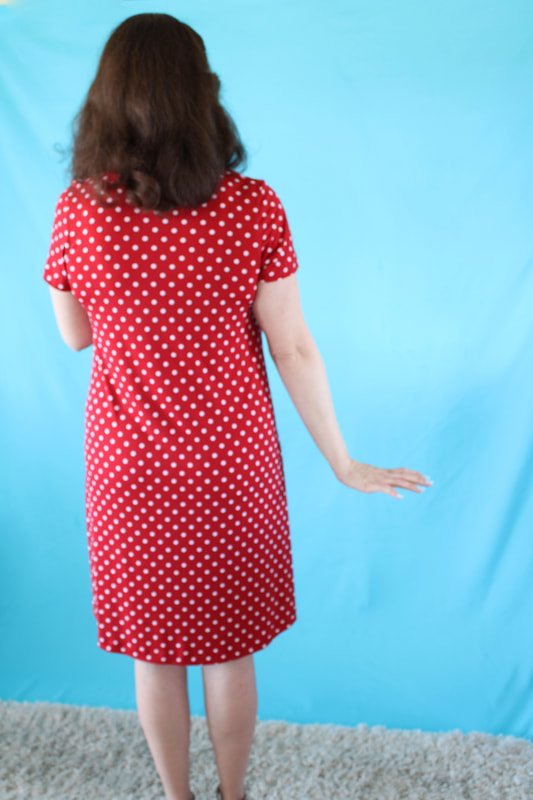
This dress is perfect for lounging around the house or doing laundry. It's the Laundry Day Tee dress. Simple to sew and comfy for a laid-back Sunday.
Are you ready for Spring? I've been playing (cleaning) in the yard lately. We planted 5 new rose bushes, hydrangeas, and various berry bushes. Ahh, it feels so good to be outdoors after the long winter we've had. The daytime temps in my corner of Southern California are rising and the weather got me thinking about all the outfits and bags I plan to make for summer.
Cue the Laundry day tee dress by Love Notions. The dress comes in a great size range XS-5X. Yay! I snatched up the pattern for $5. What a steal!! I had never heard of this pattern company until I went to the Arizona Sewcial. Boy, I was excited when I went to their website. Give me all the knit patterns. I bought the Sabrina Slims pants pattern as well. Stay tuned for that review.
This post isn't a sewing tutorial so much as it's more of a pattern review. So, here ya go.
PROS
This pattern can be made in many variations. I loved the dress version most. I have a few lightweight dresses I constantly reach for during summer. Flouncy and bouncy without zippers or waistbands to contend with. They keep me happy and comfy during the humid months. So, I knew I wanted to make an easy knit dress for Summer.
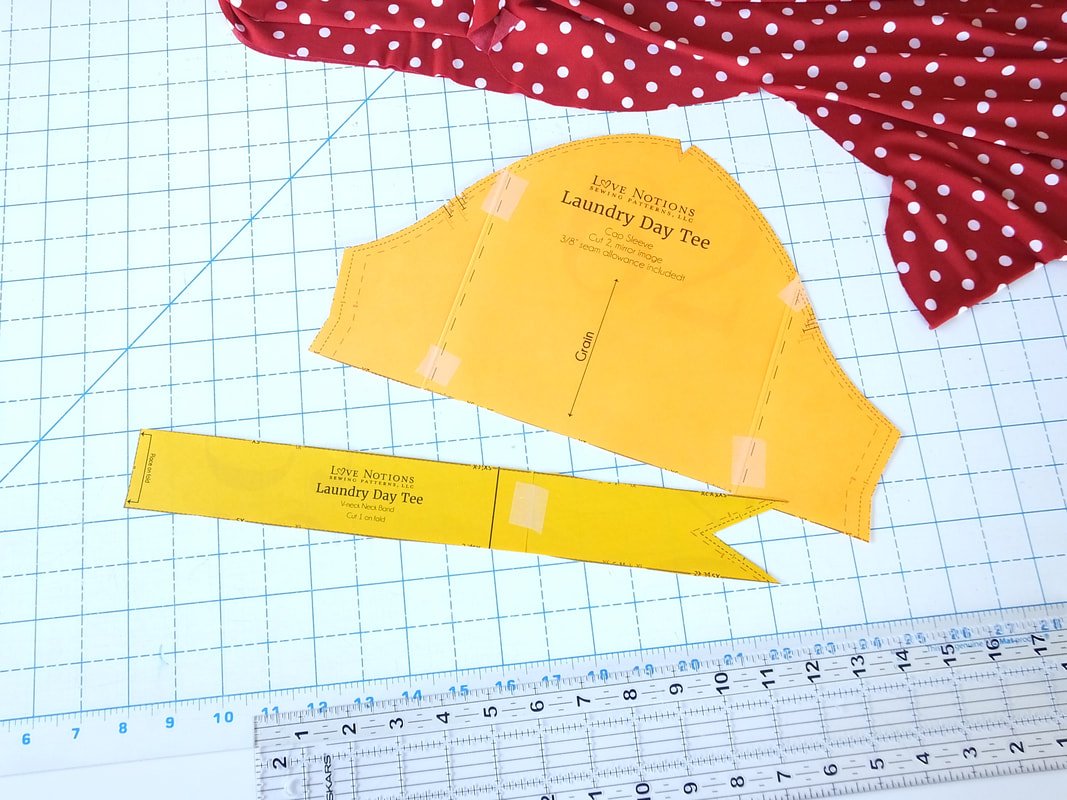
The pattern lets you choose from long sleeves, 3/4 sleeves, short sleeves, or a tank style. You can make a top or dress, long, short, tunic whatever you fancy. Oh, and it has an optional cowl neckline too. Whew! So many options.
I chose the dress length, short sleeves, and the V-neckline.
The pattern calls for stretch knit fabric and was a quick project on the serger. Cut to finish took 2 hours, minus the V-neck insertion of doom.
CONS
In choosing the V-neck, I was surprised as to how confusing that whole ordeal was. I've made a handful of V-neck tops and they've been easy as pie. This one was not. Maybe it was a combo of the fabric and my sewing brain, but I won't follow that insertion again. I had to make it twice and it still isn't centered into the V. Ugh
I printed and cut the full bust front piece. I usually do an FBA on all my dresses and tops, so I thought this was a neat option. However, in trying the dress on, it looked frumpy. Maternity-like if you will. My husband and 2 older kids said it looked frumpy too and I didn't like how I looked in the dress. Frumpy is a four-letter word to me. Ha!
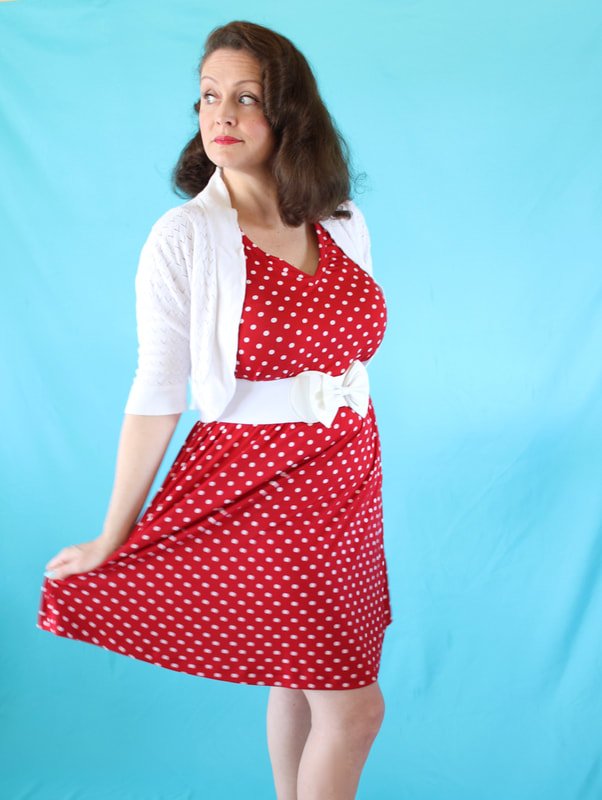
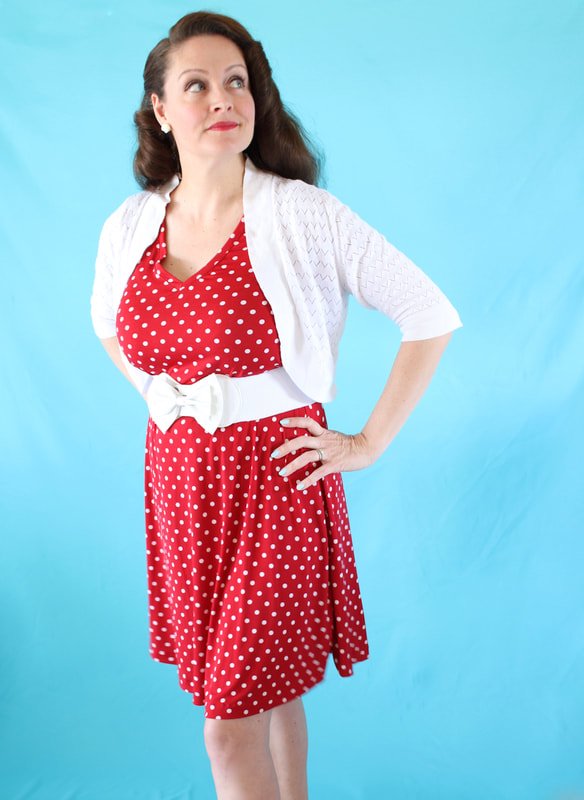
So, I added a cinch belt, a cute sweater, matching flats, and jewelry to turn the dress into a casual pinup look. Yay! Almost similar to the Popover dress I made. Almost.
I want to print out the regular front piece and see how that fits. I think it might fit a tad better. And, I want to size down next time as well.
Frumpiness aside, it's comfortable and easy to throw on. I see a few of these becoming Summer wardrobe staples. Heck, I might make a nightgown too, with some added length.
This pattern is perfect for beginners.
Print, cut, and tape the PDF pieces together. It has very few pieces; one front and one back, a neckline piece, and sleeves or armband facings if you choose the tank version. Oh and that cowl piece too.
SEWING STEPS
Sew the shoulder seams, making sure to use clear elastic to support those seams.
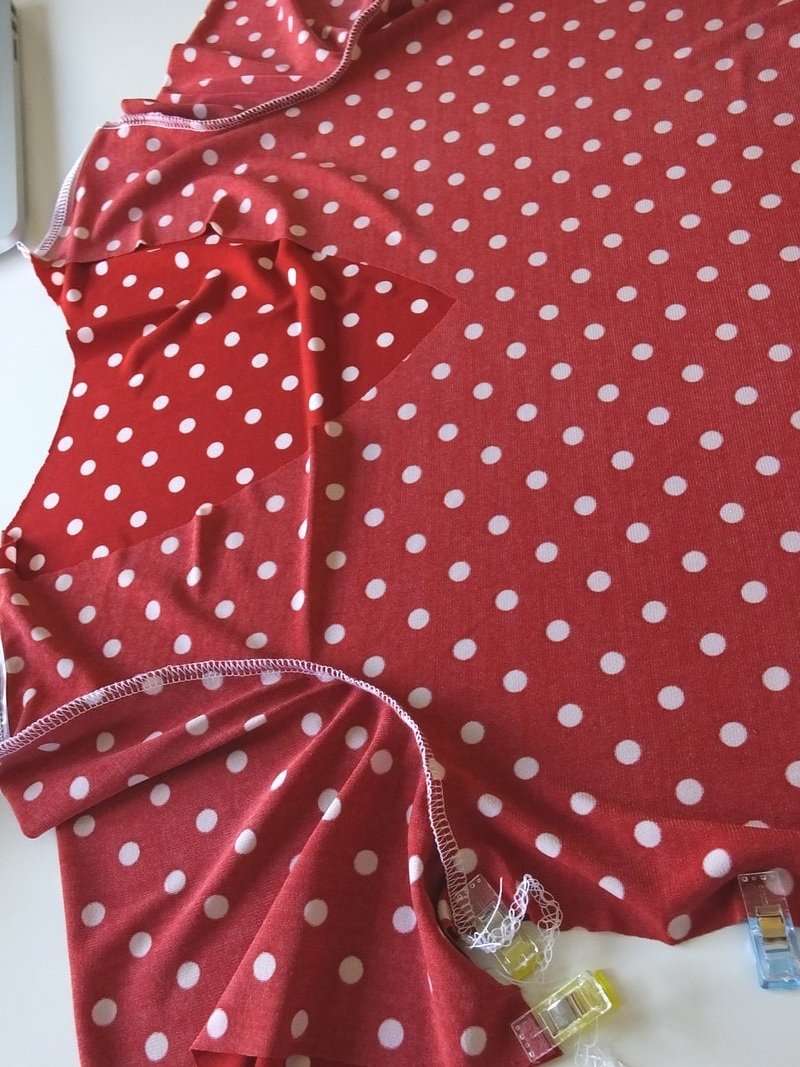
Attach the sleeves, easy enough making sure to match the notches.
2 notches for the back, 1 notch for the front of the armscye.
Attach the neckline, hem the sleeves, and bottom hem and you're done. So easy!!
So what do you think? Have you ever wanted to make a T-shirt dress?
As always, thanks for hanging out. Please share this post and blog with your friends and family and follow me on Instagram @sewingtothemoon.
Leave a comment below if you plan on making this pattern or have already made it.
XO,
Annette


