
Pattern Reviews, Sewing Hacks, Tips & Free Patterns
Sewing Blog Besties

New Look pattern 6446 Romper
New Look 6446, an adult romper sewing pattern. This was such a fun and easy garment to sew.

This New Look 6446 pattern is my favorite romper to sew. It's easy and fun to sew. Plus, it has options to make the legs different lengths. Jumpers or rompers ares great seasonal transition pieces. Add a sweater and some chucks, and you're set.

This is half sew-along and half review. It's not a complete step-by-step. Hopefully, you'll get some useful info out of it though.
Most of the summer was spent enjoying beautiful weather, great friends, resort pools, and camping.
My friend stayed with us for a week and we squeezed in some sewing time. And, the jumper was finished at another friend’s house while I visited her. Ha!! Yes, having sewing friends in real life is amazing.
Grab the New Look Pattern 6446. You won't regret it! There are tons of tutorials on this pattern online and on YouTube.
I chose to use this fabric that I've had since 2015. Yikes!
I bought 3 yards at Joann Fabrics in the clearance section. It's an extremely soft, thick, satin-like fabric. I used a 16" invisible zipper and coordinating white thread.
I used my high bust measurement for the bodice. My waist measurement almost always gets blended out because I'm not a wasp. I used size 14 for the top and blended out to a size 16 for the waist, and back down to 14 for the hips. This worked well for me.

Make sure you cut out everything and throw it all in a pile on the floor until you're ready to sew! It's the only way to do it. ;) Oh and take a blurry pic too.
There were quite a few pieces, but it was pretty simple to cut everything. I used the actual pattern pieces instead of tracing them onto pattern paper. I know, I know, bad sewing move.

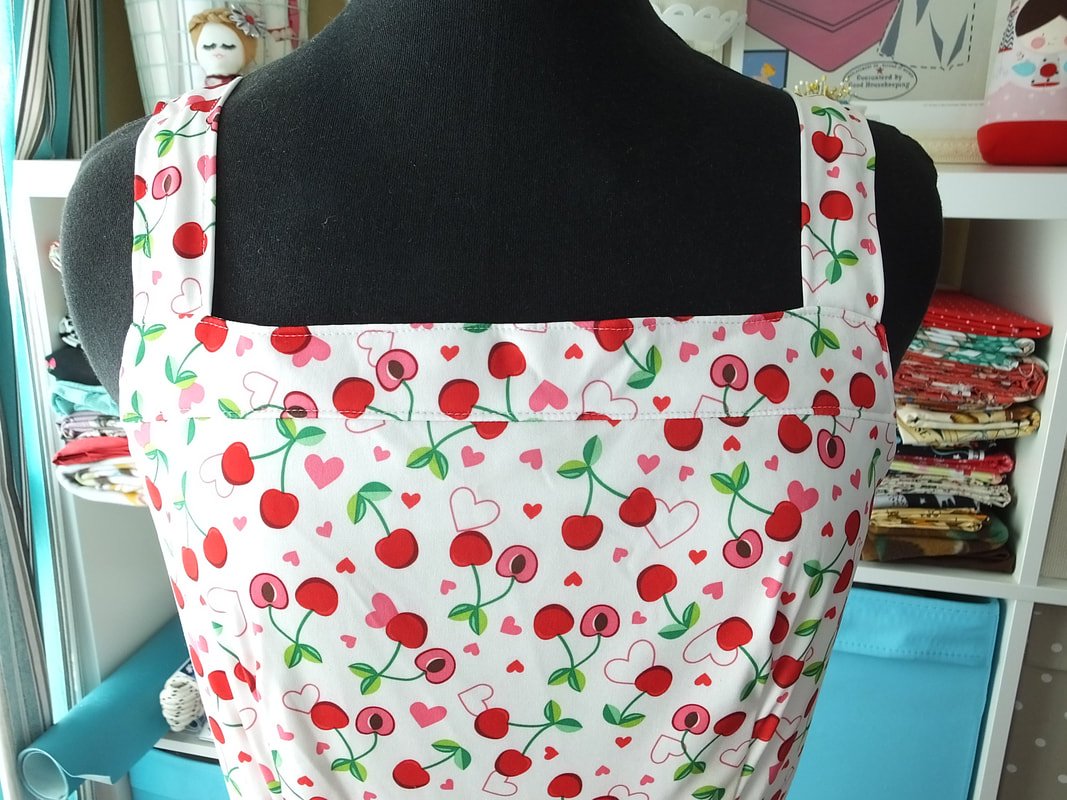
Sew the darts and assemble bodice pieces. Do this for the bodice and lining as well.

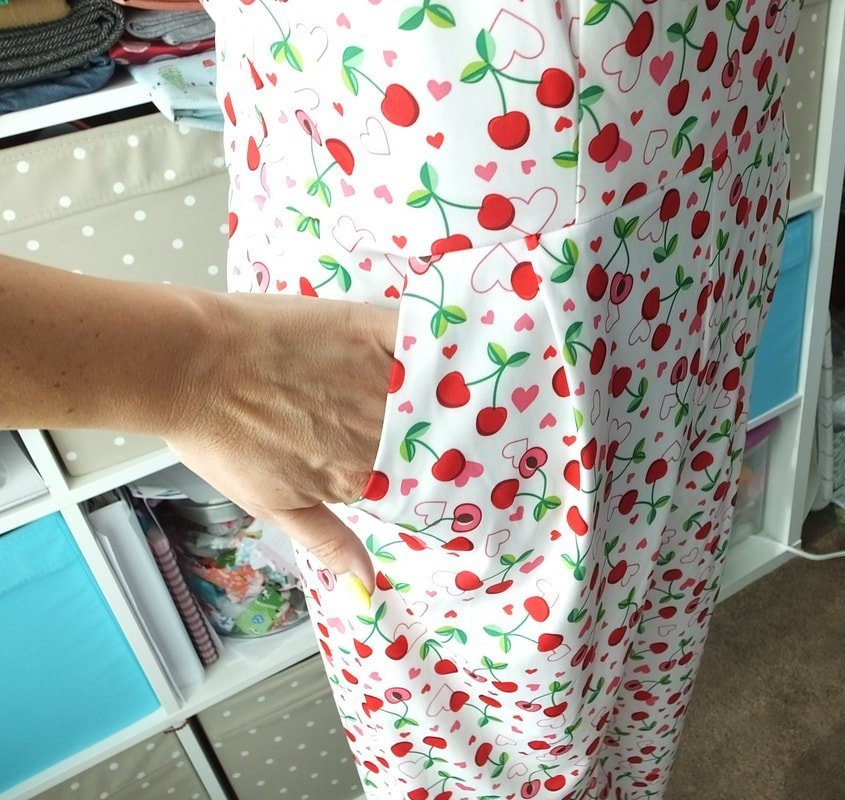
The pockets were easy to make. It's a one-piece, pattern piece that you fold together and sew into the waist area.
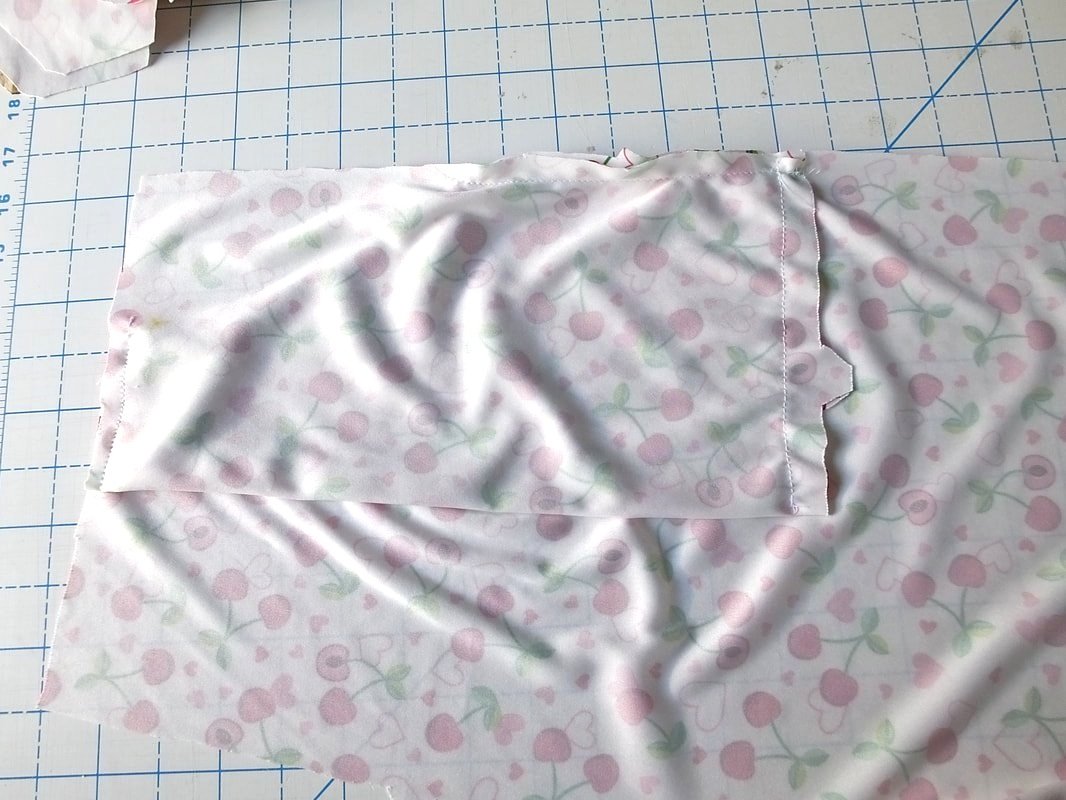
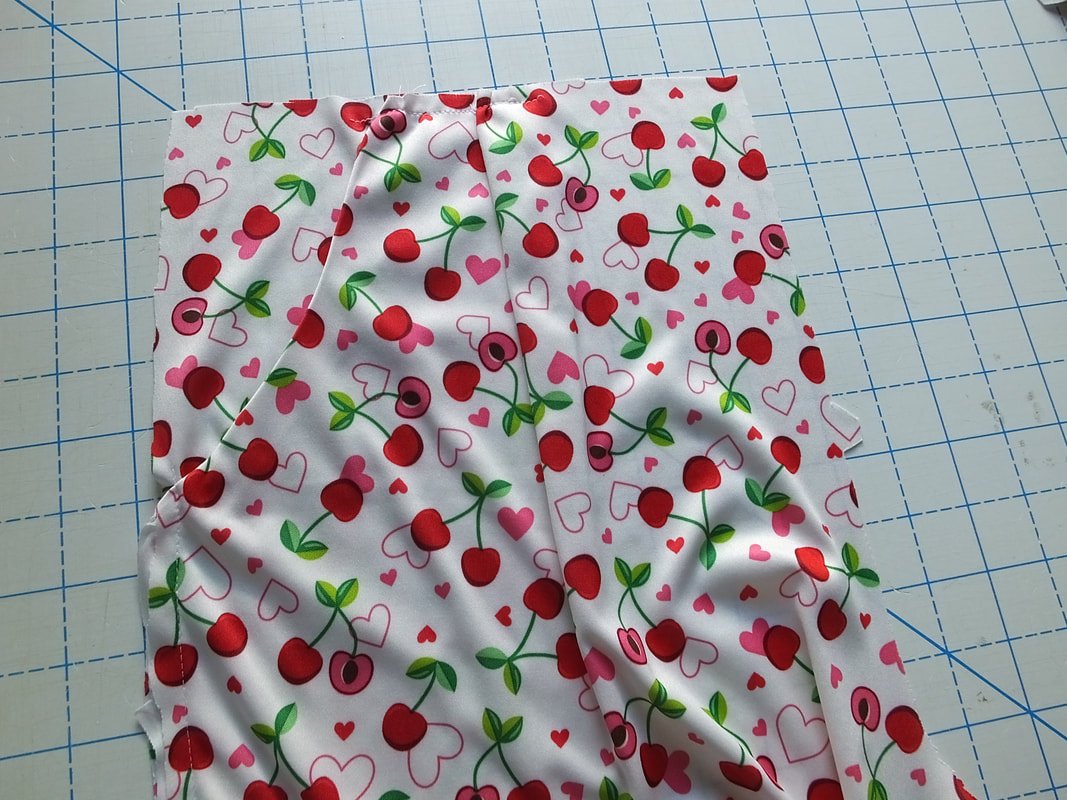

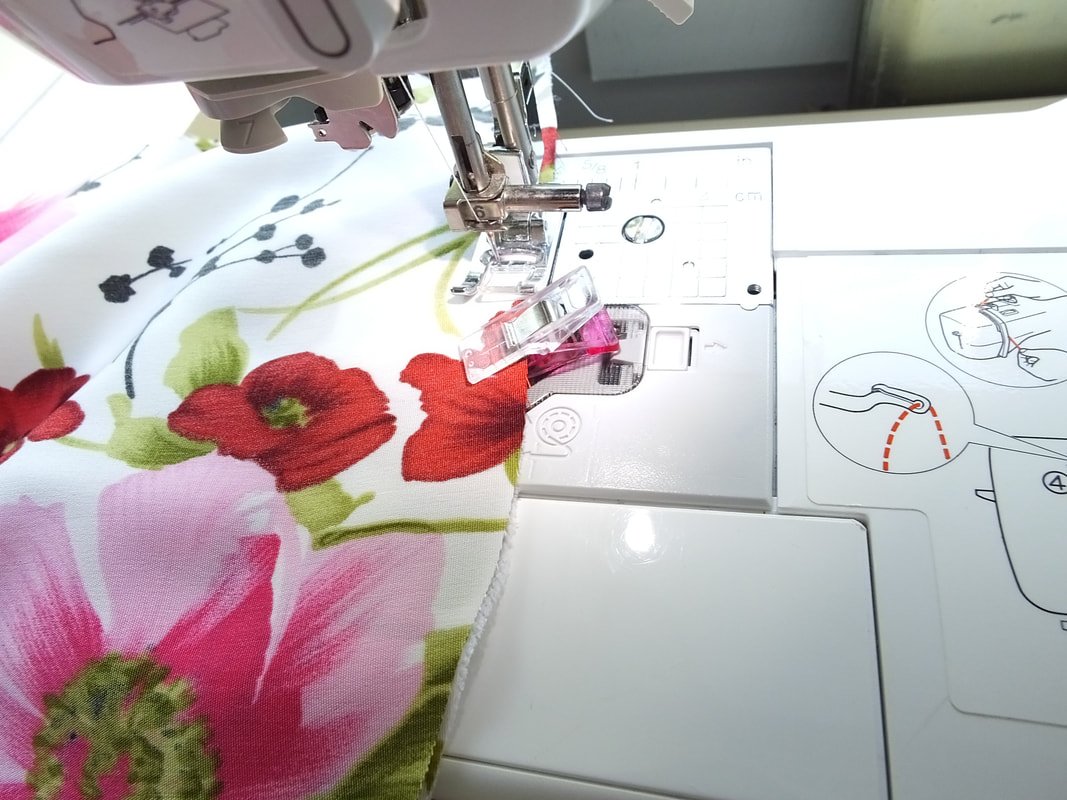
Does anyone else get excited over a perfect crotch seam? LOL

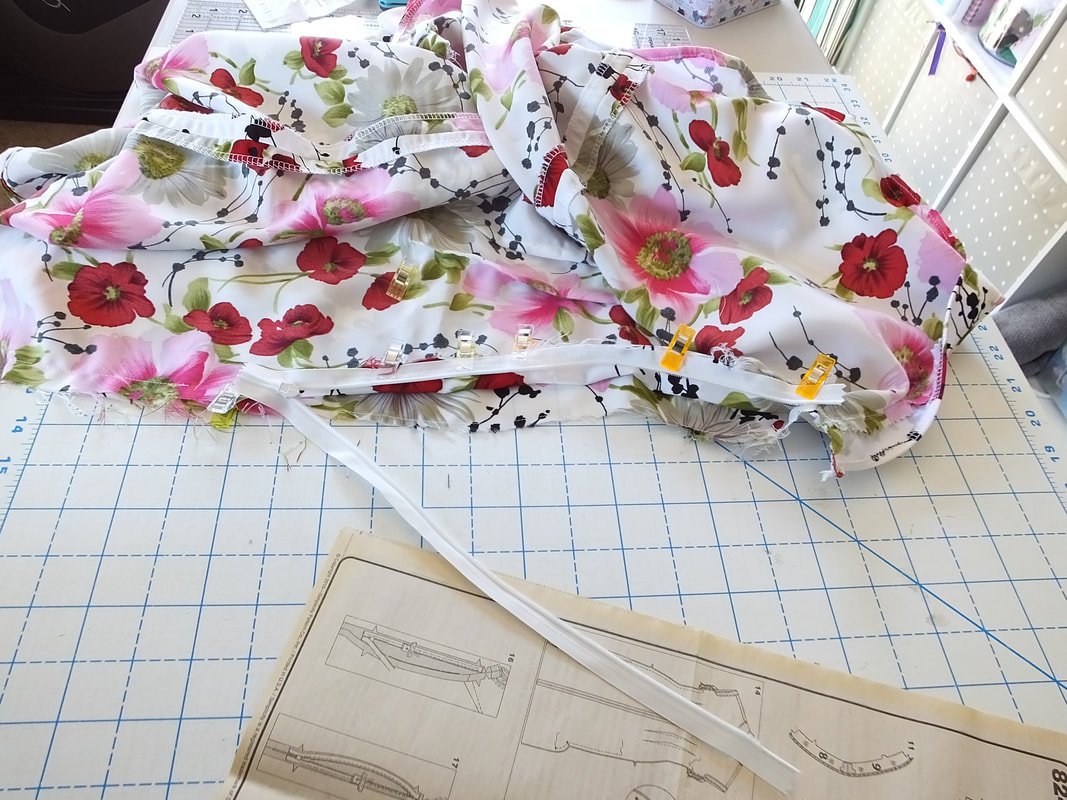
Sew up the pant legs following the pattern directions. Inseam first, then outer legs. It’ll look like a big floppy mess at this point.
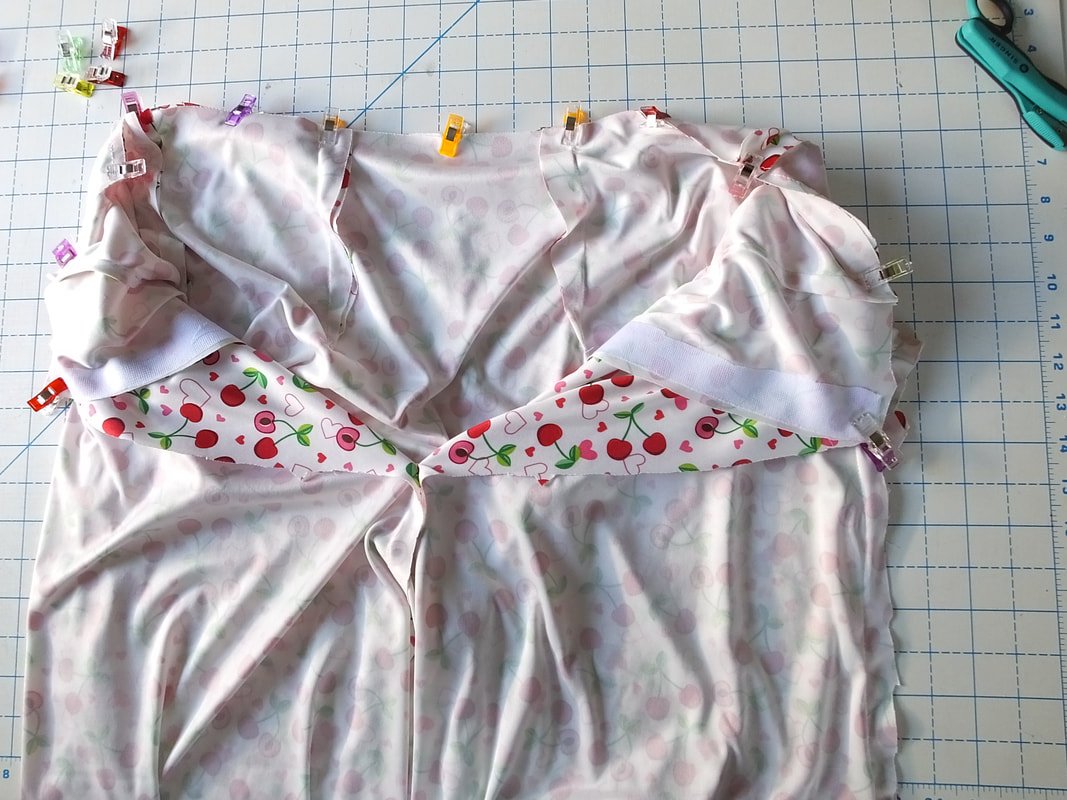
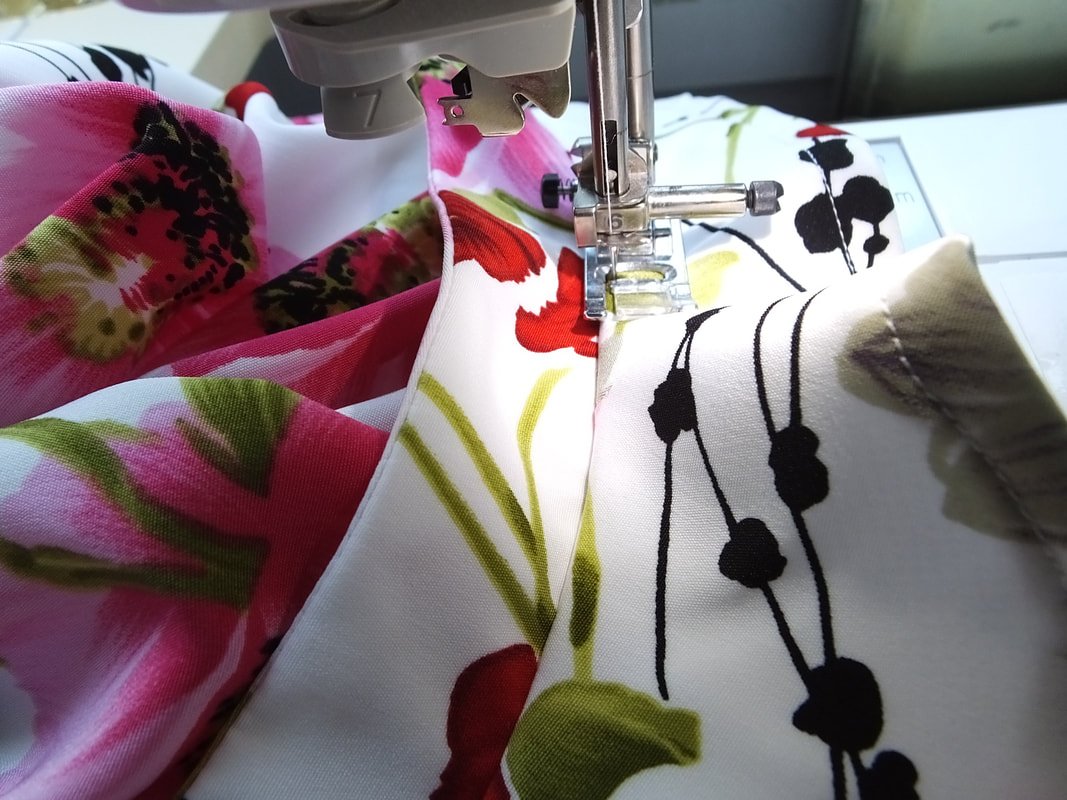
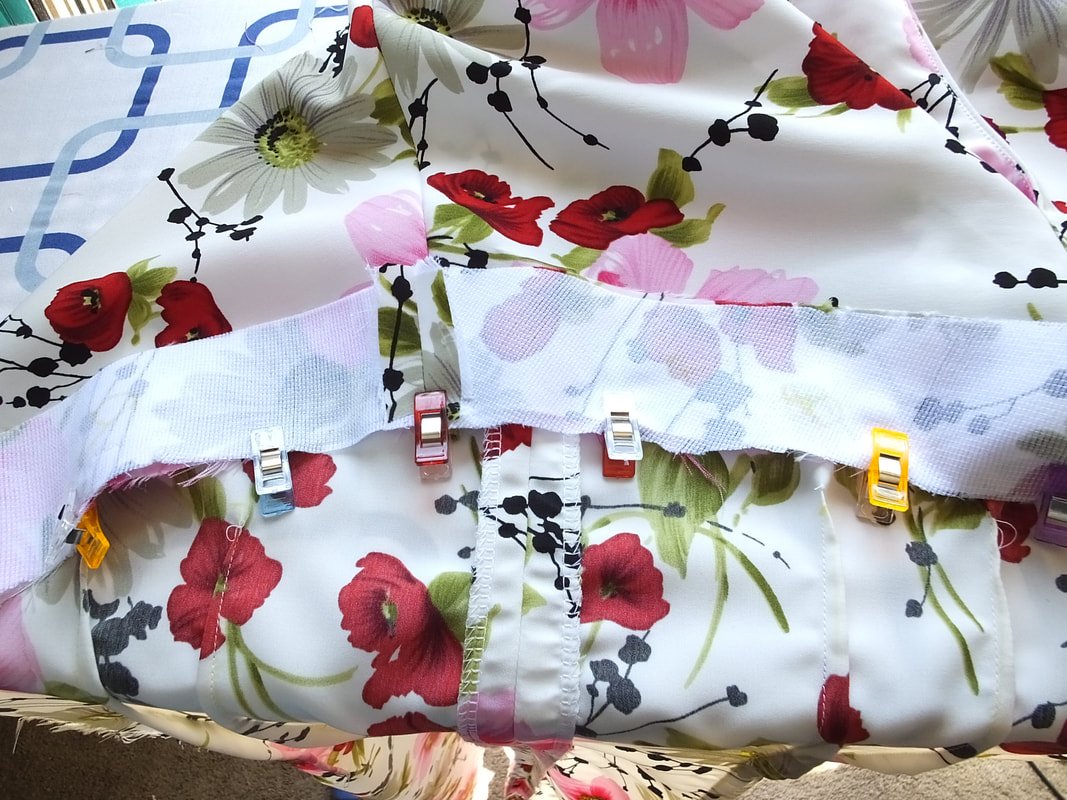
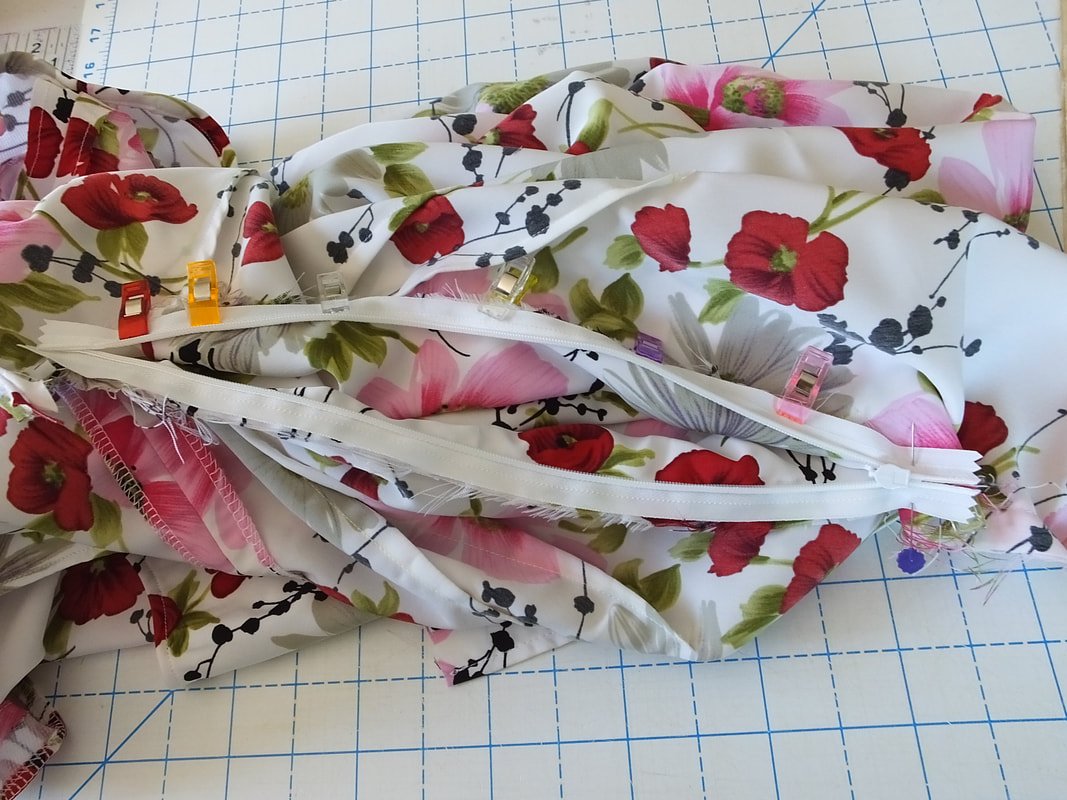
Tuck the bodice inside the pant legs at the waist, right sides together. I used clips and they seemed to hold all the slippery layers more easily. I don’t know what this mystery fabric is, but I love it! (I think it’s a cotton sateen, but I’m not 100% sure.)

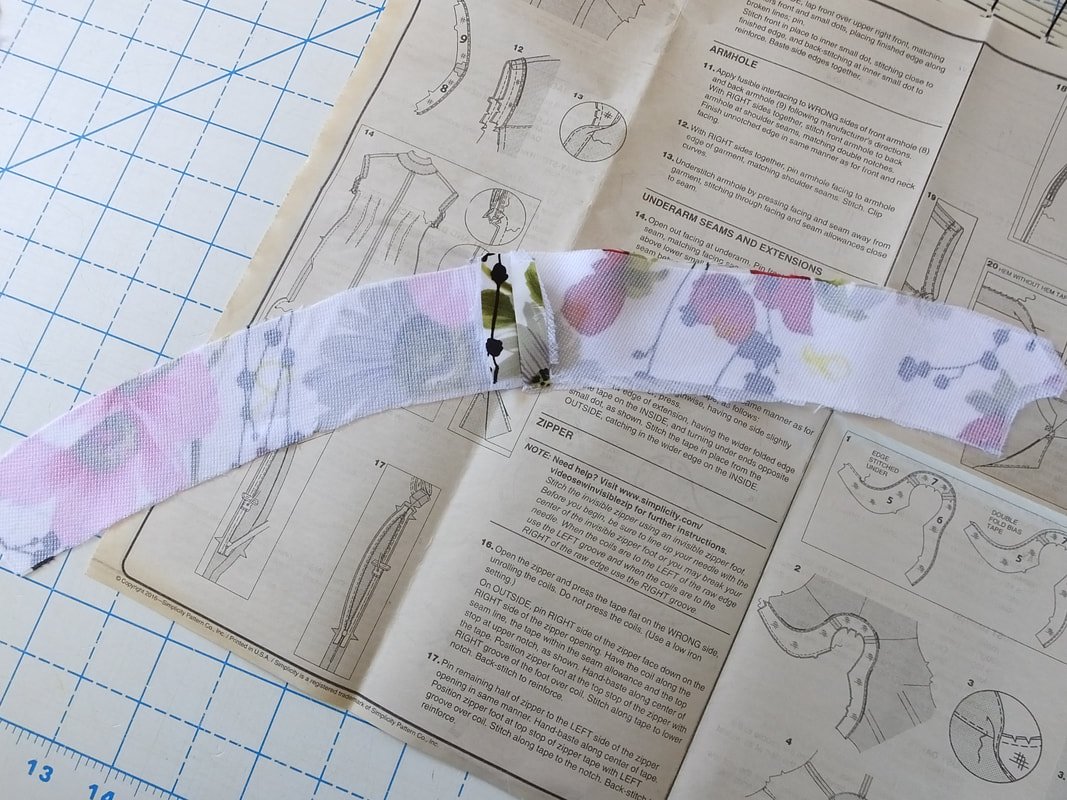
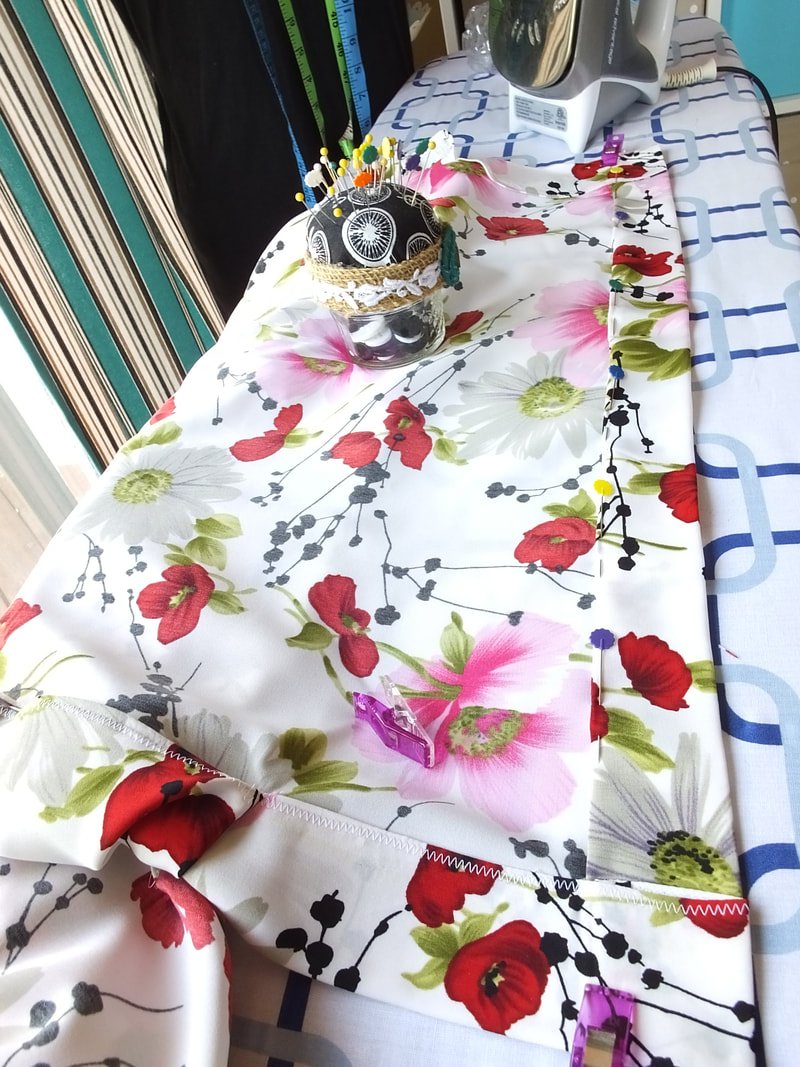
Cut the straps.

Sew the straps. I like the seam being down the middle. Topstitch them to hold in place.
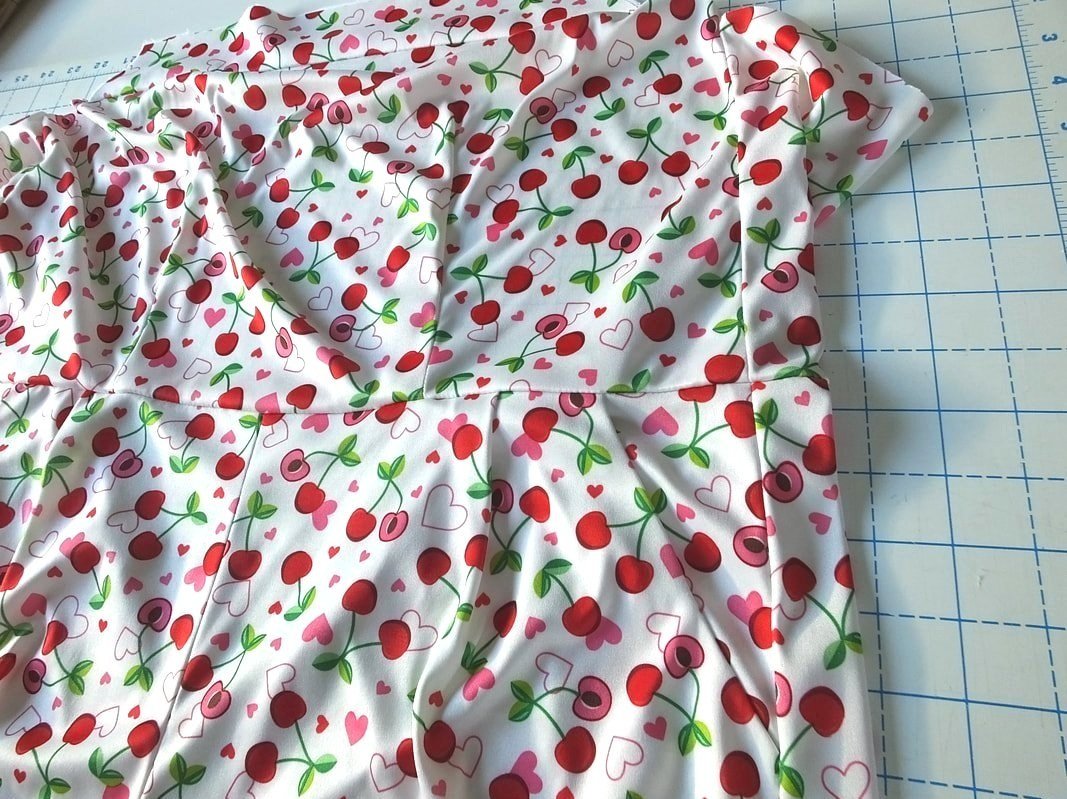
Cut and sew the straps. Baste them and sew them into the bodice sandwiched between the lining and bodice pieces. Add the hem, and you're done!
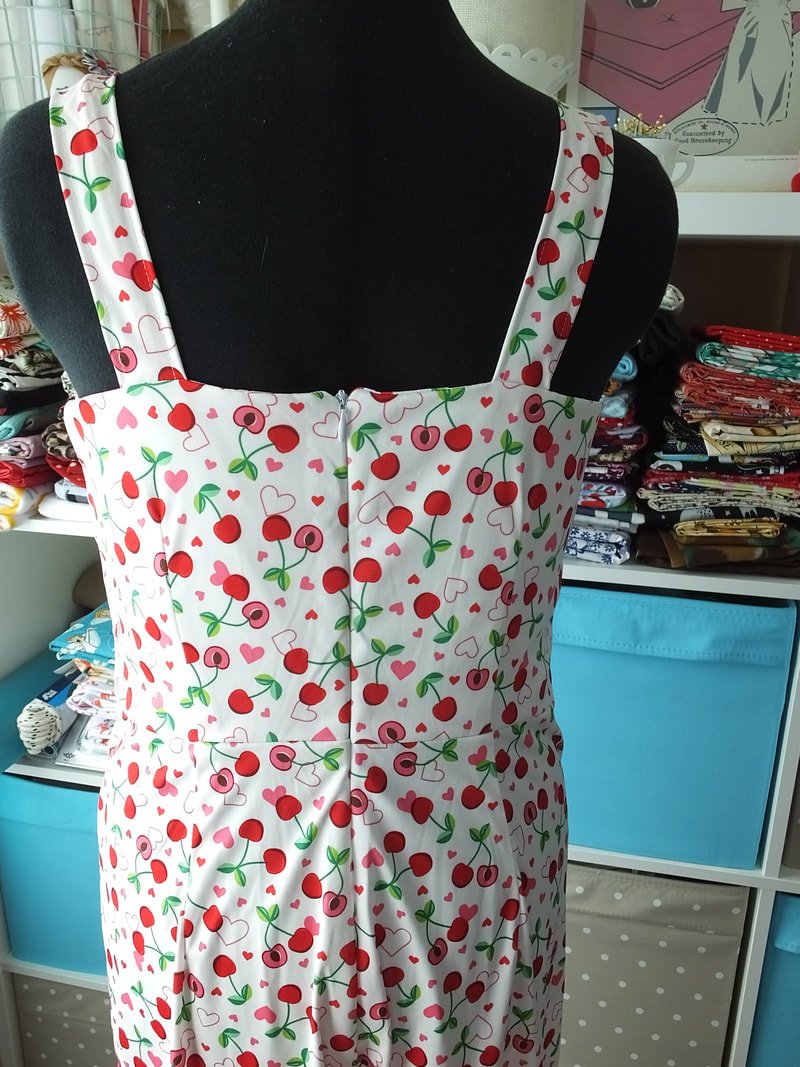
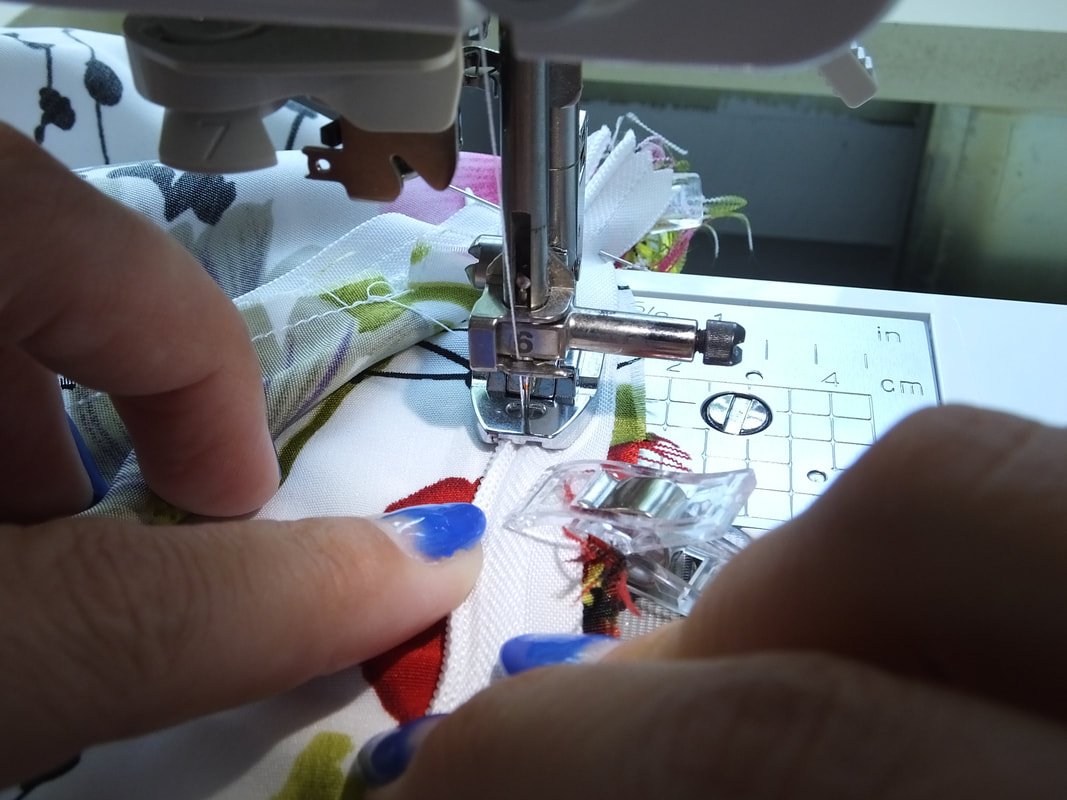
**The zipper gets added before the straps are attached, but I sewed the zipper at a friend’s house, so no pictures.
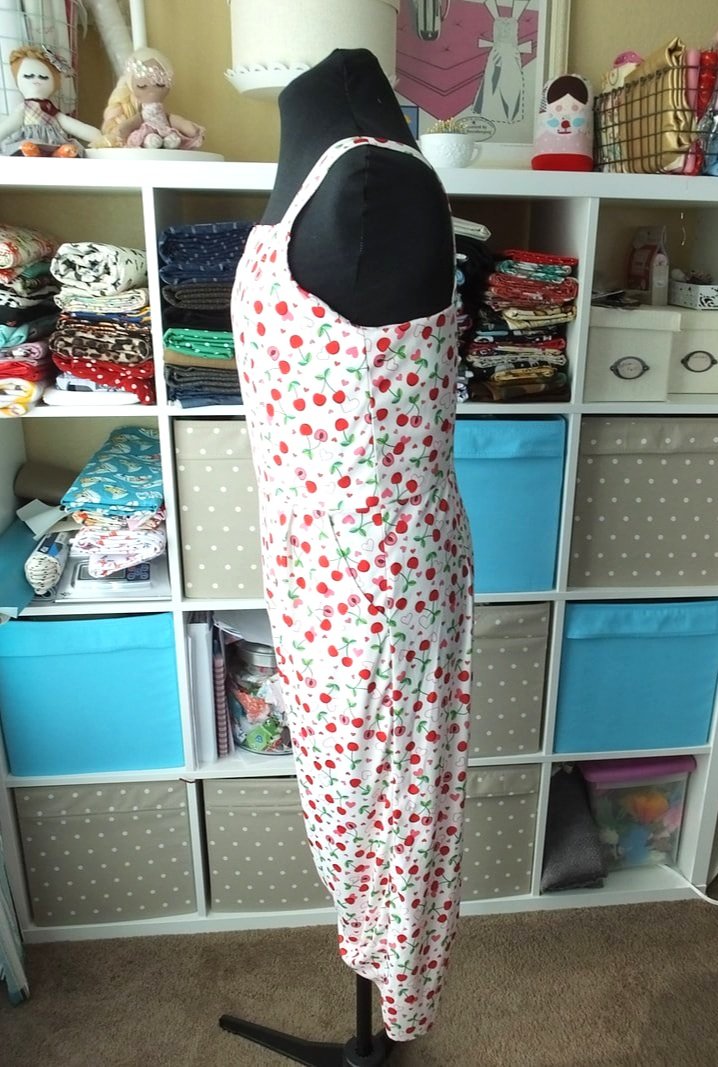
I've worn this a few times already, it washes up beautifully, and it's comfy to wear. I need to get yards and yards of fabric to make 20 more of these! Ha!
Grab the pattern, get some fabric, and make one or ten. You won’t regret it, I promise!
Have you made this pattern? Let me know in the comments below. Tag me on Instagram so I can see your version of the New Look pattern 6446.
Happy Stitching,
Annette

How to Sew Simplicity 8244 Cheongsam
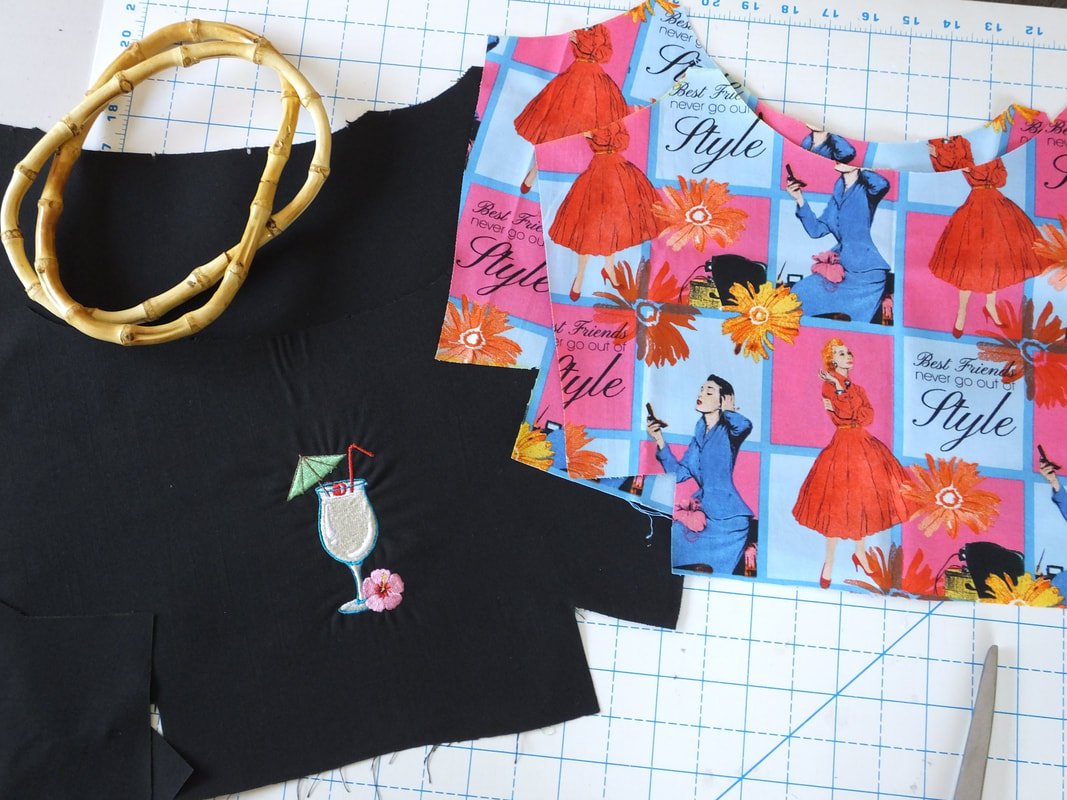
How to sew a cheongsam. Simplicity sewing pattern 8244, sew along. This dress was a labor of love and turned out beautifully.

Have you ever been scared to sew something? Too nervous to start because you didn't know where to start? Let me share a little story with you. Grab a cup of tea, this is a long one. And, this is also the dress that made me start a sewing blog.

Simplicity 8244, a 1950s style dress pattern. Fabric was from JoAnn.
I picked up the Simplicity pattern and beautiful floral fabric with a vacation in mind. My husband and I were going away for a few days. I wanted to make something pretty and different.
When I sew something for myself, I like to look at other people's versions. It’s how I pump myself up. LOL
I searched the interwebs to find any and every tutorial, on how to sew up Simplicity's #8244 pattern. I didn't find what I was hoping for. I found a few pattern reviews and photos, but no tutorials or step-by-step instructions. I messaged a gal asking a few questions, but she didn't have the answers I needed either.
Hesitantly, I traced the pattern onto my paper (here's a list of my go-to sewing tools) and transferred the markings. I always need to do a FBA (full bust adjustment). How was I supposed to make one with this asymmetrical dress? After staring at the pattern for what felt like days, I shut down. I rolled up my traced-off paper and set it aside. For one year, exactly.
Not sure what lit a fire under me, but I decided to pull that rolled-up pattern out of hiding and give it another go!
I made a muslin using some old Halloween costume fabric on hand.
I sewed up the muslin, making sure to include the darts, side, and back seams, and any other important areas. I did not attach the collar or zipper. It's a muslin, so it was for the fit purpose only. I HIGHLY recommend making a muslin for this pattern. You may find that you need a few simple adjustments.
I found that my bust fit pretty well. *I did use my high bust measurement. I have a 5-inch difference between my high bust and regular bust. FBA to the rescue.
I made the short waist adjustment- because I have no torso. Ha!! Thanks, Mom. ;)
I also did a forward-sloping shoulder adjustment as well. Bad posture FTW!
Nothing else was needed. I transferred those measurements back to the pattern piece and traced out my pieces onto the pretty fabric.
Gather everything you need:
Fabric
Pattern
Interfacing, matching thread, needles
Frog Closures or buttons
Piping. I opted out, but you may want to add the piping detail
Sewing machine, etc.
All your favorite pattern tracing and cutting tools
Patience and a good night’s sleep
Now that the fitting info is out of the way, let's dive in and make this beautiful traditional Chinese dress. I did a little research on the dress, thanks wikipedia. If you want to find out some more information and the dress history, click that link. Youtube has some amazing videos on how the dresses are made as well. I love the internet.

Trace out the pattern onto your favorite paper. Don't forget to transfer every marking, there's a lot with this pattern.

I didn’t have a table big enough, so I traced it off on the floor. Ouch, my poor knees.
This was a lot of dress, make sure you have a large space to lay out the pattern. I chose to do this on the floor. Cue the angry sewing Gods. >: )
Once everything is cut out, and your marks, darts, and hemlines are transferred. Cut out the fabric. **Pay close attention to the pattern layout on the tissue paper. You don't want anything backward or inside out. This is very important. you'll see why later.

Sew the fisheye darts.
Sew your fisheye and bust dart first. Fisheye darts are pinched in the middle and sewn up. Knot by hand. Go back to the middle and sew down to the opposite end. Knot by hand. Press the waist darts towards the center. I love this style of dart, they are so flattering. A tad tricky for your first time, but once you get the hang of them, you’ll love them.

Match up shoulder seams and back center seam. Stitch. Press open.

So far, so good. Right? Moving right along. It should look more like a dress at this point.
Facings
Now for the fun part. The facings. All the armhole and neck facings. So many facings. And collar pieces. Wheee!! Keep them separated by attaching your pattern pieces to them with a clip or pin. It will make you scream less. I promise.

Attach all the facing pieces together following the pattern directions. I used the picture on the pattern to make sure I got it right. It looks wonky, but it works. If you didn't iron the interfacing on earlier, do it before you sew the interfacing snake. That’s what it is, it’s a facing snake. LOL

Attach the facings together at the seams, be sure to match the notches. This is very important for the facing to lay correctly and flat. Sew the seams together, and it should resemble a funky snake. Now you're going to attach the facing snake to the dress. Matching notches again, and following the curves and angles.

Side note- The pattern has you do a hem on the facing, but I wished I would have just serged the edge. It creates a little more bulk than I like. It doesn't bother me enough to rip it out though. #lazysewis
I didn't take a photo, but you make the collar before applying the facing snake. The collar is sandwiched in between the dress and facing snake. It has basting stitches to hold the 2 layers together.

See the collar sandwiched in there? If you opt out of the collar, pay no attention to this picture.
Sew the three layers together. Understitch the collar and facing area.
As long as the facings and collar went in well, it should look something like the photo. If you opted for the pretty piping detail, that would have gotten sewn in between the facing and dress seams as well.

The front of the Cheongsam is looking pretty good so far.
This dress was a labor of love. I sewed a little each day, without rushing. I definitely took the slow sewing approach to this one. And, if you need to take a break, take it. If not... forge on!
Next up, stitch the 2" small area to enclose the flap part. Those are the technical terms in case you're wondering. I think they have you do this to ensure nothing is accidentally seen, skin-wise.

Sew this small area around the flap part.
Armhole facing time. Apply your interfacing if you haven't done so already. Finish the edge as you did with the neck facing. I serged the edge instead of an actual hem. I learned after making the front facing. Attach to the armhole matching notches and follow the curve.
This is where the pattern placement messed me up. Well, where I messed up. I had to cut out so many armhole facing pieces. I kept doing it backward. Ugh. I turned the machines off, unplugged the iron, and walked away. I returned the next morning with a clear head. Sometimes that’s the only thing you can do.
After the facings are sewn to the armholes, the instructions have you start the vent openings.Oh boy, I was so confused at this part. I read the instructions over and over and over. I've never made a vent before, so I went to ye old YouTube.
Below is a video of how to create a vent by Professor Pincushion. She has fantastic videos on almost everything, so check out her YouTube channel and website out.

I followed the video and made both vents with the snip at the backside of the dress.

You can see the stitching line on the outside if you look closely.
After that was all sorted, I was a happy lady. Whew! Thank you Professor Pincushion; you saved the day.
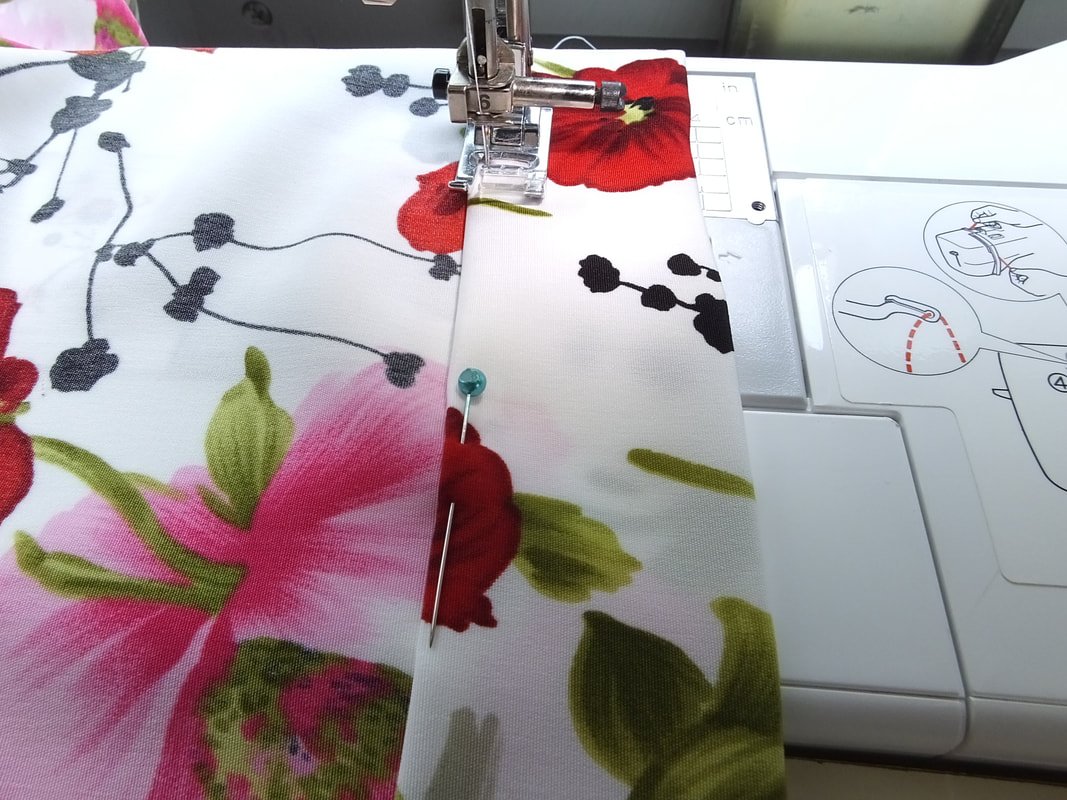
I put in the side zipper. You can insert the zipper before or after the vent. It doesn't really matter. But, you do need an invisible zipper foot.

It makes a pretty zipper that hides secretly in your side seam.

Grab your invisible zipper and invisible zipper foot. I like using clips for this. Attach it backward, and if you use the correct foot, it'll be a breeze. The foot is designed to grab and push the zipper teeth away from the fabric. The teeth then refold back to make a beautiful seamless zipper.
Sew up the left side first.
After you sew up the left side, backstitch and go to the sewing table.
Pin or clip the right side of the zipper tape to the seam fabric. It looks like this when half sewn. See how it's backward. You have to flip your sewing brain inside out to do these zippers.
Sew the other side down. Hold the tape and work with the machine while I slowly sew the zipper.

Inserting an invisible zipper is easy once you think of it as going in, backward.
Wow, all that is left to do is the bottom hem. The pattern suggests a 2" hem. So, that's what I did. I serged the raw edge, then turned it under, and under again. The pattern calls for hand stitching, but at this point, I had enough of this dress. So, I tossed that sucker on my machine. I usually don’t hand-sew anything unless I absolutely have to.
Sewing the hem.

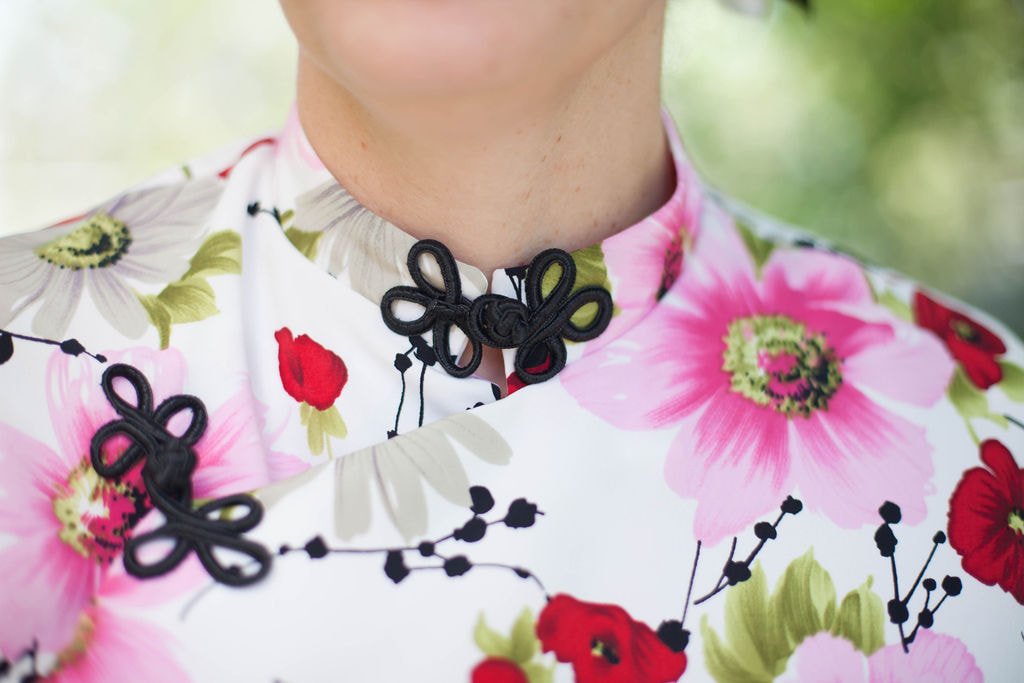
A little behind-the-scenes shot. Phew! Glad the dress is done. Oh wait, I need to sew on the frog closures by hand. Cue a tear and a Netflix show. LOL.

Use a clip to hold the collar together. Pin each side of the frogs to the dress exactly where you want them. Thread that hand needle and get to work. I should have used some interfacing behind where I sewed. Ugh. Stitch them both by following the pattern instructions. It looked like one was at the corner of the front bodice flap and another at the collar. That's where I put mine. Once these beauties are on, you should be done! Hooray!!!
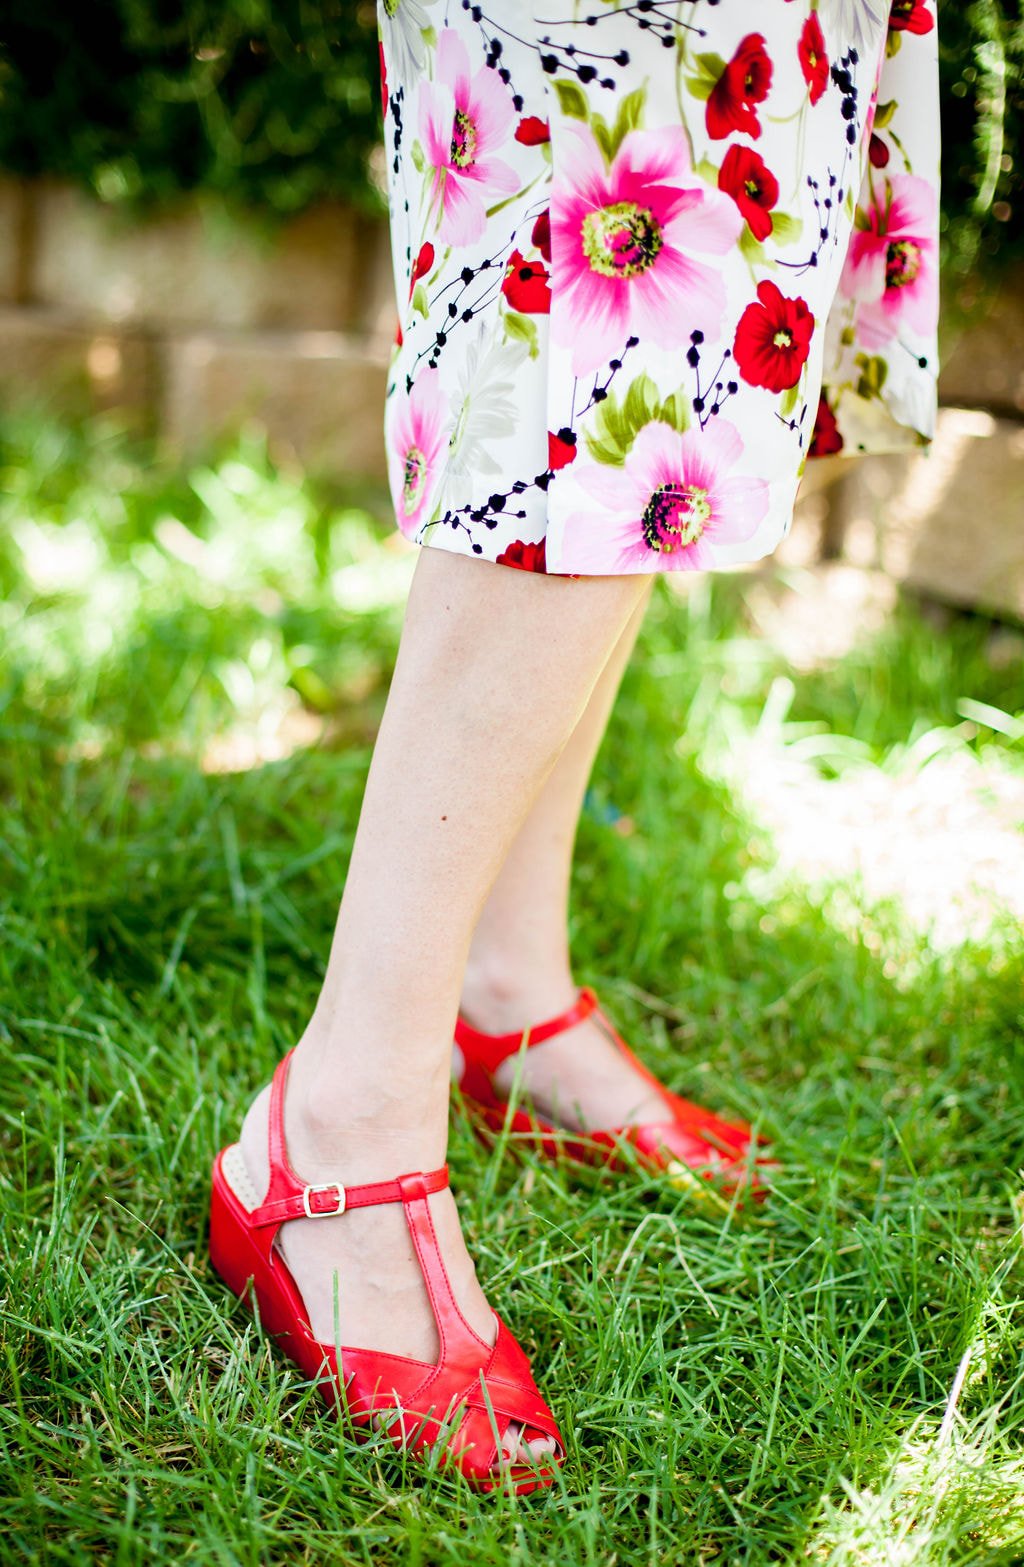
Overall, I love this dress. The fit is amazing. It's form-fitting but loose. Does that even make sense? I like the length too. I'm glad I decided to just dive in, after a year of it staring at me... from the corner of the floor. I don't like labeling sewists as beginners, advanced, etc. But, I think this dress would be best for someone who has a few garments under their belt already. It was time-consuming, and the pattern layout was tricky. Just take your time, and you'll be a vintage goddess in no time.
The only thing now is where I'm going to wear it. Hmm...
Photos below are all by Erica Lancaster


Well, that’s it. I hope you make this dress if you’ve been on the fence for a while. If so, tag me on Instagram @sewingtothemoon. I want to see your version. I love this dress and can't wait to wear it everywhere, once I figure out where to wear it.
Happy sewing,
Annette
Vintage Sewing notions and pattern
Vintage sewing notions. Do you use them? Are you a collector? Some I use and some I just keep for memorabilia.

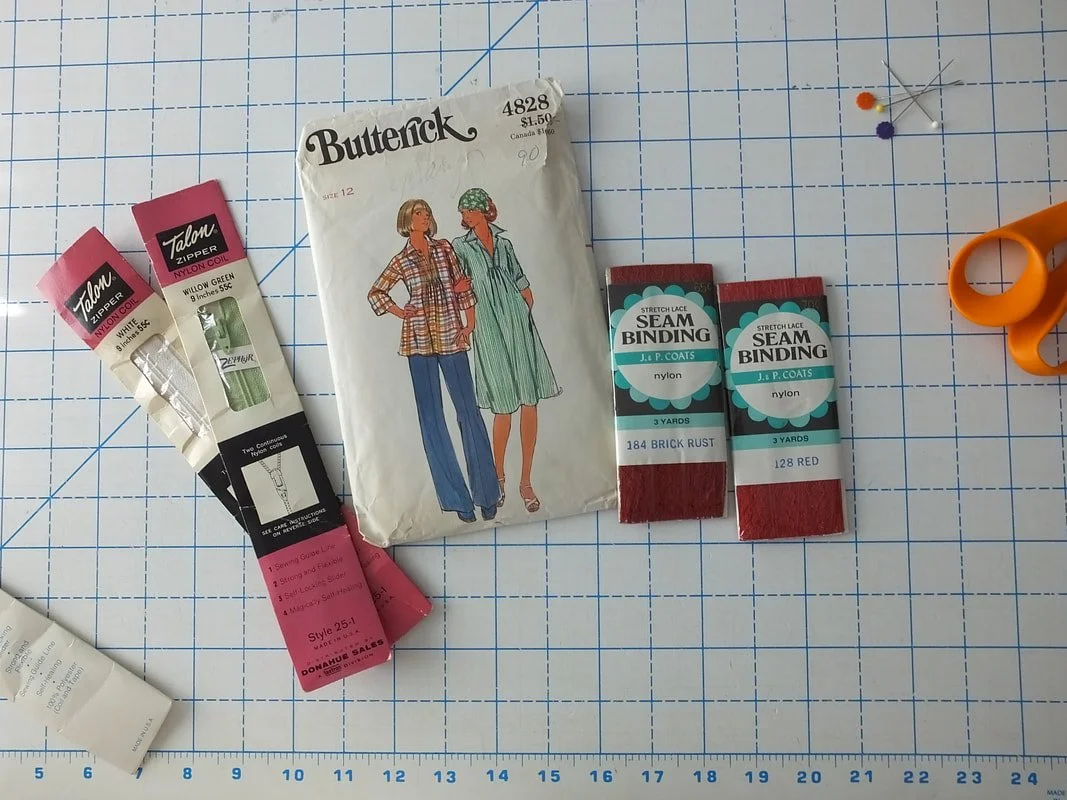
My mama gave me a small bag of vintage sewing items she found while rummaging through the garage. She thought I might like them, and she was right! It’s always fun seeing the prices of things and the vintage packaging. I had to share my gifts with you all.
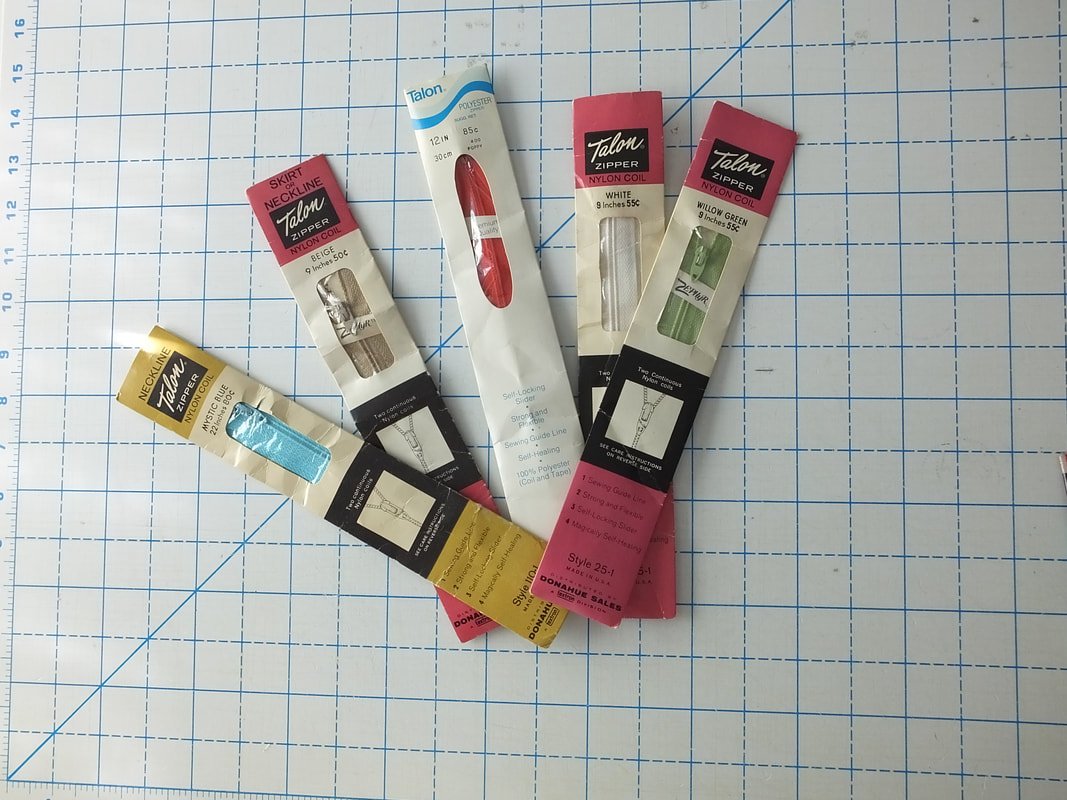
Vintage zippers. I’m not a big fan of using them, they seem to get stuck easily. But, they’re fun to look at.
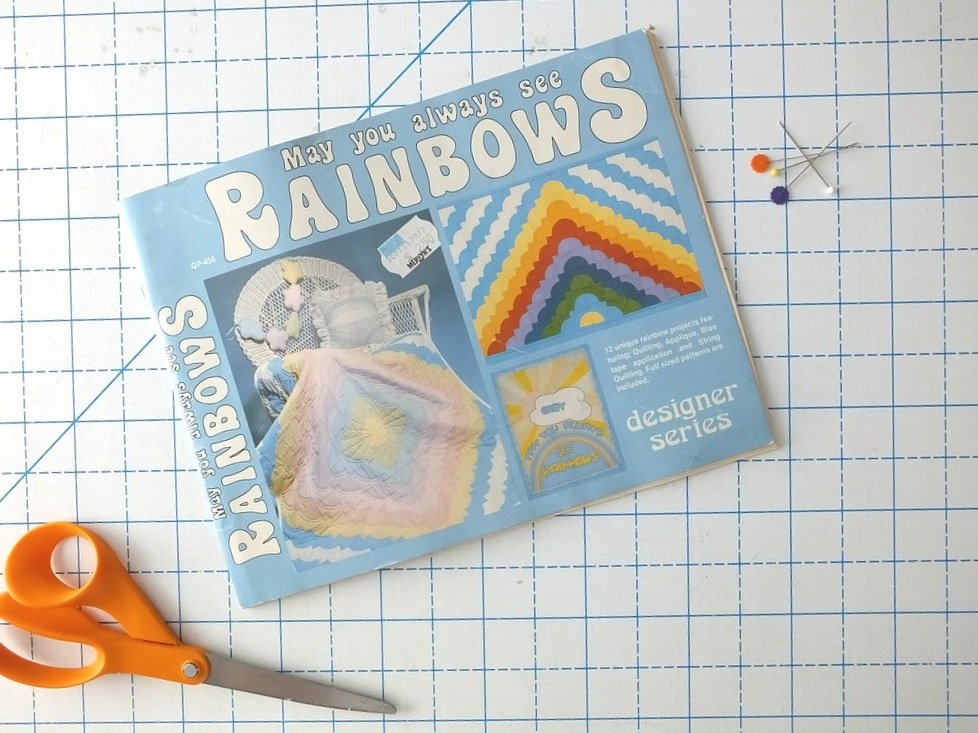
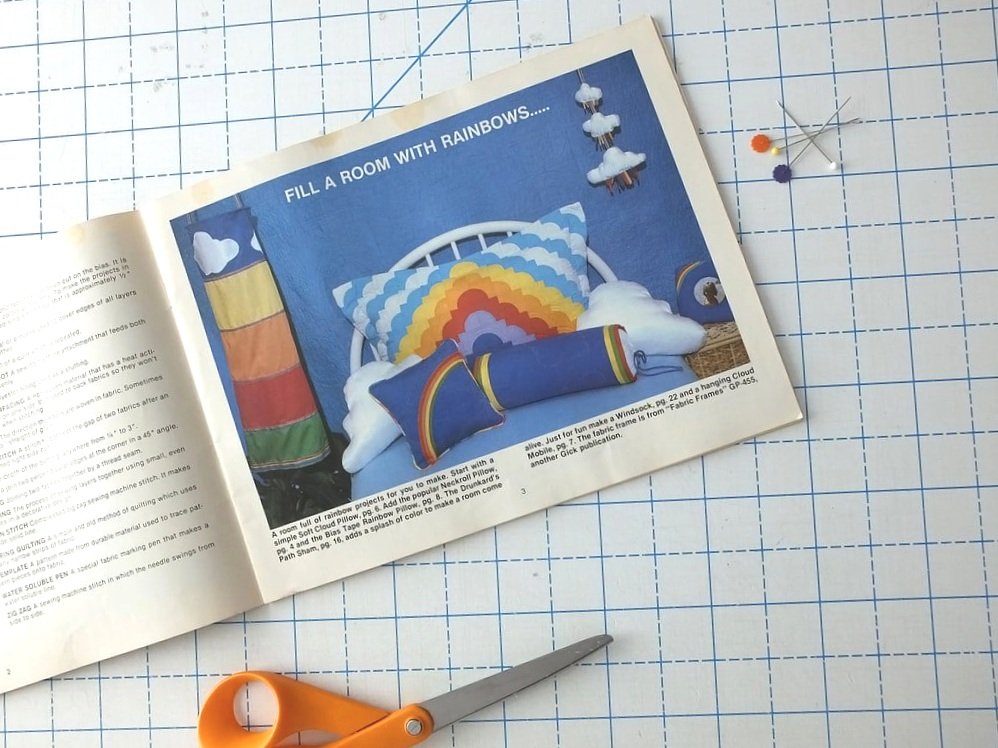
Where are the 80's babies at? My mom made my whole nursery using this book. The cloud pillow wall hanging. I had a mobile over my crib. I find it so funny that trends always come back around. Rainbows are everywhere right now. And don't even get me started on unicorns! I had a unicorn bedroom as a child. Oh memory lane, how I love you.
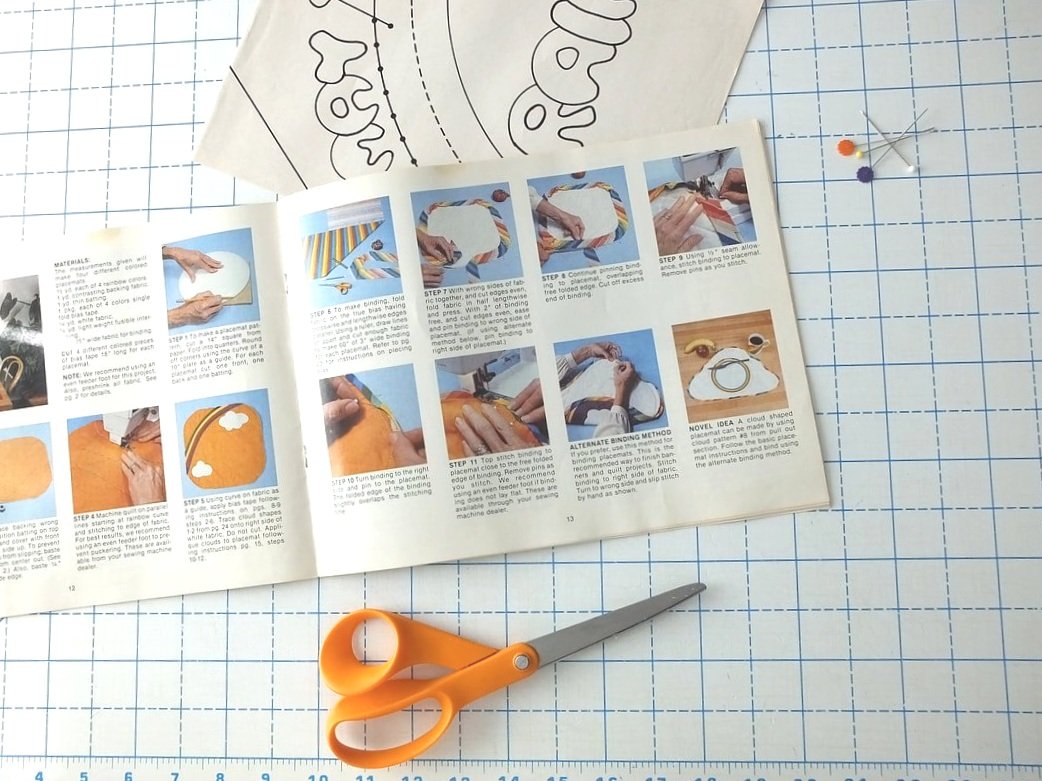
The instructions in this book are really simple. Today, sewing books and patterns are over-complicated.

And then there was a roll of pleat-making tape. I've never used it but, it's cool to have. Have you used this before? What is it for?
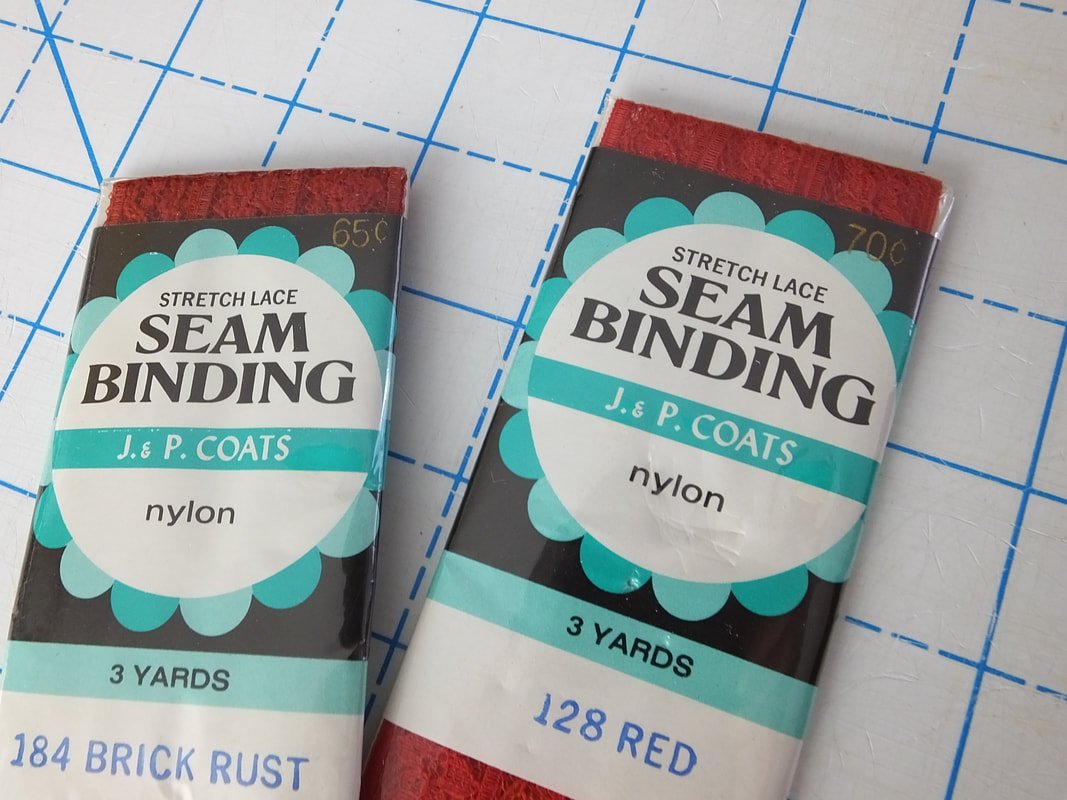
Red lace seam binding. 65 cents! Can you imagine?? These were back from the days where it was less expensive to make your own clothing. Sigh…

Well, that's it. She gave me an old tailor’s ham as well as some muslin. The muslin was used right away, Ha. Hope you enjoyed a little look into the bag of goodies my mama gave me. I am always amazed at how things change and some things stay the same. I hope you enjoyed the items I shared.
Let me know in the comments below if you've found some cool vintage sewing notions or patterns. What vintage notions do you have? Do you use them or save them?
Happy finding,
Annette

Look back at 2019 Sewing
2019 reflection of what I sewed. Looking forward to the upcoming year and filling out a sewing journal.

Who's ready for the new year? Not me. Not yet, anyway. I still need to eat turkey and put up the tree. But, I'm enjoying the calm before the holiday storm right now.
I subscribe to a sewing magazine, Sew News, and at the end of December's issue, they included a sewing goal chart to fill out. It gave me an idea to ask you if your sewing dreams were fulfilled for 2019. Did you complete projects, use up some stash fabric, or maybe you learned something entirely new?
Let's break down the year, together. This way, we can set new goals for 2020! It's gonna be a great year, can't you just feel it?
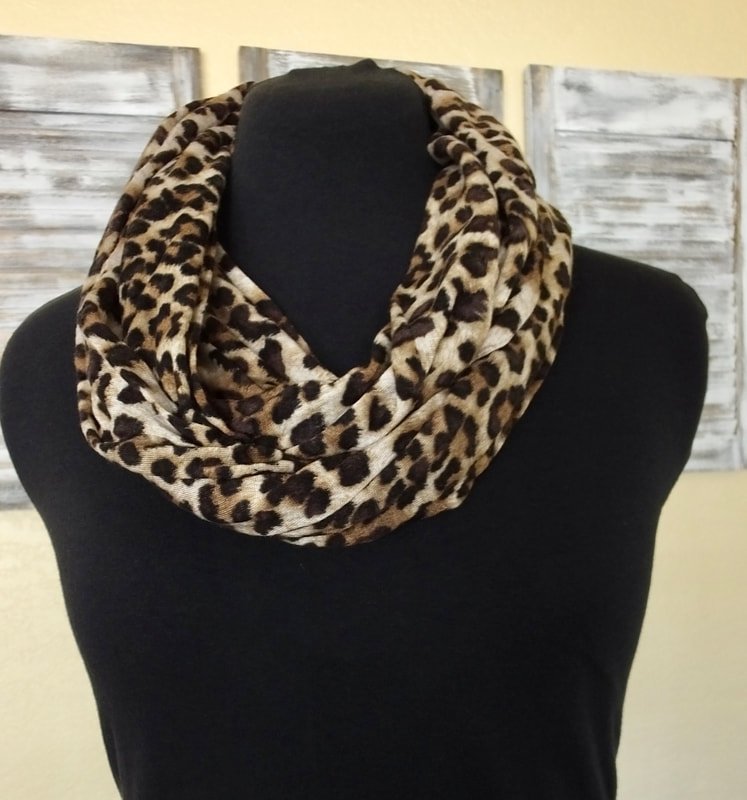
How many apparel items did you make? Simple items such as a headscarf, do count. ;)
How many new patterns did you sew up? Did you sew any a second or third time? A.k.a. the TNT (tried and true pattern).
What new fabrics or patterns did you purchase? Maybe you even discovered a new notion?

So now that your wheels are turning, let’s dive in a little deeper.
What type of projects do you enjoy making? An easy, one-hour bag, or do you love a three-day sewing bender? Drafting your own pattern for a special occasion, fully lined, fancy fabric dress? Or, maybe you're like me and fall in between and love to sew both types. It all depends on the mood.
A few more points the sewing chart asks you to fill out:
Favorite makes
Your proudest moment
Fail moment (Oh, here’s a good one)
A new skill
Classes you’ve taken
Challenges (good, bad, and the ugly)
A make that feels like you, the most
You planned on sewing ___________, but it didn't happen.
I encourage you to write down these prompts and make a list. Maybe start a sewing journal. I have a journal a friend gave me, maybe I’ll start using it for sewing thoughts too.
What do you want to add to your sewing dream list for 2020? Maybe you want to add more pants to sew up, or less pants. LOL. Heck, maybe you didn't sew anything this whole year because...life.
I can't wait to fill out the chart and tape it to my sewing wall.
Share your results in the comment section below. I'm really curious where everyone's at in their own sewing journey.
As always, thanks for hanging out with me, and happy sewing.
XO,
Annette

DIY Advent Calendar
Sew up your own Advent Calendar this year. It’s an easy DIY Christmas project that will bring smiles for years to come.

Are you itching to do some holiday sewing? This advent calendar is a quick-ish sew if you want to whip up a fun Christmas item now! Get some stash-busting done too.
Tools needed:
rotary cutter or scissors
ruler
1/4 yard of a few different fabrics or scraps
1/2-3/4 yard of sturdy solid fabric for the front and back. (duck cloth, canvas, denim, etc.)
Matching thread
Iron on numbers, cutting machine with HTV vinyl, or template for sewing them on, if you don't embroider them.
All the sewing notions and a machine
A piece of 1/2" wooden doweling and twine for hanging.

Machine embroidered numbers on pockets
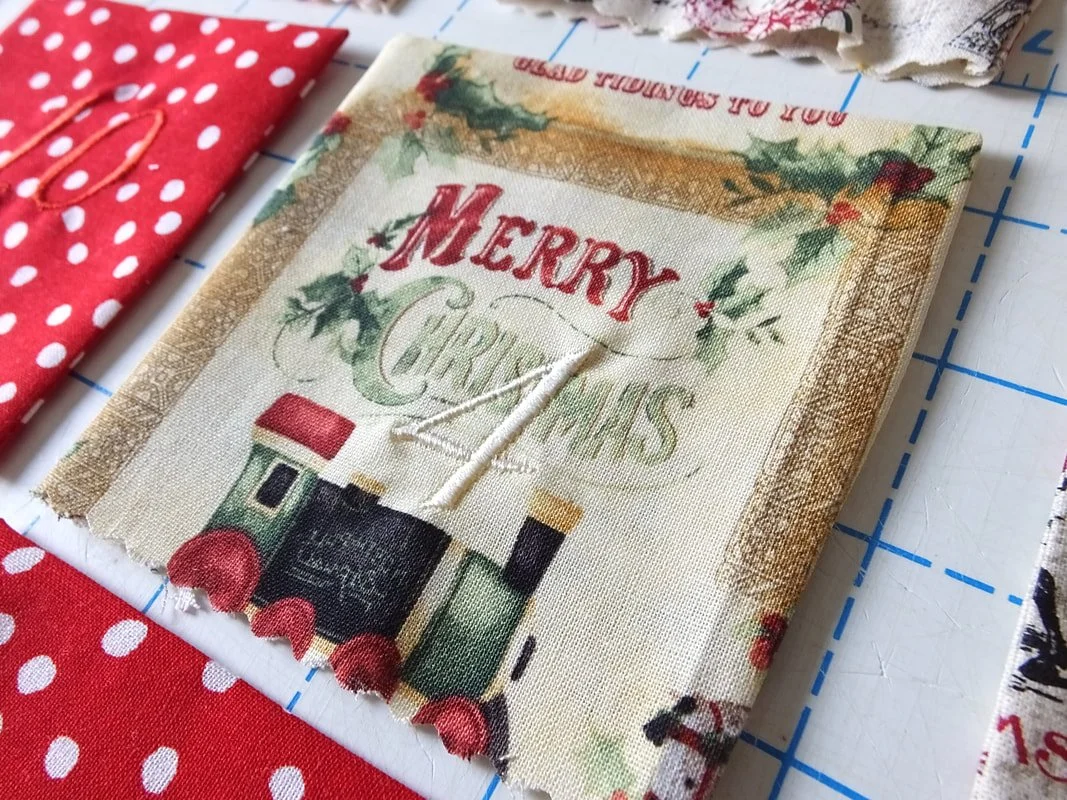
I chose Christmas fabrics similar in color, grabbed them, and started cutting. I liked the size of my phone, so I used it as a pattern. Find something around the house that is the size you want, and use that as a pattern template.

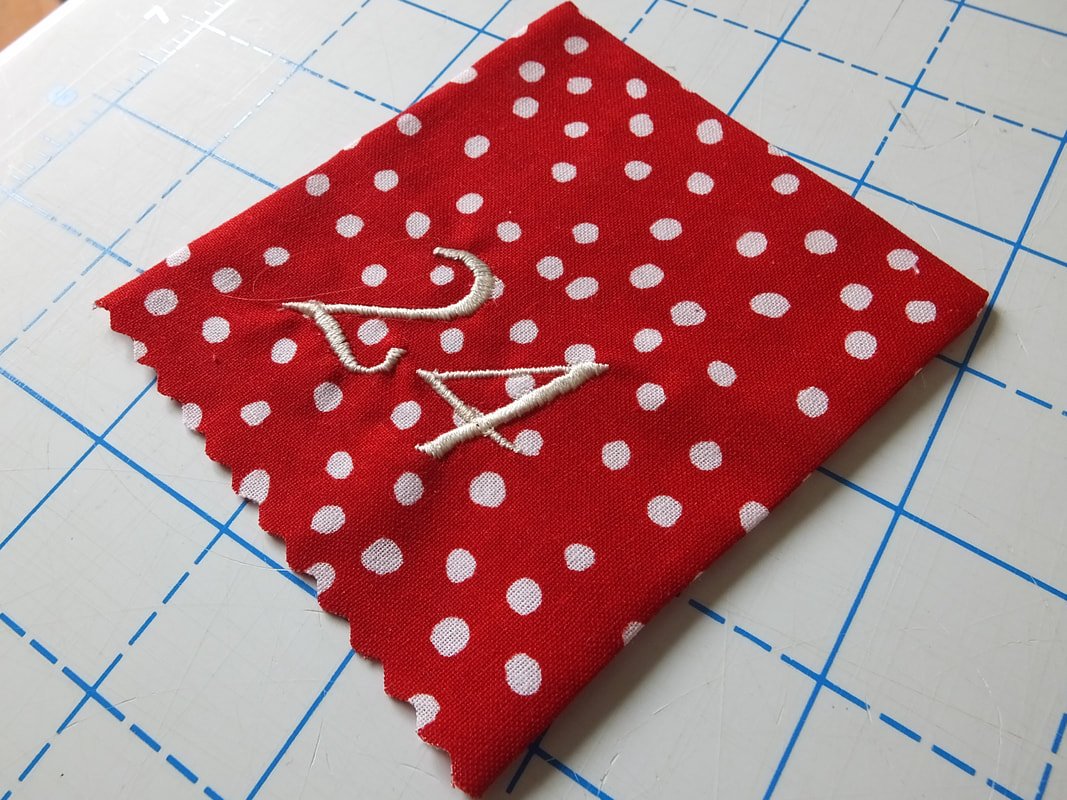
My phone roughly measured 6.5" by 3". I added 1 inch to the width and length for seam allowances to make rectangles. Fold them in half RST (right sides together) and stitch with a 1/2" seam allowance. Sew the sides only. Leave the bottom open, clip corners, turn out, and press flat.
**If you decide to sew or embroider the numbers on, do this before sewing the pocket together. If you use vinyl or iron-on numbers, you can add the numbers after the pockets are sewn and turned.
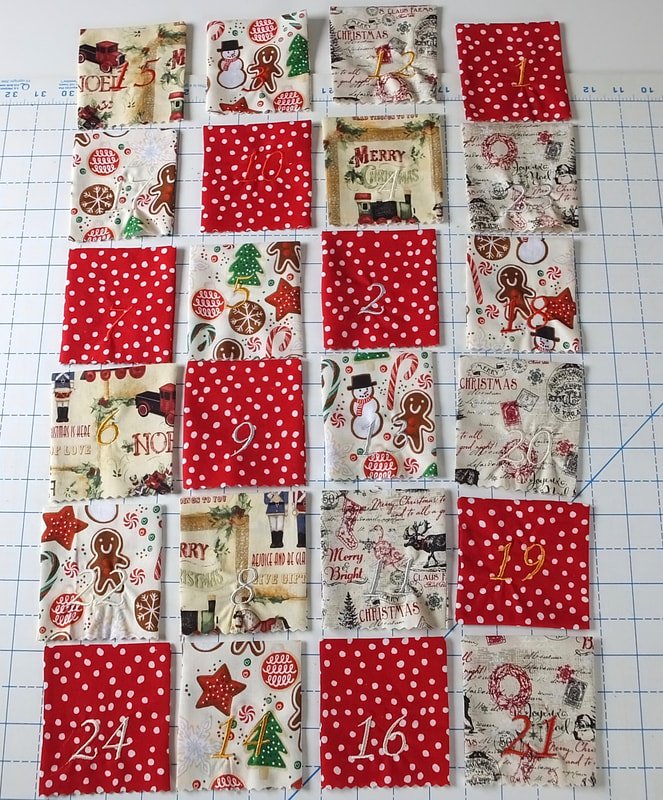
Organize them vertically if you’d like.
After you have your pockets made, lay them out and switch around until you decide which assortment you love the best or go crazy. I liked the taller version better.
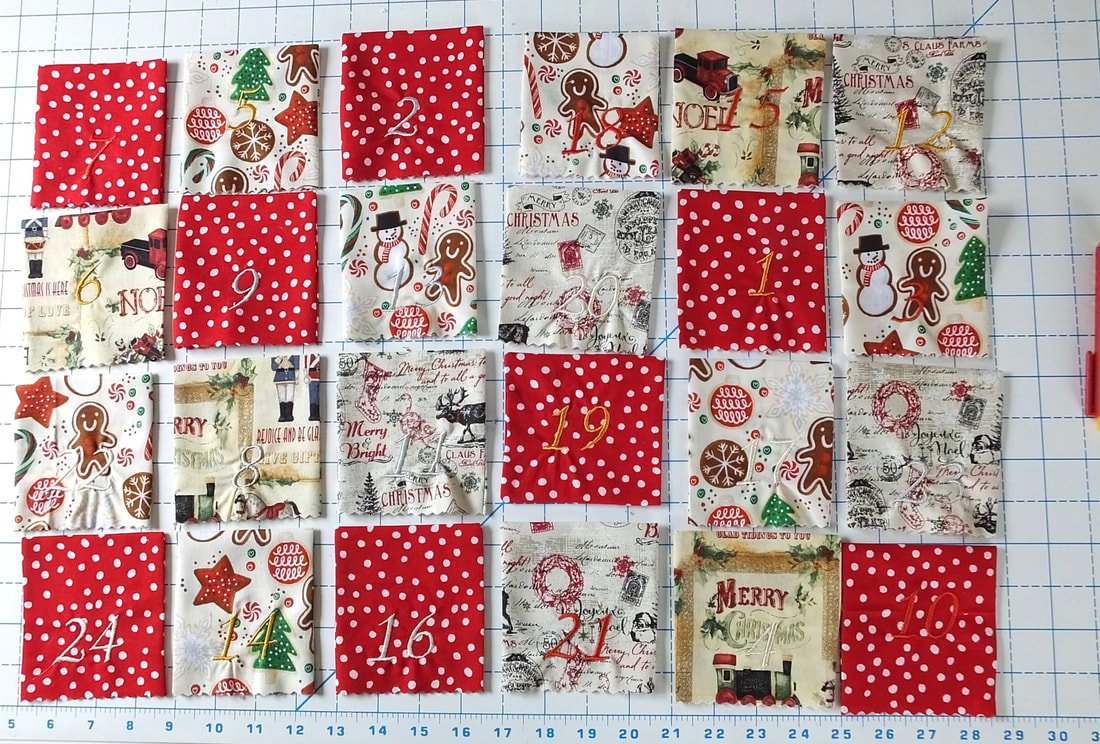
Arrange them in a horizontal way if you like that better.
I did this part backward, sorta. After laying the pockets out, I cut my fabric for them to be sewn onto. I measured the size of all the pockets and added 2" on each side. 5" to the top and 2" to the bottom. This allowed extra room for seams and the top to get turned down and stitched to create a loop for the wooden doweling.

I added length and width to the solid piece of fabric to sew the pockets onto.
I worked from the bottom up, sewing the bottom row of pockets first. You do what works best for you. :)

Measure from the bottom row of the pockets to see how much room you want.

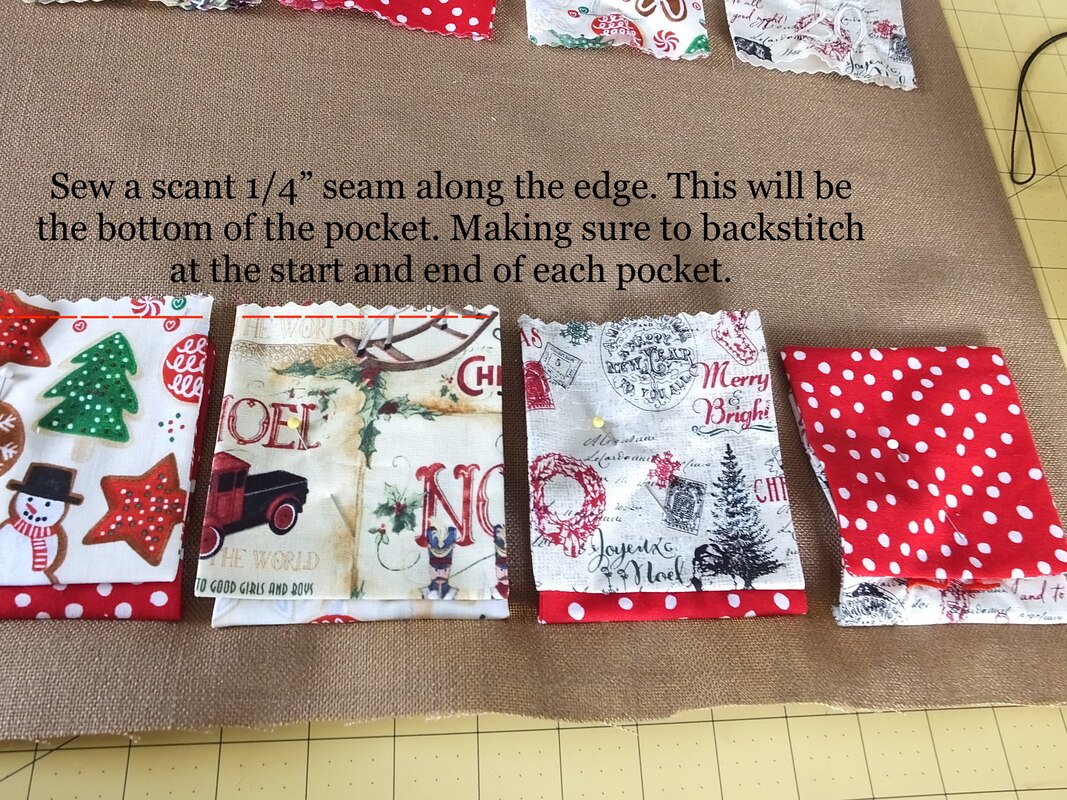
Flip pockets the wrong side up and stitch along the open edge.
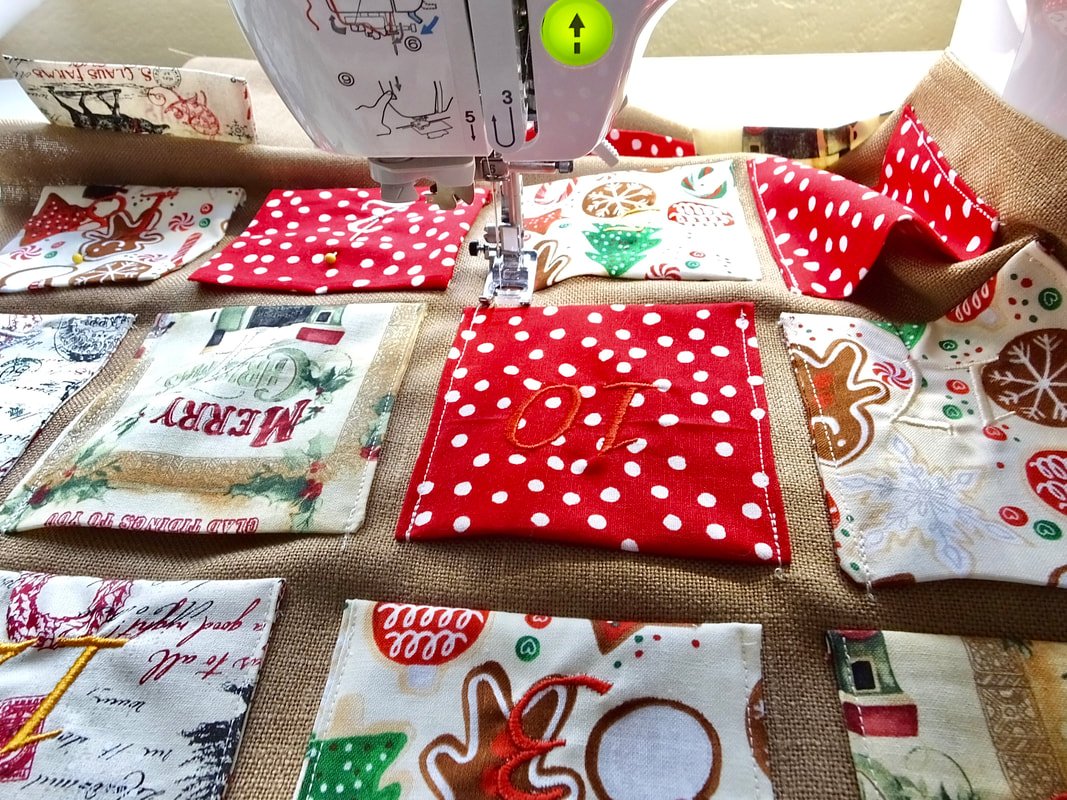
I sewed the second row 1/2" above from the top of the first row. You decide on your own spacing.
I decided to sew the bottoms of all the pockets on first. Then, I flipped them up to sew the sides. As you can see, I used pinking shears to keep the edges from unraveling. This whole project was on the fly and meant to be fun, without overthinking. Sometimes you just gotta sew something! LOL

Sewing the sides. Start from the bottom and go up, backstitch at the beginning and end.
Be sure to backstitch at the start and end of each pocket side. I also added extra stitching at the top where little hands will reach in and out to discover the treasures inside.
After you have all the pockets sewn on, it’s time to put it together.
Grab the backing fabric and pocket piece, and lay the pocket side RST on top of the backing fabric.
Pin or clip the pieces together, and sew a 1/2" seam allowance. Leave a 4"-5" gap at the top for turning. It’s a lot of fabric and layers so, you’ll want a nice size gap for turning out.

It’s starting to come together and look like an Advent calendar now.

Leave an opening for turning.
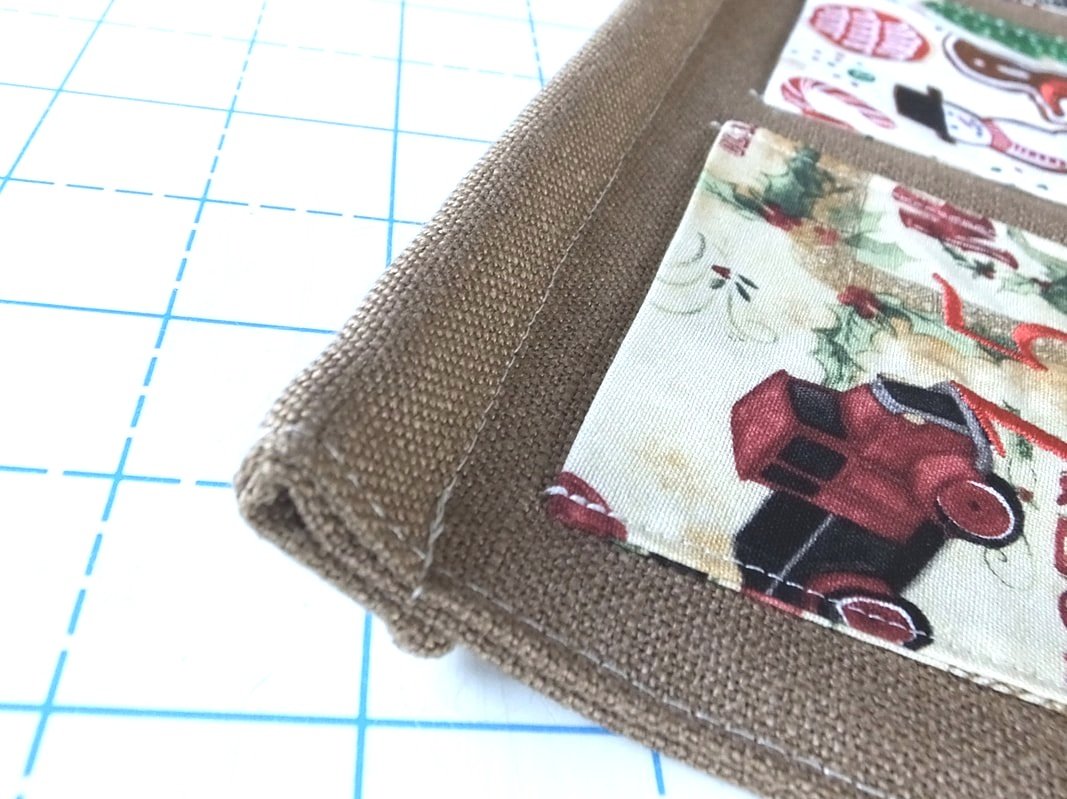
Clip the corners and trim thread tails. Turn out and top stitch around the whole calendar.
Decide how big of a loop you need for your wood doweling to slide through, pin, and stitch to create the loop.
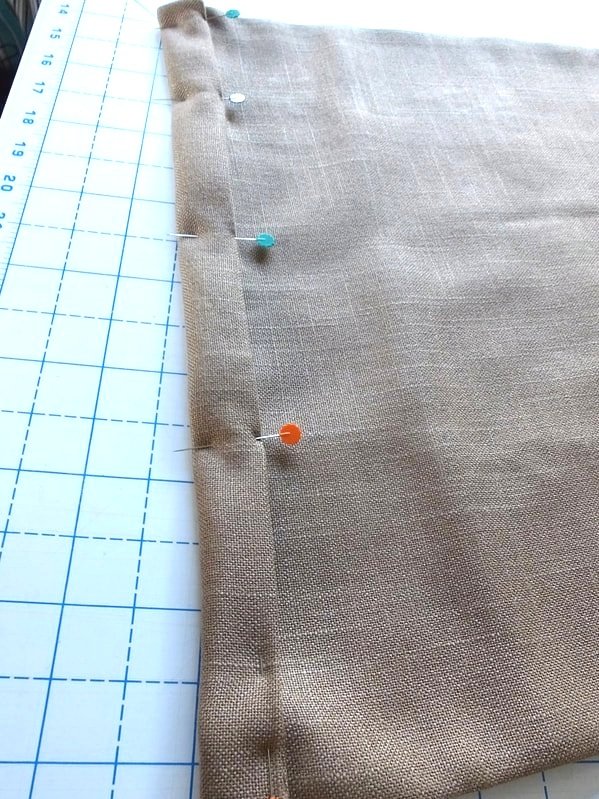
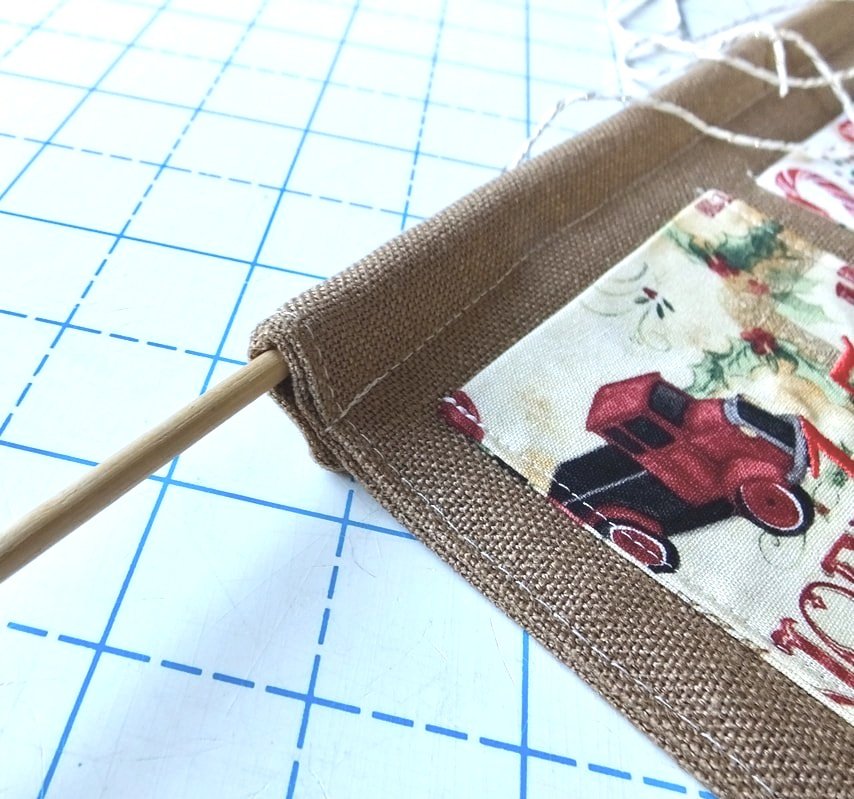
Slide the dowel through. Tie string or twine on each end with a double knot. Hang up and fill it with lots of little treasures.
You're done! Yay!!! Now, what do you fill it up with?
Filling it up
What are you going to fill the pockets with? Who is going to use the advent calendar? Little ones or big ones? I've listed some ideas below of what to put inside for all ages. Wrapping each item would make it extra fun and keep wandering eyes from peaking.
Chapstick or lipgloss
Fruit snacks
Small fruits, a tiny orange
Movie theater ticket
Handmade coupons
Small packs of beef jerky
Cash
$5 gift card
Hair elastics or barrettes
Small lego sets
Candy
Toy cars
Earbuds
USB stick
SD card
Crayons
Package of nuts
Hot cocoa packet
Socks
Soft gloves
Squishy toys
Stress ball
These are just a few ideas, the sky is the limit on fun little treasures. Just think of anything that will fit in the palm of a hand.
Well, I'm off to buy some items to fill our calendar with. If you think of other ideas, please share those in the comments below. The more ideas, the merrier! Are you going to make an advent calendar? Or make one as a gift? Let me know in the comments below.
Merry Christmas,
Annette